The hottest new trend in photography is manipulating Depth of Field, or DOF. It’s how you get those wonderful portraits with the subject in focus and the background ever so artfully blurred out. In years past, it was achieved with intelligent use of lenses and settings on an SLR film camera, but now, it’s all in the software.
For the Pixel 2 smartphone, Google had used some tricky phase-detection autofocus (PDAF) tricks to compute depth data in images, and used this to decide which parts of images to blur. Distant areas would be blurred more, while the subject in the foreground would be left sharp.
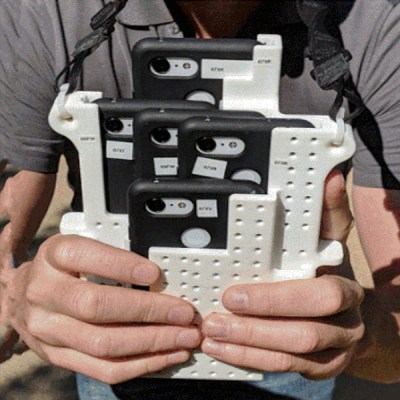
This was good, but for the Pixel 3, further development was in order. A 3D-printed phone case was developed to hold five phones in one giant brick. The idea was to take five photos of the same scene at the same time, from slightly different perspectives. This was then used to generate depth data which was fed into a neural network. This neural network was trained on how the individual photos relate to the real-world depth of the scene.
With a trained neural network, this could then be used to generate more realistic depth data from photos taken with a single camera. Now, machine learning is being used to help your phone decide which parts of an image to blur to make your beautiful subjects pop out from the background.
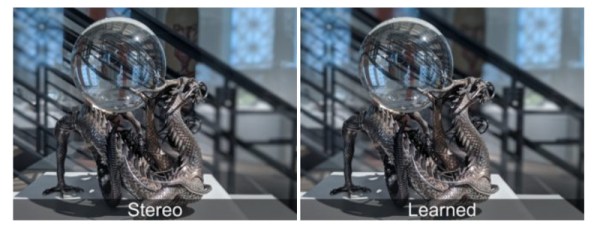
Comparison images show significant improvement of the “learned” depth data versus just the stereo-PDAF generated depth data. It’s yet another shot fired in the smartphone camera arms race, that shows no signs of abating. We just wonder when the Geiger counter mods are going to ship from factory.
[via AndroidPolice]