Solar panels are revolutionizing the electric power industry, but not everyone is a good candidate for rooftop solar. Obviously people in extreme northern or sothern latitudes aren’t going to be making a ton of energy during the winter compared to people living closer to the equator, for example, but there are other factors at play that are more specific to each individual house. To find out if any one in particular will benefit from solar panels, [Jake] and [Ryan]’s solar intensity sensor will help you find out.
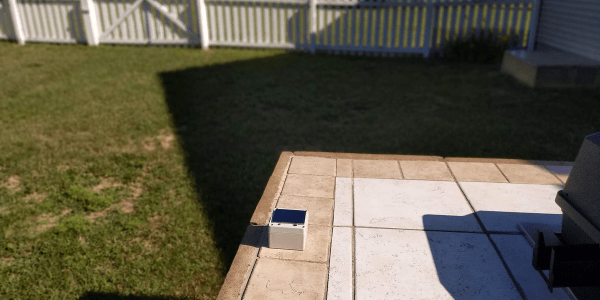
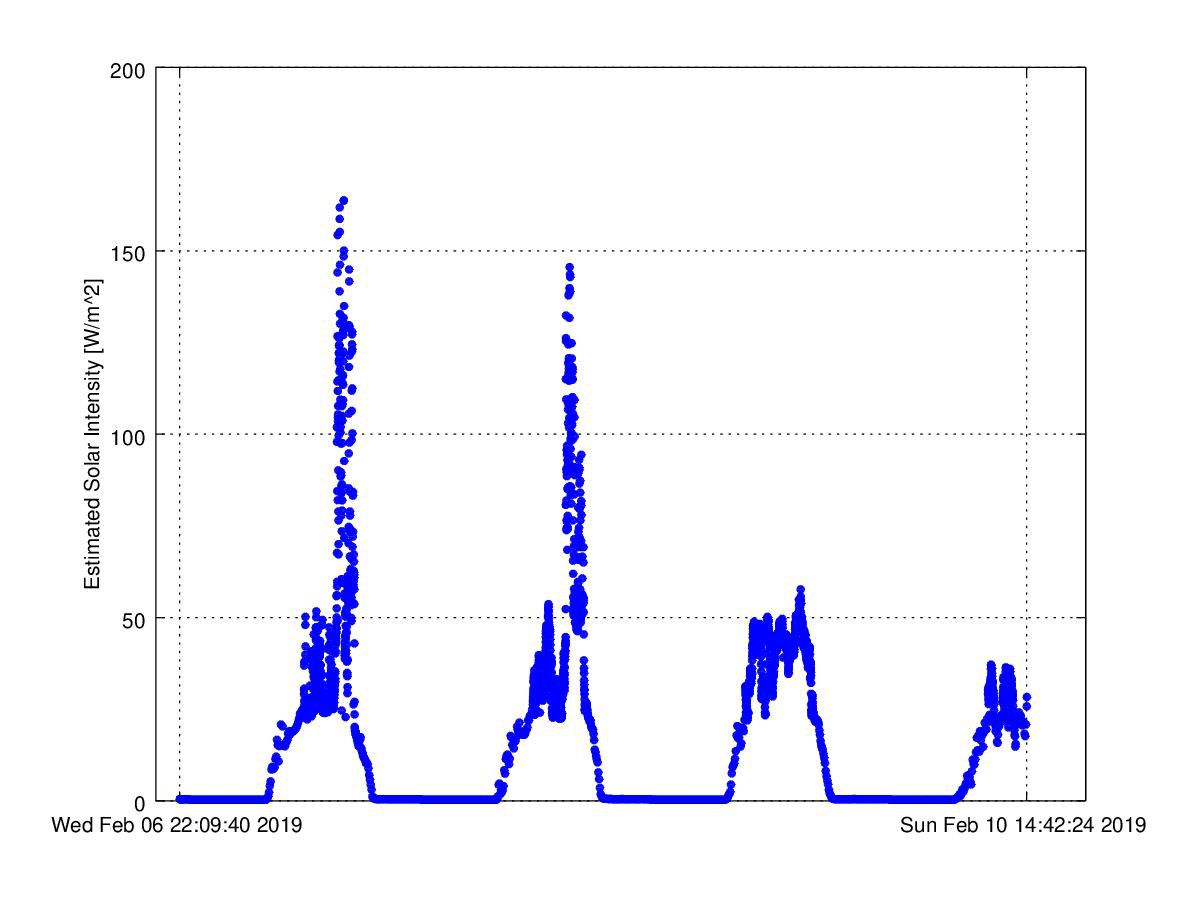 The long-term intensity tracker is equipped with a small solar panel and a data recording device, properly contained in a waterproof enclosure, and is intended to be placed in the exact location that a potential solar installation will be. Once it has finished gathering data, it will help determine if it makes economical sense to install panels given that the roof slope might not be ideal, landscaping may be in the way, or you live in a climate where it rains a lot in the summer during peak production times.
As we move into the future of cheap, reliable solar panels, projects like this will become more and more valuable. If you’re not convinced yet that photovoltaics are the way of the future, though, there are other ways of harnessing that free solar power.