In the last year or so we’ve been seeing an array of portable game system builds based around “trimmed” Wii motherboards which have literally been cut down to a fraction of their original size. It turns out that most of the board is dedicated to non-essential functions, with the core Wii system contained within one specific area that can be isolated with a steady hand. But as [Gman] shows in his latest build, the same concept can also be applied to the Sega Dreamcast.
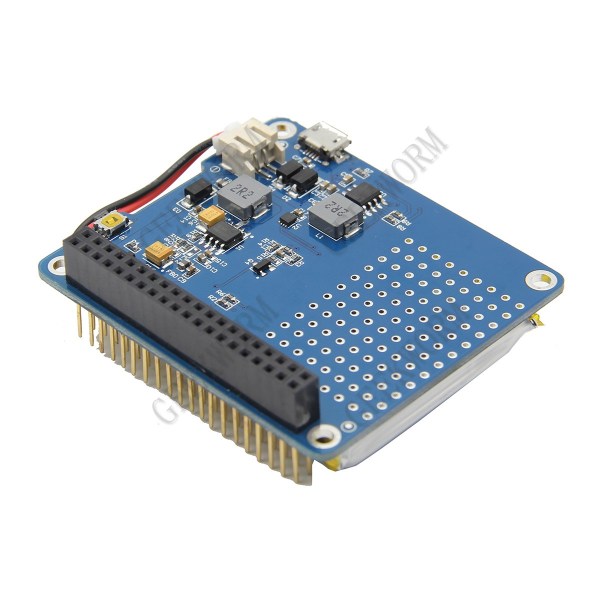
But of course, there’s a bit more to it than just taking a hacksaw to a Dreamcast motherboard. [Gman] had to supplement the trimmed system with quite a bit of additional hardware, such as a power management board he originally designed for portable Wii projects.
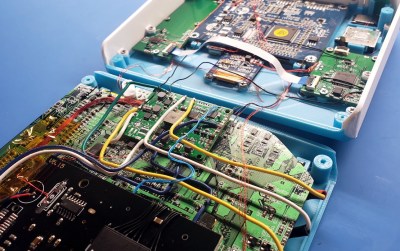 Other components were specifically built for this project. For example there’s a custom PCB that handles emulating the Dreamcast controller using a PIC32MZ microcontroller. He’s also using a LM49450 to pull digital audio from the motherboard over I2S, completely bypassing the analog output.
While not currently functioning, [Gman] also included an SPI OLED display and the hardware necessary to emulate basic functionality of the system’s unique Visual Memory Unit (VMU) right in the front of the system. We’re looking forward to seeing him revisit this feature in the future when he’s got the software side of things worked out.
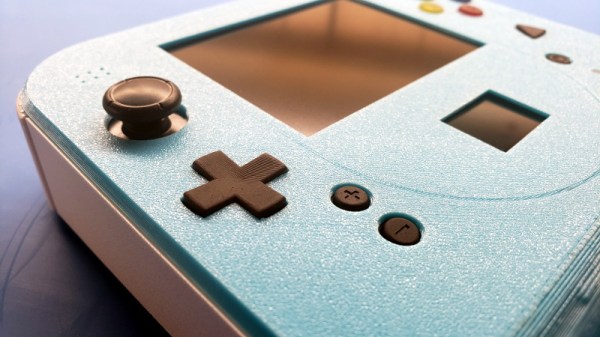
The Nintendo 2DS inspired enclosure is completely 3D printed. A Prusa i3 with textured PEI bed was used to achieve the gorgeous dappled look on the system’s front panel, while the buttons were done on a Form 2 SLA printer. With a mold made from the printed buttons, [Gman] was able to cast the final pieces using a variety of colors until he found a combination he was happy with.
If you’re not Team Sega and would rather hack up your own tiny versions of Nintendo’s hardware, look no further than this fully functional trimmed Wii built into an Altoids tin.