Turning GameCube & N64 Pads Into MIDI Controllers

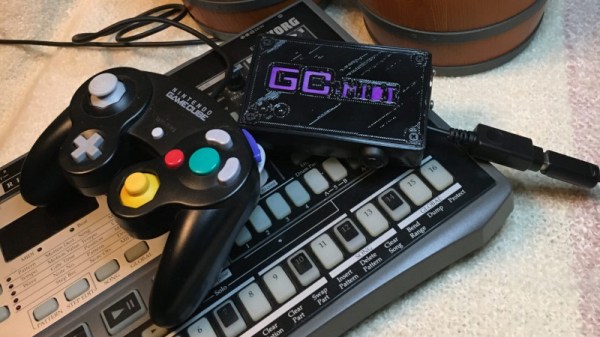
It’s fair to say that the Nintendo 64 and GameCube both had the most unique controllers of their respective console generations. The latter’s gamepads are still in high demand today as the Smash Bros. community continues to favor its traditional control scheme. However, both controllers can easily be repurposed for musical means, thanks to work by [po8aster].

The project comes in two forms – the GC MIDI Controller and the N64 MIDI Controller, respectively. Each uses an Arduino Pro Micro to run the show, a logic level converter, and [NicoHood’s] Nintendo library to communicate with the controllers. From there, controller inputs are mapped to MIDI signals, and pumped out over traditional or USB MIDI.

Both versions come complete with a synth mode and drum mode, in order to allow the user to effectively play melodies or percussion. There’s also a special mapping for playing drums using the Donkey Konga Bongo controller with the GameCube version. For those eager to buy a working unit rather than building their own, they’re available for purchase on [po8aster’s] website.

It’s a fun repurposing of video game hardware to musical ends, and we’re sure there’s a few chiptune bands out there that would love to perform with such a setup. We’ve seen other great MIDI hacks on Nintendo hardware before, from the circuit-bent SNES visualizer to the MIDI synthesizer Game Boy Advance. Video after the break.

Continue reading “Turning GameCube & N64 Pads Into MIDI Controllers”

Turning The Virtual Boy Into A Handheld Console

The Virtual Boy, Nintendo’s most infamous failure, was plagued by several issues. The most glaring problem was the red monochrome stereoscopic display technology which gave many users a headache after even a short time playing, but it’s sky-high price and extremely limited library of games kept many prospective buyers at bay as well. There was also the issue of portability: unlike the Game Boy it was named after, the Virtual Boy barely qualified as a portable system due to the fact it needed to be set up on a table to use.

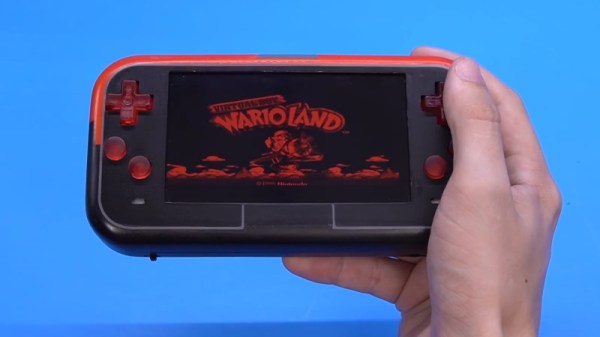
But now, thanks to the tireless efforts of [Shank], at least a few of those issues have been resolved. He’s built the world’s first truly portable Virtual Boy, which swaps the system’s troubled 3D display for a modern IPS LCD panel. The custom handheld, designed to merge the Virtual Boy’s unique aesthetic with the iconic styling of the Game Boy Advance, looks like it came from some alternate timeline where Nintendo decided to produce a cheaper and less cumbersome version of the system rather than abandoning it.

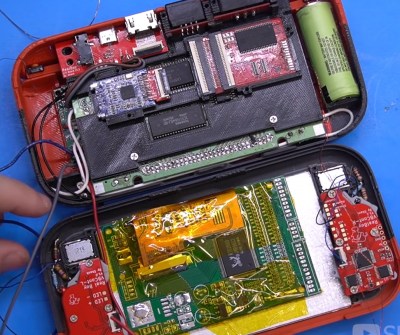
While the work [Shank] has put into the project is unquestionably impressive, it should be said that it took the efforts of several talented hackers to create the handheld Virtual Boy. The key component that made the modification possible in the first place is the VirtualTap by [Furrtek], which not only provides the VGA output that’s driving the LCD panel, but fools the system’s motherboard into believing the servo-actuated stereoscopic display is still connected and active.

It’s also using the open source power management board that [GMan] originally developed for his own portable N64, [Bassline] chipped in to cast the custom buttons and D-pad in translucent resin, and [Mitch 3D] put an untold number of hours into printing and reprinting the system’s multicolored enclosure until it came out just right.

All the little details of the final system, which [Shank] calls the Real Boy, put this project into a league of its own. Special combinations of button presses allows the user to change the color of the display, should you get sick of the infamous red-tint. The buttons also have RGB LEDs behind them that correspond with the color scheme of the display itself, for that extra bit of gamer cred. He even made sure to include the system’s original link port, despite the fact that no officially released game ever made use of it.

Our first run in with [Shank] was when he demoed a portable Wii built into a mint tin. It made for a pretty pitiful gaming experience, but the project demonstrated his dedication to seeing a project through to the end. Watching his skills improve over the last few years has been inspiring, and we can’t wait to see what he comes up with next.

Continue reading “Turning The Virtual Boy Into A Handheld Console”

An Emulator That Only Plays One Game

[Ben Smith] had previously implemented a GameBoy Color emulator but decided to make a new emulator that to play just one game called pokegb. The game is, of course, the popular blue edition of Pokemon. While this emulator could play other GameBoy games, the way it was implemented was to support only the opcodes and features that Pokemon Blue used. What’s perhaps even more amazing is that this full emulator is just 582 lines of C++ (using SDL for graphics and input). There is also an obfuscated version that comes in at just 68 lines and in the shape of three Pokeballs. All the code for pokegb can be found on GitHub.

[Ben] goes through a detailed listing of each opcode of the processor, memory, the graphics unit (PPU), and how it interacts with a modern operating system. We love the idea of implementing each opcode one by one and gradually seeing the emulator make it farther and farther through the ROM. The only feature that’s noticeably absent is sound, which would require a significant amount of code to emulate properly.

If you’re interested in a deep dive into the audio chips inside a Gameboy Color, [Ken Shirriff] has already done the research for you.

Adding A Laser Blaster To Classic Atari 2600 Games With Machine Vision

Remember the pistol controller for the original Atari 2600? No? Perhaps that’s because it never existed. But now that we’re living in the future, adding a pistol to the classic games of the 2600 is actually possible.

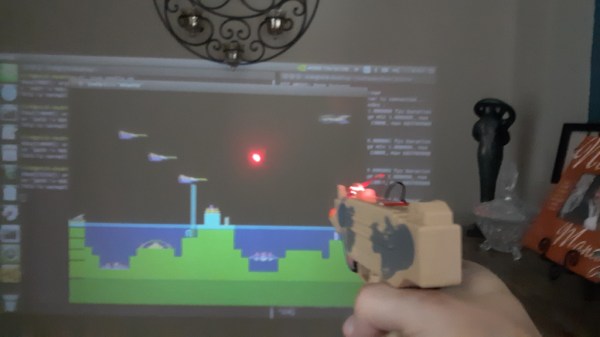
Possible, but not exactly easy. [Nick Bild]’s approach to the problem is based on machine vision, using an NVIDIA Xavier NX to run an Atari 2600 emulator. The game is projected on a wall, while a camera watches the game field. A toy pistol with a laser pointer attached to it blasts away at targets, while OpenCV is used to find the spots that have been hit by the laser. A Python program matches up the coordinates of the laser blasts with coordinates within the game, and then fires off a sequence of keyboard commands to fire the blasters in the game. Basically, the game plays itself based on where it sees the laser shots. You can check out the system in the video below.

[Nick Bild] had a busy weekend of hacking. This was the third project write-up he sent us, after his big-screen Arduboy build and his C64 smartwatch.

Continue reading “Adding A Laser Blaster To Classic Atari 2600 Games With Machine Vision”

Arduboy On The Big Screen

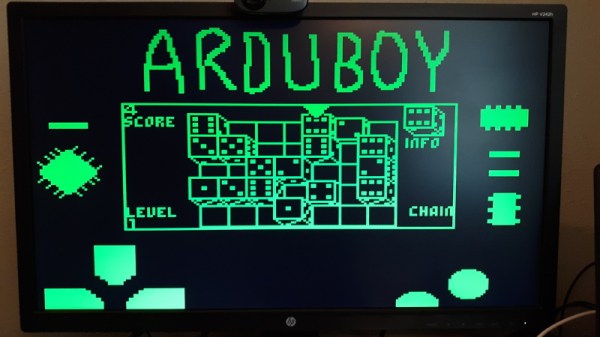
We’re big fans of the Arduboy here at Hackaday, but we’ll admit its tiny screen isn’t exactly ideal for long gaming sessions. There are some DIY builds of the open source handheld that use a larger SPI OLED display, though you’re relatively limited on what kind of changes can be made to the hardware before the games start balking. But as [Nick Bild] shows with his Arduboy home console, hacking the core system library opens up a lot of interesting possibilities.

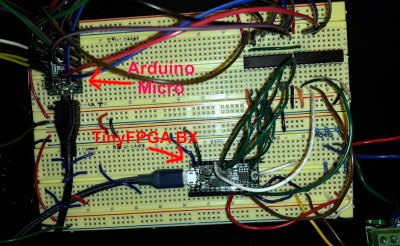
Games written for the Arduboy make use of a common library that handles all the low-level hardware stuff, which includes a display() function to push the graphical data out to an SPI-connected OLED display. What [Nick] has done is re-write that function to instead output to a custom VGA generator running on the TinyFPGA BX. He had to delete support for the Arduboy’s RGB LEDs because he needed the extra pins, but that shouldn’t cause much of a problem in terms of software support.

This does mean that games need to be recompiled against the modified library to work on his hardware, but as the vast majority of Arduboy software is open source anyway, that’s not much of a problem. We particularly like the Super Game Boy style border  you get around the display at no extra cost.

At this point the hardware looks less like a console and more like a breadboard filled with jumpers, so we’re interested in seeing this project taken to its logical conclusion. A custom PCB, enclosure, and possibly even support for using the original NES controllers would turn this into proper system worthy of any hacker’s game room. You could even put the games on custom cartridges if you wanted, though a flash chip that holds the system’s entire library would be quite a bit more convenient.

Simple MicroPython Game Is A 30 Minute Game Dev Course

Sometimes, it’s really useful to watch a project’s parts come together one piece at a time in order to get a complete understanding and mental picture of the whole, and we found that to be the case with this simple, retro-inspired sample game from [ezContents]. (Video, embedded below.) The code is on GitHub but if you’re at all interested in what goes on behind the scenes in a game like that, don’t miss the video.

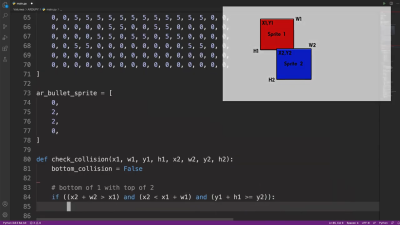
In the video, each game element and function is illustrated, showing exactly what gets done and why. This part is collision detection (click to enlarge.)

These sprite-based games are mostly about moving a small graphical object (a sprite) around a screen in response to user input, and managing what happens when collisions are detected between the player’s sprite and other sprites like enemies, projectiles, and so forth. The development process is wonderfully documented and demonstrated in a video, as each separate part of functionality gets built and explained one piece at a time.

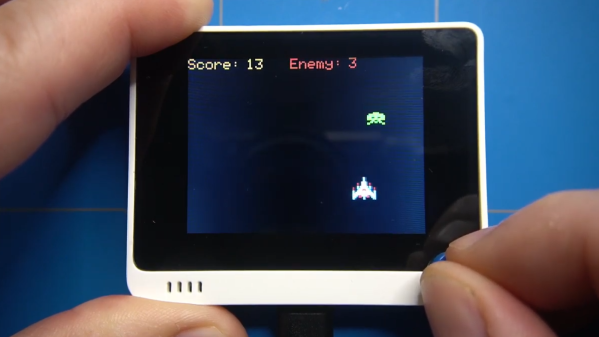
The simple game is made using ArduPy (which is MicroPython combined with Arduino APIs) using Seeed Studios’ Wio Terminal, a small microcontroller development board with integrated screen, sensors, and button inputs including a little directional clicker that [ezContents] uses as a joystick.

The video of the whole process is embedded below; give it a watch and you’ll maybe come away with inspiration, but you’ll definitely have a much better understanding of how these types of games are developed, even if you’re not using the same hardware or development environment.

Continue reading “Simple MicroPython Game Is A 30 Minute Game Dev Course”

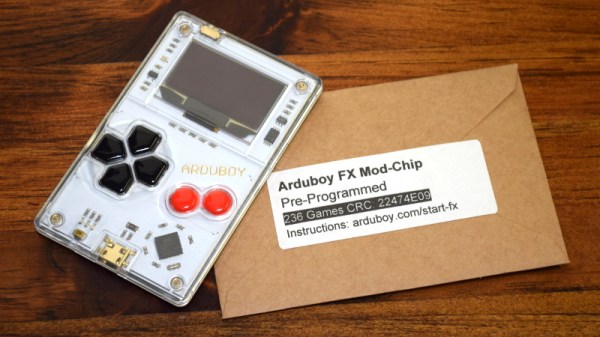
Arduboy FX Mod-Chip: Now You’re Playing With Power

Traditionally, a forum full of technical users trying integrate their own hardware into a game system for the purposes of gaining unfettered access to its entire software library was the kind of thing that would keep engineers at Sony and Nintendo up at night. The development and proliferation of so called “mod chips” were an existential threat to companies that made their money selling video games, and as such, sniffing out these console hackers and keeping their findings from going public for as long as possible was a top priority.

But the Arduboy is no traditional game system. Its games are distributed for free, so a chip that allows users to cram hundreds of them onto the handheld at once isn’t some shady attempt to pull a fast one on the developers, it’s a substantial usability improvement over the stock hardware. So when Arduboy creator Kevin Bates found out about the grassroots effort to expand the system’s internal storage on the official forums, he didn’t try to put a stop to it. Instead, he asked how he could help make it a reality for as many Arduboy owners as possible.

Now, a little less than three years after forum member Mr.Blinky posted his initial concept for hanging an external SPI flash chip on the system’s test pads, the official Arduboy FX Mod-Chip has arrived. Whether you go the DIY route and build your own version or buy the ready-to-go module, one thing is for sure: it’s a must-have upgrade for the Arduboy that will completely change how you use the diminutive handheld.

Continue reading “Arduboy FX Mod-Chip: Now You’re Playing With Power”