Before Wolfram Alpha, before the Internet, before even PCs, calculations more complex than what could be accomplished with a “four banger” required some kind of programmable calculator. There were many to choose from, if you had the means, and as time passed they became more and more sophisticated. Some even added offline storage so your painstakingly written and tediously entered programs didn’t evaporate when the calculator was turned off.
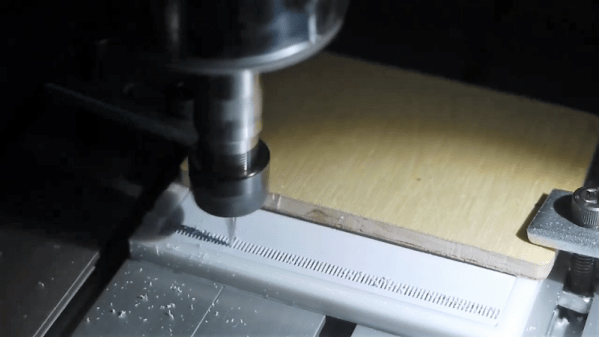
One such programmable calculator, a Casio PRO fx-1 with magnetic card storage, came across [amen]’s bench recently. Sadly, it didn’t come with any cards, so [amen] reverse engineered the card reader and brought the machine back to its 1970s glory. The oddball mag cards for it are no longer available, so [amen] had to make do with. He found some blank cards of approximately the right size for cheap, but somehow had to replicate the band of vertical stripes adjacent to the magnetic strip on the card. Reasoning that they provide an optical synchronization signal, he decided to use a CNC router to cut a series of fine-pitched slots in the plastic card. It took a little effort to get working, including tapping the optical sensor and reading the signal on an oscilloscope, but as the video below shows, the hacked cards work fine with the vintage calculator.
Kudos to [amen] for reviving this retro-cool calculator. Now that it’s back in action, it might be fun to visualize domains on the magnetic strip. A flatbed scanner can be used for that job.
Continue reading “Reviving A Casio Scientific Calculator, With A CNC Router”