Aside from putting a whole lot of tact switches on a board, no one has quite figured out how to make very small keyboards for wearable projects. [Madaeon] might have the answer, and it’s using a resin-based 3D printer to create a flexible keyboard without silicone.
The world of small keyboards is filled with what are effectively the squishy parts of a remote control. This uses a piece of silicone and tiny carbon ‘dots’ on the underside of each button. Press the button, and these carbon dots bridge two traces on a PCB, closing a switch. No one has yet mastered home-casting silicone, although the people behind the ESP32 WiPhone have been experimenting with aluminum molds.
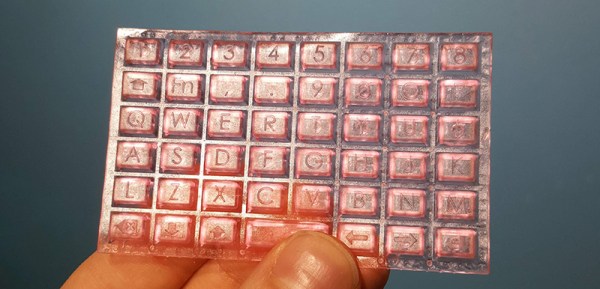
Instead of going down the path of casting and curing silicone, [Madaeon] decided to use 3D printing, specifically resin 3D printing, using a very flexible resin. The build process is what you would expect — just some button-shaped objects, but this gets clever when it comes to bridging the connections on the keyboard matrix. This is done with conductive paint, carefully applied to the underside of each button.
Right now this is a viable means of getting a tiny keyboard easily. The color is a garish pink, and the labels on each button aren’t quite as visible as anyone would like, but the latter can be fixed with silkscreening, just like how it’s done on the silicone buttons for remote controls.