Trackball Gets Bolt-On Button Upgrade

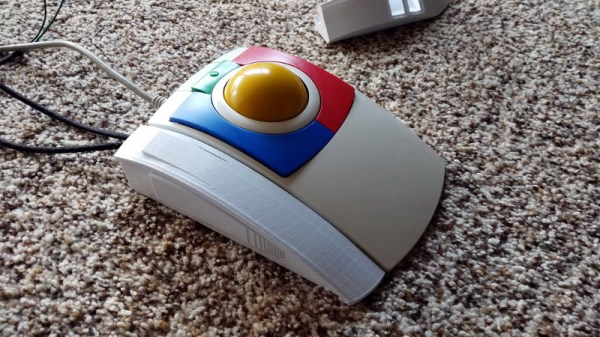
The question of whether to use a mouse versus a trackball is something of a Holy War on the level of Vi versus Emacs. We at Hackaday want no part of such things, use whatever you want, and leave us out of it. But we will go as far as to say that Team Trackball seems to take things mighty seriously. We’ve never met a casual trackball user: if they’ve got a trackball on their desk then get ready to hear all about it.

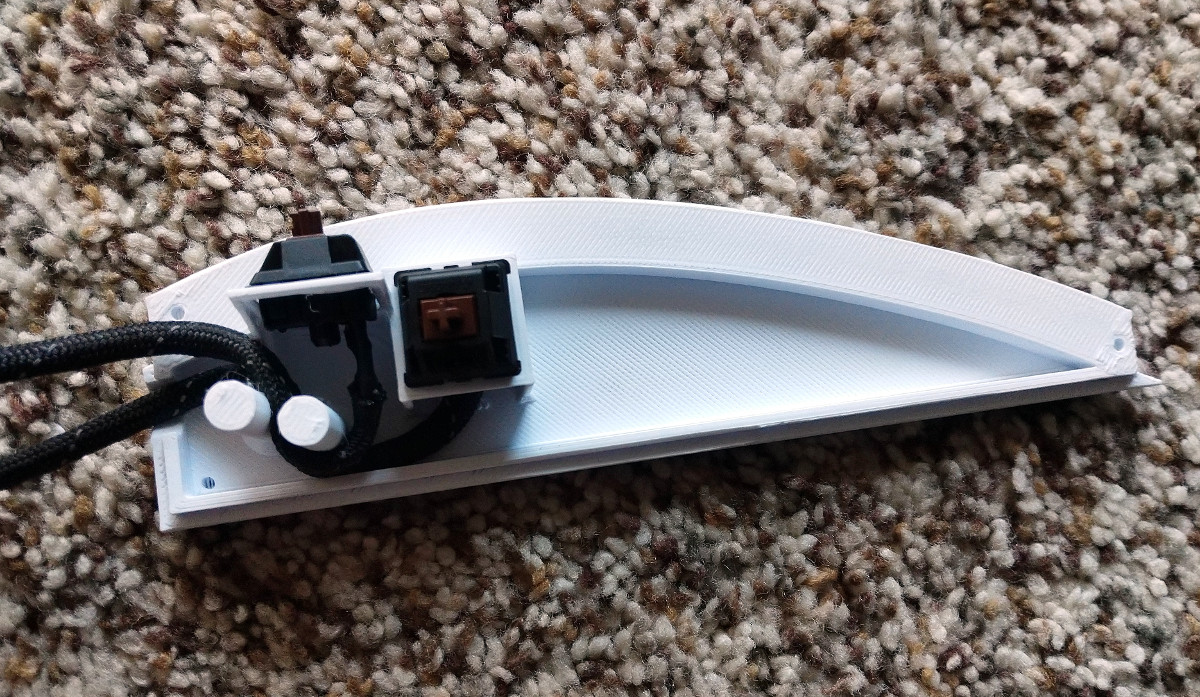
With that in mind, the lengths [LayeredDesigns] went to just to add a couple extra buttons to his CST trackball make a bit more sense. Obviously enamored with this particular piece of pointing technology, he designed a 3D printed “sidecar” that you can mount to the left side of the stock trackball. Matching the shape of the original case pretty closely, this add-on module currently hosts a pair of MX mechanical keys, but the plans don’t stop there.

[LayeredDesigns] mentions that all the free room inside the shell for this two-button modification has got him thinking of what else he could fit in there. The logical choice is a Teensy emulating a USB HID device, which could allow for all sorts of cool programmable input possibilities. One potential feature he mentioned was adding a scroll wheel, which the Teensy could easily interface with and present to the operating system.

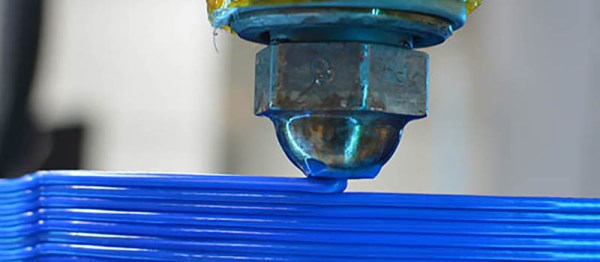
We’ve seen our fair share of 3D printed keyboards and keyboard modifications, but we can’t say the same about the legendary trackball. Ones made of cardboard, sure. Pulled out of a military installation and hacked to add USB? You bet. This project is just more evidence of what’s possible with a 3D printer, a caliper, and some patience.

[via /r/functionalprint]

This Weekend: The East Coast RepRap Festival

Are you around Philly, Baltimore, or DC, and looking for something fun to do this weekend? Great news, because Saturday sees the start of the first inaugural East Coast RepRap Festival in Bel Air, Maryland. Eh, we’ll grab some Bohs and boil up some crabs. It’ll be a great time.

Regular readers of Hackaday should have heard of MRRF, the Midwest RepRap Festival, and the greatest 3D printer convention on the planet. There’s a reason it’s so good: it’s not a trade show. It’s simply everyone in the business and a ton of cool people heading out to the middle of Indiana one weekend per year and simply dorking out. All the heavy hitters were at MRRF last year, from [Prusa], to E3D, to [Brook] of Printrbot. The 3D Printing YouTubers made it out, and the entire event was simply a thousand or so people who were the best at what they do just hanging out.

Want evidence a highly unorganized conference of 3D printing enthusiasts can be great? Here’s a working MakerBot Cupcake. Here’s full-color printing with cyan, magenta, yellow, black, and white filament. How about an infinite build volume printer? There are roundtables, demos, and talks. This is the state of 3D printing, and it inexplicably happens in the middle of nowhere every year.

This weekend, the East Coast RepRap Festival is launching. This is not an event organized by SeeMeCNC, the hosts of the Midwest RepRap Festival. This is an independent event, and we have no idea how it’s going to turn out. That said, the schedule of events looks great with 3D printed pinewood (douglasfirfill?) derbies, and of course, the event space will be filled with strange and exotic homebuilt printers. The big names will be there, and it looks like this may be the beginning of something great.

Hackaday is going to have some boots on the ground this weekend, and we’re going to be showing off the greatest and the best from ERRF. Tickets are still available, and it looks like this is shaping up to be a great weekend.

A CNC Plasma Cutter Table, From The Shop Floor Up

Some projects are simple, some focus on precision and craftsmanship, and some are more of the quick-and-dirty variety. This home-built CNC plasma cutter table seems to follow a “go big or go home” philosophy, and we have to say we’re mighty impressed by the finished product.

For those who follow [Bob]’s “Making Stuff” YouTube channel, this build has been a long time coming. The playlist below has eight videos that cover the entire process from cutting the first tubes of the welded frame to the initial test cuts with the finished machine. [Bob] took great pains to make the frame as square and flat as possible, to the extent of shimming a cross member to correct a 0.030″ misalignment before welding. He used good-quality linear rails for each axis, and hefty NEMA 23 steppers. There were a few false starts, like the water pan that was going to be welded out of five separate pieces of steel until the metal shop guys saved the day with their press brake. In the end, the machine turned out great; with a build cost of $2000 including the plasma cutter it’s not exactly cheap, but it’s quite a bargain compared to similar sized commercial machines.

We think the video series is a great guide for anyone looking to make a CNC plasma table. We’ve seen builds like this before, including [This Old Tony]’s CNC router. Watching these builds gives us the itch to get into the shop and start cutting metal. Continue reading “A CNC Plasma Cutter Table, From The Shop Floor Up”

Hexabitz, Modular Electronics Made Easier

Over the years there have been a variety of modular electronic systems allowing the creation of complex circuits by the interconnection of modules containing individual functions. Hexabitz, a selection of interlocking polygonal small PCBs, is just such a system. What can it bring to the table that others haven’t done already?

The problem facing designers of modular electronics is this: all devices have different requirements and interfaces. To allow connection between modules that preserves all these connections requires an ever-increasing complexity in the inter-module connectors, or the application of a little intelligence to the problem. The Hexabitz designers have opted for the latter angle, equipping each module with an STM32 microcontroller that allows it to identify both itself and its function, and to establish a mesh network with other modules in the same connected project. This also gives the system the ability to farm off computing tasks to individual modules rather than relying solely upon a single microcontroller or single-board computer.

An extremely comprehensive array of modules can be had for the system, which lends it some interesting possibilities, however, it suffers from the inherent problem of modular electronic systems, that it is less easy to incorporate non-standard functions. If they can crack a prototyping module coupled with an easy way to tell its microcontroller to identify whatever function is upon it, they might have a winner.

Analog Discovery 2 As A Vector Network Analyzer

A while back, I posted a review of the Analog Discovery 2, which is one of those USB “do everything” instruments. You might recall I generally liked it, although I wasn’t crazy about the price and the fact that the BNC connectors were an extra item. However, in that same post, I mentioned I’d look at the device’s capabilities as a network analyzer (NA) sometime in the future. The future, as they say, is now.

What’s an NA?

In its simplest form, there’s not much to an NA. You sweep a frequency generator across some range of frequencies. You feed that into some component or network of components and then you measure the power you get out compared to the power you put in. Fancy instruments can do some other measurements, but that’s really the heart of it.

The output is usually in two parts. You see a scope-like graph that has the frequency as the X-axis and some sort of magnitude as the Y-axis. Often the magnitude will be the ratio of the output power to the input power as a decibel. In addition, another scope-like output will show the phase shift through the network (Y-axis) vs frequency (X-axis). The Discovery 2 has these outputs and you can add custom displays, too.

Why do you care? An NA can help you understand tuned circuits, antennas, or anything else that has a frequency response, even an active filter or the feedback network of an oscillator. Could you do the same measurements manually? Of course you could. But taking hundreds of measurements per octave would be tedious and error-prone.

Continue reading “Analog Discovery 2 As A Vector Network Analyzer”

Friday Hack Chat: Ladyada On Creative And Interactive Robotics

Somewhere at the intersection of microcontrollers, open source toolchains, the Maker Movement, and the march of technology, there’s a fuzzy concept that can best be described as robotics or physical computing. Instead of a computer in a box or a dumb microcontroller, these projects interact with the outside world. Whether that’s through the Internet, tapping a bunch of sensors, or just waving the arm of a servo around, there’s a need for a platform that actually does all of this stuff. For this week’s Hack Chat, we’re going to be talking all about creative and interactive robots, and you’re invited.

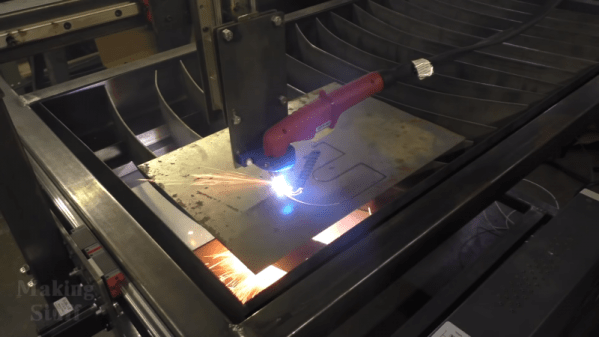
Our guest for this week’s Hack Chat will be Limor “Ladyada” Fried, the founder of Adafruit, and someone who needs no introduction but we’re going to do it anyway. Adafruit began as a weird side project selling exact reproductions of the Roland TB-303, building cell phone jammers, and making guides to build your own USB power bank before USB power banks were a thing. This has grown into Adafruit, a company with over 100 employees in the heart of New York City, one of the best places for learning and making electronics, and a place that does everything Open Source with zero loans or VC money. By any objective measure, Adafruit has become the most successful business story to come out of the Maker Movement, however nebulously that can be defined.

This week the Hack Chat will be focused on the CRICKIT, the Creative Robotics and Interactive Construction Kit. The CRICKIT is an add-on to Adafruit’s Circuit Playground that allows you to build your own robot with CircuitPython, MakeCode, or just Arduino. There’s support for arts, crafts, sensors, audio, animatronics, physical computing, kinetic sculptures, science experiments, and just about anything else you can think of. Need an example? Here’s Blue Öyster Cult. Here’s that robot that came with the NES. It’s all great fun.

You are, of course, encouraged to add your own questions to the discussion. You can do that by leaving a comment on the Hack Chat Event Page and we’ll put that in the queue for the Hack Chat discussion.join-hack-chat

Our Hack Chats are live community events on the Hackaday.io Hack Chat group messaging. This week is just like any other, and we’ll be gathering ’round our video terminals at noon, Pacific, on Friday, June 22nd.  Here’s a clock counting down the time until the Hack Chat starts.

Click that speech bubble to the right, and you’ll be taken directly to the Hack Chat group on Hackaday.io.

You don’t have to wait until Friday; join whenever you want and you can see what the community is talking about.

Print Physical Buttons For Your Touch Screen

Modern handheld gaming hardware is great. The units are ergonomic powerhouses, yet many of us do all our portable gaming on a painfully rectangular smartphone. Their primary method of interaction is the index finger or thumbs, not a D-pad and buttons. Shoulder triggers have only existed on a few phones. Bluetooth gaming pads are affordable but they are either bulky or you have to find another way to hold your phone. Detachable shoulder buttons are a perfect compromise since they can fit in a coin purse and they’re cheap because you can make your own.

[ASCAS] explains how his levers work to translate a physical lever press into a capacitive touch response. The basic premise is that the contact point is always touching the screen, but until you pull the lever, which is covered in aluminum tape, the screen won’t sense anything there. It’s pretty clever, and the whole kit can be built with consumables usually stocked in hardware stores and hacker basements and it should work on any capacitive touch screen.

Physical buttons and phones don’t have to be estranged and full-fledged keyswitches aren’t exempt. Or maybe many capacitive touch switches are your forte.

Continue reading “Print Physical Buttons For Your Touch Screen”