A 65-in-1 The 2024 Way

If necessity is the mother of invention, nostalgia must be its stepmother, or its aunt at the very least. The desire to recreate long-obsolete devices simply because they existed while we were growing up is a curious trait, but one that’s powerful enough to drive entire categories of hardware hacking — looking at you, retrocomputing buffs.

Hardware nostalgia isn’t all about 6502s and Z80s, though. Even more basic were the electronic toys of the 1970s, such as the Radio Shack 65-in-1 kit that [Tom Thoen] is currently recreating. The 65-in-1 was a breadboarding kit aimed at the budding electrical engineer, with components mounted to colorful cardboard by spring terminals. The included “lab manual” had circuits that could be quickly assembled using a handful of jumper wires. It was an endlessly fascinating toy that undoubtedly launched many careers, present company included.
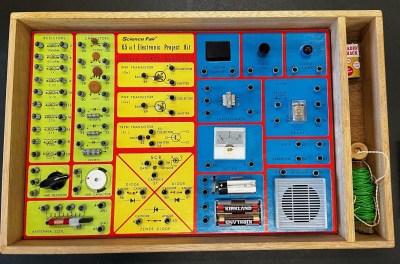
The original 65-in-1 was $21.95 in 1976, or about $120 today.

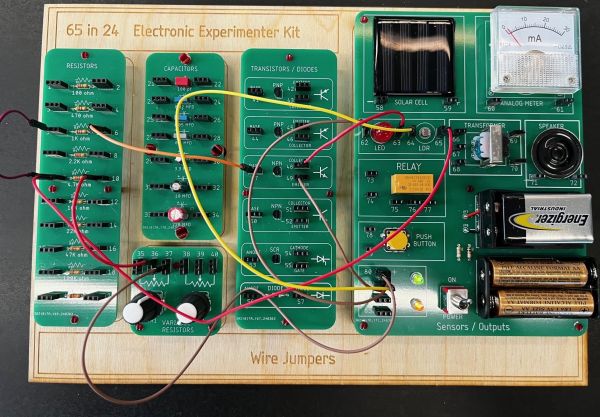
While the passage of time may not have dulled [Tom]’s memories of his original 65-in-1, technology has marched on, meaning that certain allowances had to be made to create a modern version. He wisely eschews the cardboard for PCBs, one for each of the major component blocks provided in the original, and uses female header connectors in place of the springs. Component choice is tailored for the times; gone are the ferrite rod antenna and variable capacitor of the original, as well as the incandescent lamp, which is replaced by an LED that would have been a significant fraction of the kit’s $21.95 price back in 1976. There’s no BOM yet, so we can’t say for sure if any of the transistors are germanium, but it’s clear that there aren’t any of the old TO-1 cans. But dismay not, originalists, for the meter, relay, CdS photocell, and “solar battery” all made the final cut.

[Tom] has done some beautiful work here, with more to come. We imagine that 3D printing could be used to recreate some details like the original Morse key and speaker grille. We love the laser-engraved backing board, too, as it captures some of the charm of the original’s wooden box. This isn’t the only love for the “Science Fair” brand we’ve seen lately, either; the nostalgia seems to be contagious.

FLOSS Weekly Episode 775: Meshtastic Central

This week, Jonathan Bennett and Rob Campbell chat with Ben Meadors and Adam McQuilkin to talk about what’s new with Meshtastic! There’s a lot. To start with, your favorite podcast host has gotten roped into doing development for the project. There’s a new Rust client, there’s a way to run the firmware on Linux Native, and there’s a shiny new web-based flasher tool!

Continue reading “FLOSS Weekly Episode 775: Meshtastic Central”

Artist rendition of the Chandra telescope system in deep space. (Credit: NASA / James Vaughn)

The Chandra X-Ray Observatory Faces Shutdown In FY2025 Budget

The Chandra X-ray Observatory started its mission back in 1999 when Space Shuttle Columbia released it from its payload bay. Originally, it was supposed to serve only a five-year mission, but it has managed twenty-four years so far and counting, providing invaluable science along with the other Great Observatory: the Hubble Space Telescope. Unfortunately, NASA’s FY2025 budget now looks to threaten all space telescopes and Chandra in particular. This comes as part of the larger FY2025 US budget, which sees total funding for NASA increase by 2%, but not enough to prevent cuts in NASA’s space telescope operations.

NASA already anticipated this cut in 2023, with funding shifting to the Nancy Grace Roman Space Telescope (infrared spectrum, scheduled for 2027). Since Hubble is a joint operation with ESA, any shortfalls might be caught this way, but Chandra’s budget will go from 68.3M USD in FY2023 to 41.4M USD in FY2025 and from there plummeting to 5.2M USD by FY2029, effectively winding down the project and ending NASA’s flagship X-ray astronomy mission. This doesn’t sit well with everyone, with a website called Save Chandra now launched to petition the US government to save the observatory, noting that it still has a decade of fuel for its thrusters remaining and it also has stable mission costs.

Continue reading “The Chandra X-Ray Observatory Faces Shutdown In FY2025 Budget”

A 555-Shaped Discrete Component 555

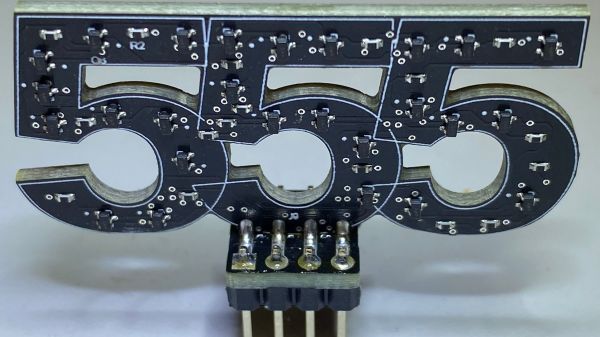
While the “should have used a 555” meme is strong around these parts, we absolutely agree with [Kelvin Brammer]’s decision to make this 555-shaped plug-in replacement for the 555 timer chip using discrete parts, rather than just a boring old chip.

As [Kelvin] relates, this project started a while back as an attempt to both learn EDA and teach students about the inner workings of the venerable timer chip. The result was a 555-equivalent circuit on a through-hole PCB, with the components nicely laid out into the IC’s functional blocks. As a bonus, the PCB was attached to an 8-pin header which could be plugged right in as a direct replacement for the chip.

Fast forward a few years, and [Kelvin] needed to learn yet another EDA package; what better way than to repeat the 555 project? It was also a good time to step into SMD design, as well as add a little zazzle. While the updated circuit isn’t as illustrative of the internal arrangement of the 555, the visual celebration of the “triple nickel” is more than worth it. And, just like the earlier version, this one has a header so you can just plug and chug — with style.

Want to know how the 555 came to be? We’ve covered that. You can also look at some basic 555 circuits to put your 555-shaped 555 to work. We’ve even seen a vacuum tube 555 if that’s more your thing.

A “Full” Keyboard For $5*

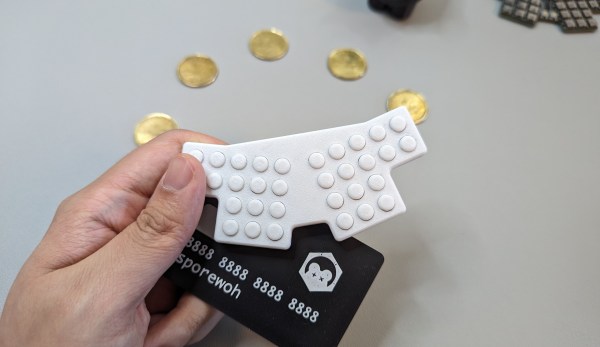
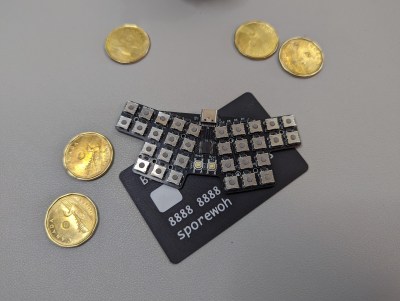
Sure, we’ve all seen PCB business cards at this point, but what about giving away a full-blown keyboard at meetups and such? That’s just how cost-effective the idawgz32 keyboard is. How on Earth can it cost so little? [sporewoh] used the CH552 microcontroller, which comes in around a dollar and only needs a couple of capacitors to get it up and running. The firmware is FAK.

As [sporewoh] writes in this blog post about the keyboard, they did some analysis and realized that most of the cost of their previous tiny board came from the switches. In addition to switching up the switches, [sporewoh] performed a few tricks to get the cost down, like making the key spacing 9 mm x 9 mm so that the overall board is less than 100 mm x 100 mm (which triggers a deal at a certain board house).

Unfortunately, the switches turned out not to be so good. They had greater travel and required more actuation force than the ones [sporewoh] was used to with previous board. The switches were also scratchy, which was solved with a little Krytox. But ultimately, they are pretty unreliable, so the next revision will use Panasonic EVQP0N02Bs.

If this seems familiar, you may be recalling this $3 macro pad which uses the same chip, or maybe the fact that we’ve covered the CH552 in detail.

*Thanks to the current CAD to USD exchange rate.

DietPi Version 9.1: Now With Raspberry Pi 5 Support And More

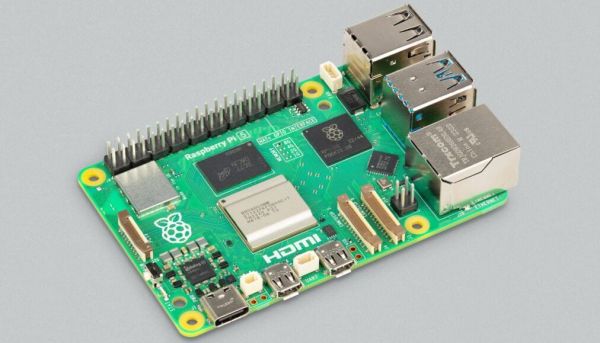
DietPi recently released version 9.1, which among other changes includes new images for the Raspberry Pi 5, Radxa Rock 4 SE and NanoPi R5S/R5C & 6. The Radxa Rock 4 SE image was necessary because the Rock 4’s RK3399 SoC is subtly different from the RK3399-T’s SoC in terms of memory support, which prevents a Rock 4 image from booting on the Rock 4 SE. Meanwhile the Raspberry Pi 5 image is all new and still a bit rough around the edges, with features like the changing of the resolution and camera module support not working yet. These new images are all available for testing.

We covered DietPi previously with their 8.12 release, along with the reasons why you might want to use DietPi over Armbian and Raspberry Pi OS. Essentially DietPi’s main focus is on performance combined with a small installed size, with the included configuration tools and the setup allowing for many more features to be tweaked than you usually find. If the performance improvements, lower RAM usage and faster boot times seen with the Raspberry Pi 4 holds up, then DietPi can just give the Raspberry Pi 5 a nice little boost, while saving power in the process.

Thanks to [StephanStS] for the tip.