An Eight-Day Home Automation Hackathon Is Inspiration For Getting More Projects Done

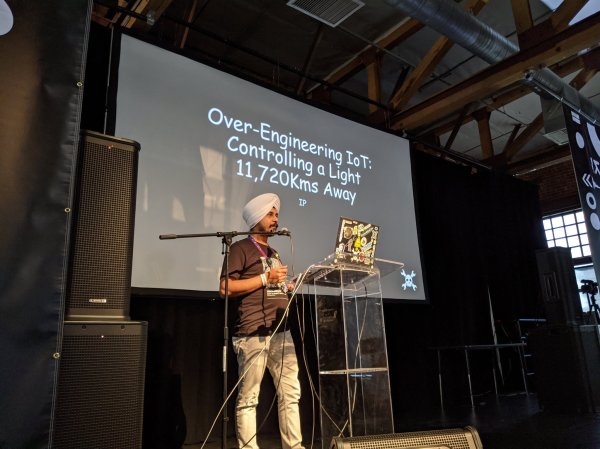
There’s nothing quite like a deadline to cut through extras and get right at the heart of the problem. Maybe we should all follow Interpreet’s example and stop thinking about automating our homes and just make it in an eight-day hackathon. His talk at the 2019 Hackaday Superconference covers the zero-to-deployment home automation build he finished in the eight days leading up to his move from one continent to another.

Hackaday’s very own Inderpreet Singh found himself pulling up roots and moving from his home in India to teach at Centennial College in Toronto, Canada. He needed a way to keep an eye on his home from afar and the name of the game is IoT. When the only choice is “whatever works right now”, you can learn a lot about simple solutions.

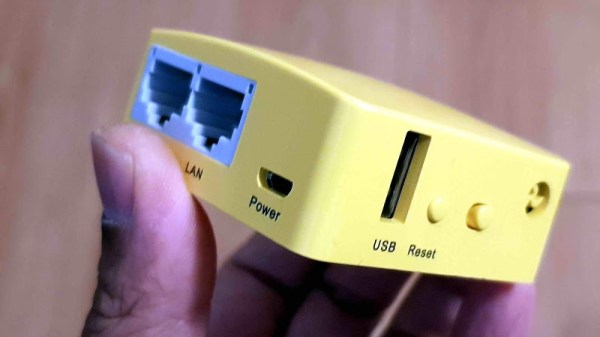
He chose familiar hardware to work with, with the ESP8266 making up the bulk of the nodes and a Raspberry Pi as as a central hub for the setup. He chose to communicate between all the nodes on his system using WiFi because the hardware is robust and available. With security in mind, he keeps the automation system separate from the daily use WiFi system by grabbing an extra access point to serve as the automation network. The Raspberry Pi serves as a router of sorts; its Ethernet port is connected to the IoT device’s AP, while the onboard WiFi is used to connect to the home’s main AP for a connection to the wider Internet.

Software for the system is built on a REST API served by a Python Flask app. Many would advocate for using MQTT but Inderpreet’s testing with that protocol came up short as the broker he intended to use was no longer available. One of the interesting parts of his system design is that all nodes will check in at regular intervals; this allows them to inquire about actions they need to take, but it also allows the system to detect a malfunctioning node immediately. I’ve seen a similar trick used by Elliot Williams where he assigns a “ping” topic to all MQTT devices that causes them to report in with their IP address. Having a system to query and ensure the health of every node is a big tip to take away from this talk.

Continue reading “An Eight-Day Home Automation Hackathon Is Inspiration For Getting More Projects Done”

Reverse Engineering Yokis Home Automation Devices

These days, it’s hard to keep track of all the companies that are trying to break into the home automation market. Whether they’re rebrands of somebody else’s product or completely new creations, it seems like every company has at least a few “smart” gadgets for you to choose from. We hadn’t heard of the Yokis devices that [Nicolas Maupu] has been working on before today, but thanks to his efforts to reverse engineer their protocol, we think they might become more popular with the hacking crowd.

Even if you don’t have a Yokis MTV500ER dimmer or MTR2000ER switch of your own, we think the detailed account of how [Nicolas] figured out how to talk to these devices is worth a read. His first step was to connect his oscilloscope directly to the SPI lines on the remote to see what it was sending out. With an idea of what he was looking for, he then used an nRF24L01+ radio connected to an ESP8266 to pull packets out of the air so he could analyze their structure. This might seem like a very specialized process, but in reality most of the techniques demonstrated could be applicable for any unknown communications protocol of which you’ve got a hex dump.

On the other hand, if you do have some of these devices (or plan to get them), then the software [Nicolas] has put together looks very compelling. Essentially it’s an interactive firmware for the ESP8266 that allows it to serve as a bridge between the proprietary Yokis wireless protocol and a standard MQTT home automation system. When the microcontroller is connected to the computer you get a basic terminal interface that allows you to scan and pair for devices as well as toggle them on and off.

This bridge could be used to allow controlling your Yokis hardware with a custom handheld remote, or you could follow the example of our very own [Mike Szczys], and pull everything together with a bit of Node-RED.

Handheld MQTT Remote For Home Automation

If you’re working on a home automation project, you’re probably knee-deep into MQTT by now. If not, you should be. The lightweight messaging protocol is an ideal choice for getting your “Things” on the Internet, and controlling them all can be done easily through a simple web interface or an application on your mobile device. Or if you’re [serverframework], you make yourself a handsome little all-in-one MQTT remote.

The hardware here is pretty simple; inside there’s just a NodeMCU ESP8266 development board, some buttons, an RGB LED to give feedback, and a 3.7v 1200mAh LiPo battery with associated charging module. Everything is held inside a nice little wooden box that looks like it would fit right in with the living room decor. We’d like to see some kind of a cover over the exposed perfboard the circuit is assembled on, but that’s arguably a personal preference kind of thing.

Most of the magic in this project is actually happening on the software side. Not only does the provided source code handle all the MQTT communications with Home Assistant, but it provides a clever user interface that allows [serverframework] to perform 25 functions with just five buttons. No, you aren’t seeing things. There are actually six buttons on the device, but one of them is a dedicated “power” button that wakes the remote out of deep sleep.

If you’d like to learn more about getting this protocol working for you, our resident MQTT guru [Elliot Williams] has plenty of thoughts on the subject. From his talk at the 2017 Hackaday Supercon to his home automation tutorial series, there’s plenty of information to get you started.

Continue reading “Handheld MQTT Remote For Home Automation”

Home Automation At A Glance Using AI Glasses

There was a time when you had to get up from the couch to change the channel on your TV. But then came the remote control, which saved us from having to move our legs. Later still we got electronic assistants from the likes of Amazon and Google which allowed us to command our home electronics with nothing more than our voice, so now we don’t even have to pick up the remote. Ushering in the next era of consumer gelification, [Nick Bild] has created ShAIdes: a pair of AI-enabled glasses that allow you to control devices by looking at them.

Of course on a more serious note, vision-based home automation could be a hugely beneficial assistive technology for those with limited mobility. By simply looking at the device you want to control and waving in its direction, the system knows which appliance to activate. In the video after the break, you can see [Nick] control lamps and his speakers with such ease that it almost looks like magic; a defining trait of any sufficiently advanced technology.

So how does it work? A Raspberry Pi camera module mounted to a pair of sunglasses captures video which is sent down to a NVIDIA Jetson Nano. Here, two separate image classification Convolutional Neural Network (CNN) models are being used to identify objects which can be controlled in the background, and hand gestures in the foreground. When there’s a match for both, the system can fire off the appropriate signal to turn the device on or off. Between the Nano, the camera, and the battery pack to make it all mobile, [Nick] says the hardware cost about $150 to put together.

But really, the hardware is only one small piece of the puzzle in a project like this. Which is why we’re happy to see [Nick] go into such detail about how the software functions, and crucially, how he trained the system. Just the gesture recognition subroutine alone went through nearly 20K images so it could reliably detect an arm extended into the frame.

If controlling your home with a glance and wave isn’t quite mystical enough, you could always add an infrared wand to the mix for that authentic Harry Potter experience.

Continue reading “Home Automation At A Glance Using AI Glasses”

Picking The Right Sensors For Home Automation

Imagine that you’re starting a project where you need to measure temperature and humidity. That sounds easy in the abstract, but choosing a real device out of many involves digging into seemingly infinite details and trade-offs that come with them. If it’s a low-stakes monitoring project, picking the first sensor that comes to mind might suffice. But when the project aims to control an AC system in an office of temperature-sensitive coders, it pays to take a hard look at the source of all information: the sensor.

Continuing a previous article I would like to use that same BMaC project from that article as a way to illustrate how even a couple of greenhorns can figure out how to pick everything from environmental sensors to various actuators, integrating it into a coherent system that in the end actually does what it should.

Continue reading “Picking The Right Sensors For Home Automation”

Build A Home Automation Hub For $20

With so many WiFi home automation devices on the market, you might want to take advantage of these low cost products without having to send your data to third-party servers. This can be accomplished by running your own home automation hub on your home network.

If you don’t want to use a full computer for this purpose, [Albert] has you covered. He recently wrote a guide on running Domoticz on the $20 GL-MT300Nv2 pocket router.

The setup is rather simple: just perform a firmware update on your router using the provided image and a full home automation stack is installed. Domoticz provides a web interface for configuring your devices, setting up rules, and viewing sensor data.

The pocket router is also supported by OpenWrt and provides a USB host port, making it a low-cost option for any WiFi hack you might have in mind. We’ve seen quite a few OpenWrt based hacks over the years.

3D Print A Home Automation Switch

If you are the kind of person who won’t use cheap Sonoff modules to control AC powered devices, we don’t blame you and you should probably stop reading now. However, if you don’t mind a little exposed AC wiring and you have a 3D printer, you might be interested in the second generation of [530 Project’s] in-wall light switch.

The 3D printed switch fits a standard box and uses the guts of a Sonoff controller. These work with all the popular ecosystems such as Alexa and Google Home. And they are cheap. Like, really cheap. If you already have a 3D printer, even counting the cost of the filament these are going to be a small fraction of the cost of a commercial switch. You can see a video about the device, below.

Continue reading “3D Print A Home Automation Switch”