Injection-Molded Glass Breakthrough Shatters Ceiling Of Work Methods

Glass is one of humanity’s oldest materials, and it is still used widely for everything from drinking vessels and packaging to optics and communications. Unfortunately, the methods for working with glass are stuck in the past. Most methods require a lot of high heat in the range of 1500 °C to 2000 °C, and they’re all limited in the complexity of shapes that can be made.

As far as making shapes goes, glass can be blown and molten glass pressed into molds. Glass can also be ground, etched, or cast in a kiln. Glass would be fantastic for many applications if it weren’t for the whole limited geometry thing. Because of the limitations of forming glass, some optic lenses are made with polymers, even though glass has better optical characteristics.

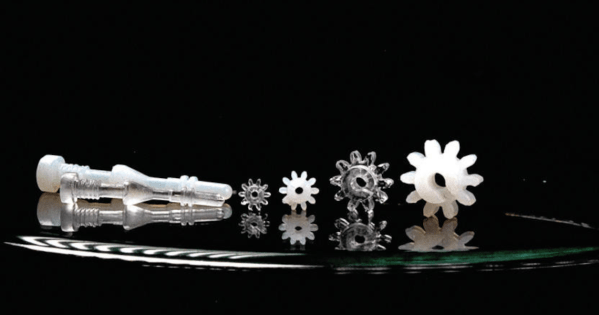
Ideally, glass could be injection molded like plastic. The benefits of this would be twofold: more intricate shapes would be possible, and they would have a much faster manufacturing time. Well, the wait is over. Researchers at Germany’s University of Freiburg have figured out a way to apply injection molding to glass. And it’s not just any glass — they’ve made highly-quality, transparent fused quartz glass, and they did it at lower temperatures than traditional methods. The team used x-ray diffraction to verify that the glass is amorphous and free of crystals, and were able to confirm its optical transparency three ways — light microscopy, UV-visible, and infrared measurements. All it revealed was a tiny bit of dust, which is to be expected outside of a clean room.

Continue reading “Injection-Molded Glass Breakthrough Shatters Ceiling Of Work Methods”

Serial Silicone Molding

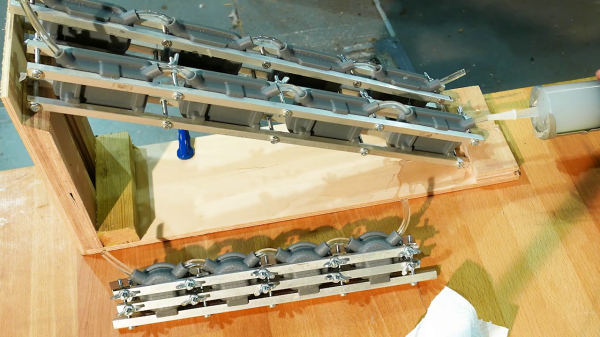
The techniques for making single-digit quantities of custom molded parts don’t scale well when you need to make dozens, as [Kevin Holmes] discovered. He needed to make 80-some sets of a silicone motor mount, and the one-up mold process was not going to work. He explores several solutions, which he rejects as being too complicated. Finally [Kevin] comes up with the idea of daisy-chaining banks of molds clamped together with rails of stock metal bars. It’s a pretty nifty process to watch and you can check the video out below, which is not unlike a very slow 7495 four-bit shift register.

Even though the silicone he uses is clear, pay attention and you can still see the carry-out as it propagates from mold to mold. He manually performs the nibble carry operation from one bank to the next — we wonder if he could cascade these banks, and inject all 80 in one really big squeeze?

Why would someone need 80 sets of silicone rubber motor mounts, you may ask? Well, you may remember the 4-mation 3D zoetrope that we wrote about back in 2018. [Kevin] is one of the founders of this mesmerizing project, and it would seem that their Kickstarter project has been successful. As he demonstrates in the video below, without some type of noise dampening mounts, a rumble from the motor is amplified through the stage of the zoetrope. If you have any favorite mold-making tips for small batch manufacturing, let us know in the comments below. Thanks to [George Graves] for sending this tip our way.

Continue reading “Serial Silicone Molding”

Making Silicone Molds – Big Ones!

If you’ve got one of something and you want more, duplicating it with a silicone mold can be a great way to go. This is applicable to 3D printing something you need many copies of, and a whole variety of other usecases. [Eric Strebel] prides himself on his abilities in this area, and has put out a guide to producing very large silicone molds in a simple and reliable manner.

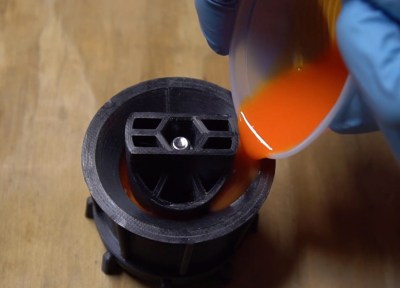
The overarching process is simple, but followed properly, it produces great results. [Eric] starts by building a mold box out of wood, coated in shellac to ensure it doesn’t stick to the silicone. The master part is then stuck to the base, surrounded by a lasercut cardboard strip which acts as a seal and key. Once properly degassed silicone is poured in and cured, the second half can be made. The mold is flipped in the mold box, the seal key removed,  and release agent applied to the silicone surfaces. With another pour and cure, the mold is ready for casting new parts.

While simple, if the correct equipment isn’t used or steps skipped, you’ll end up with a useless mold full of air bubbles or surface irregularities. It’s useful to see just what it takes to get a mold of such scale (13″ x 19″!) completed without flaws. We’ve featured [Eric]’s work before, such as his fine detail improvements on the Apple Pencil. Video after the break.

Continue reading “Making Silicone Molds – Big Ones!”

DIY Injection Molding Press

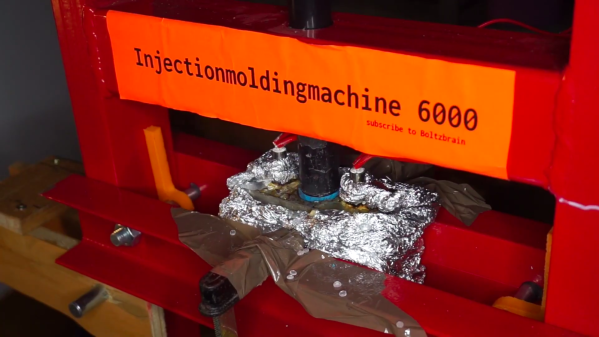
While 3D printing has now become easily accessible and cheap, there are still several use cases where you need the advantages offered by injection molding, even for small batch runs. Professional small-batch injection molding can be pretty expensive, and buying a manual machine can cost quite a bit. Of course, there are a number of DIY injection molding projects to choose from, but they usually involve a fair amount of tools and labour. [Bolzbrain] wanted to bypass all of the heavy cutting, welding and frame assembly work, so he’s built himself a DIY Injection Molding Press for cheap using an off the shelf, six ton hydraulic press. At final count, he ended up spending about €150 for the machine and another €120 for tools to build the machine. He also managed to locate a cheap, local CNC service that gave him a good deal on machining the Dies. But of course you can’t put a price on the lessons learnt and the satisfaction of having built it by hand.
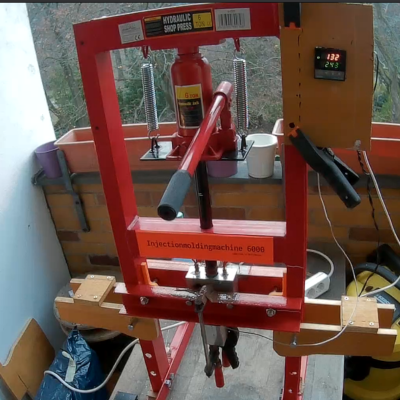
Choosing the hydraulic press is a great idea as it provides the high pressure needed for the job without the operator having to exert a lot of effort, which is a big drawback with some of the other DIY machines. As a bonus, the structural frame is quite sturdy and well suited for this purpose. The other main part of such a machine is the heated injection block and there are several different ways of doing it. After some amount of studying probable solutions, he decided to build a heated aluminium block through which the plastic granules can be rammed using the hydraulic piston. Heating is provided by a pair of 500W heaters and a type ‘k’ thermocouple does temperature sensing. An industrial PID controller adjusts the block temperature via a solid state relay. Overall, the electrical and mechanical layout cannot get any simpler.

[Bolzbrain] did a great job of documenting his build over a series of videos and more wizened hackers watching them will squirm in their seats spotting the numerous fails. He bought the cheapest pedestal drill machine that he could buy and watching the drill struggle while making a 26mm hole in the aluminium block is quite jarring.
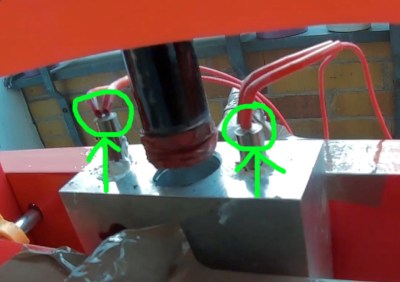
The electrical wiring has a lot of scope for improvement – with 220V AC heaters, exposed wiring and jury rigged panel held up with a pair of clamps. Installing and removing the die is a task and requires a lot of fiddling with several C-clamps — something which needs to be repeated for every shot. Maybe toggle clamps could help him to ease die fixing and removal. Once he figures out about mold release agents and wall draft angles, he won’t have to struggle trying to remove the molded article from the die. Then there’s the issue of proper runner design so that the thermo-plastic can quickly fill the mold cavity completely without any pockets.

But in the end, all that matters is that he is getting reasonably good molded parts for his purposes. With more tweaking and incremental improvements, we’re sure he’ll get better results. The video after the break is a short overview of his build, but the project page has a series of detailed videos covering all aspects of the project. And if you’d like to get an introduction to desktop injection molding, check out “Benchtop Injection Molding for the Home Gamer

Continue reading “DIY Injection Molding Press”

Casting Skateboard Wheels With A 3D Printed Mold

We’ll admit that most of the Hackaday staff wouldn’t get too far on a skateboard, but that doesn’t mean we can’t appreciate the impressive DIY wheels that [Chris McCann] has managed to cast using 3D printed molds. From unique color combinations to experimental materials, the process certainly opens up some interesting possibilities for those looking to truly customize their rides. Though it’s worth noting there’s a certain element of risk involved; should a set of homemade wheels fail at speed, it could go rather poorly for the rider.

Both the STL and STEP files for the mold have been released under the Creative Commons Attribution 4.0 license, meaning anyone with a 3D printer can follow along at home. Unfortunately, it’s not quite as simple as clicking print and coming back to a usable mold. Because of the layer lines inherent to FDM 3D printing, the inside of the mold needs to be thoroughly sanded and polished. [Chris] mentions that printing the mold in ABS and using vapor smoothing might be a workable alternative to elbow grease and PLA, but he hasn’t personally tried it yet.

Once you’ve got the three part mold printed, smoothed, and coated with an appropriate release agent like petroleum jelly, it’s time to make some wheels. The core of each wheel is actually 3D printed from PETG, which should give it pretty reasonable impact resistance. If you have access to a lathe, producing aluminum cores shouldn’t be too difficult either. With the core loaded into the mold, urethane resin is poured in through the top until all the empty space is filled.

But you’re not done yet. All those little air bubbles in the resin need to be dealt with before it cures. [Chris] puts his filled molds into a pressure chamber, though he mentions that vacuum degassing might also be a possibility depending on the urethane mixture used. After everything is solidified, the mold can easily be taken apart to reveal the newly cast wheel.

While there’s often some trial and error involved, 3D printing and resin casting are an undeniably powerful combination. If you can master the techniques involved, you can produce some very impressive parts that otherwise would be exceptionally difficult to produce on a hacker’s budget. Especially when you’re ready to start casting molten metal.

Continue reading “Casting Skateboard Wheels With A 3D Printed Mold”

Reduce, Reuse, Injection Mold

Many people have the means now to create little plastic objects thanks to 3D printing. However, injection molding is far less common. Another uncommon tech is plastic recycling, although we do occasionally see people converting waste plastic into filament. [Manuel] wants to solve both of those problems and created an injection molder specifically for recycling.

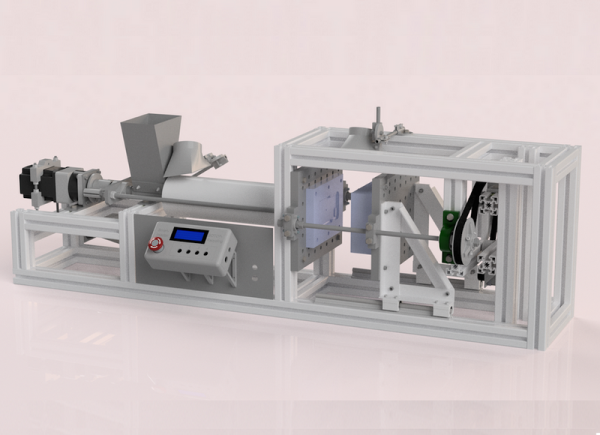
The machine — Smart Injector — is automated thanks to an Arduino. It’s pretty complex mechanically, so in addition to CAD models there are several PDF guides and a ton of pictures showing how it all goes together.

Continue reading “Reduce, Reuse, Injection Mold”

Massive Battle Bot Needs Equally Chunky Custom-Molded Wheels

We’ve all run into situations where the right part for the job isn’t something that you can just buy off the shelf. In a lot of cases, 3D-printing is the cure for that problem, but sometimes you need to go big with tough parts for a tough job. These custom molded urethane battlebot wheels are a great example of that. (Video, embedded below.)

The robotic warrior in question is “Copperhead”, a heavyweight death-dealer that has competed on the “BattleBots” show on TV. It’s an incredibly stout machine with a ridiculous 50 pound (23 kg) drum of spinning tool-steel on the front to disassemble competitors. Add to that the sheer mass of the bot’s armor plating and running gear, throw in the need to withstand the punishment meted out by equally diabolical weapons, and standard wheels are not going to fly.

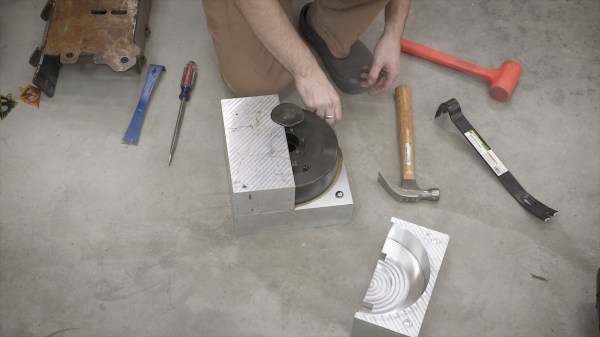
As [Robert Cowan] details in the video below, nothing but the sturdiest wheels will do, so the bot builders mold custom wheels with integrated hubs. The four-piece mold was machined out of aluminum to hold the plastic hubs, which were also machined but could easily have been 3D-printed. Polyurethane resin is poured in and adheres to the plastic hub better than we’d have thought it would: enough so to avoid coming apart despite some pretty severe blows. The whole casting process is a good watch, as is the overview of Copperhead’s design. And watching it tear apart “War Hawk” was a treat too.

You may not be building battle bots, but a scaled-down version of this process could be a handy trick to have stored away for someday. Continue reading “Massive Battle Bot Needs Equally Chunky Custom-Molded Wheels”