Brass screen is soldered together into a large mold for cardboard pulp.

How To Make A Classy, Brassy Cardboard Pulp Mold

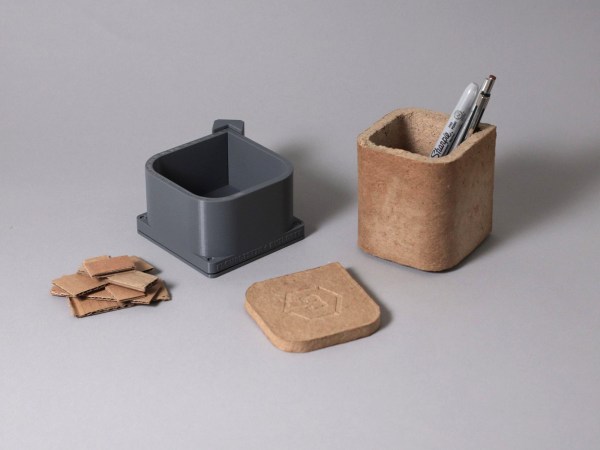
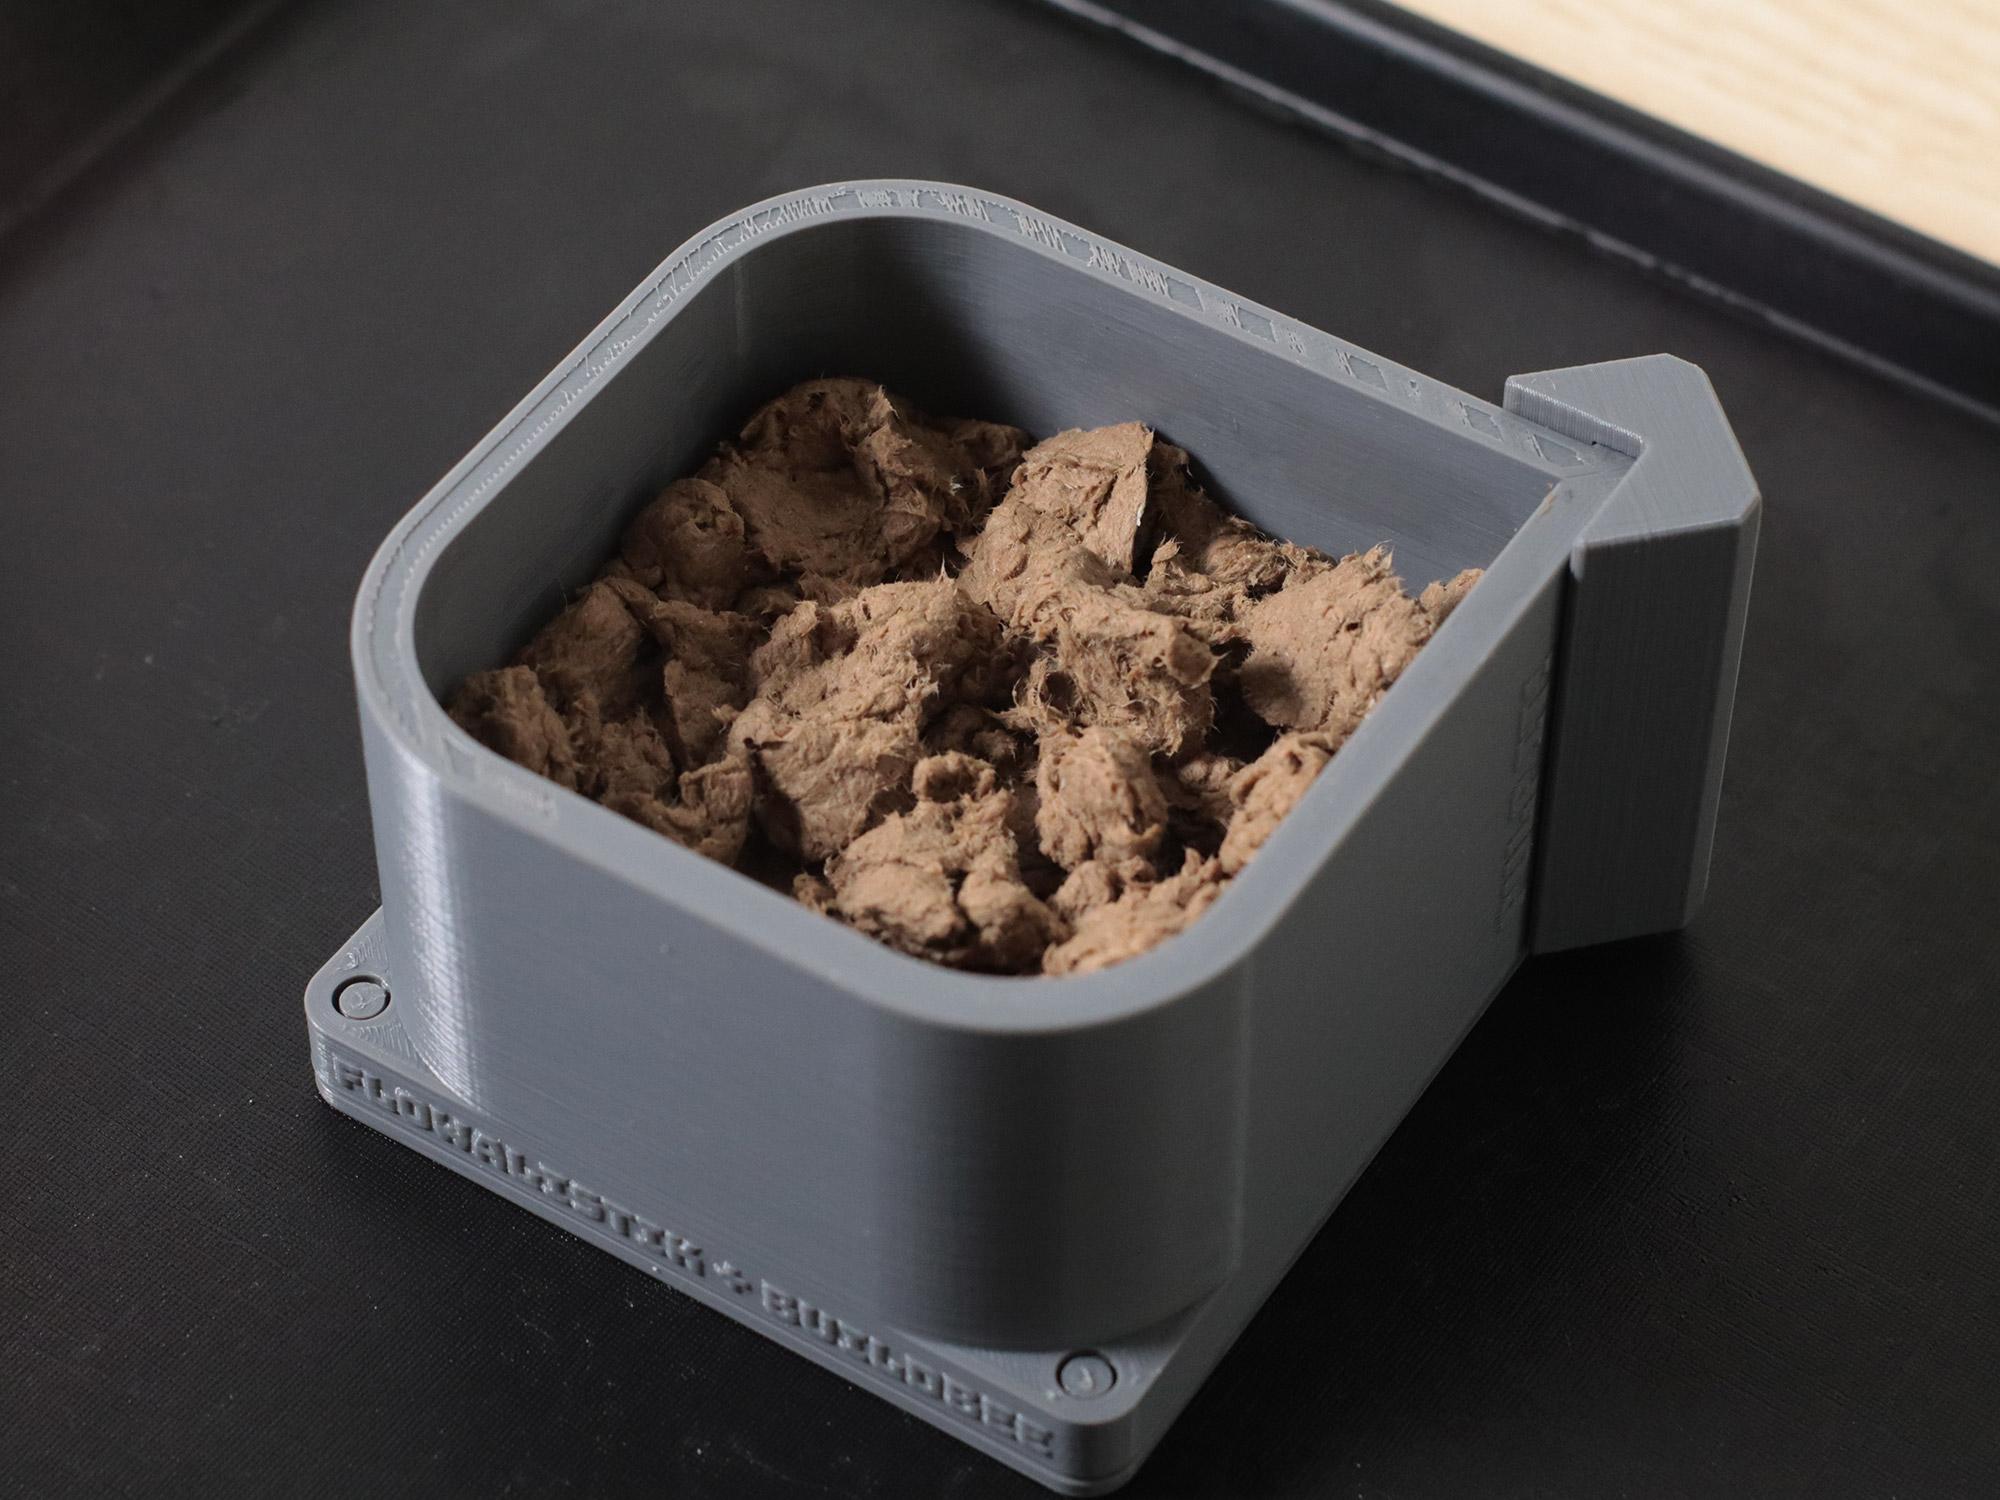
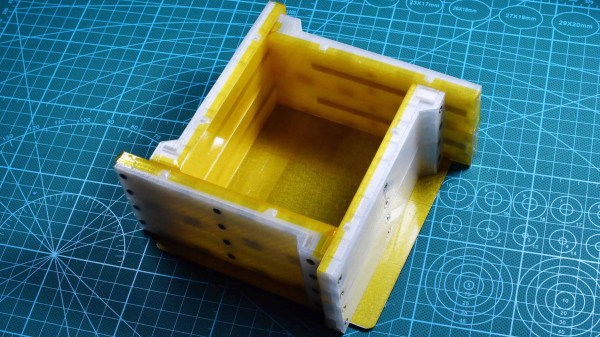
When we last checked in with prolific prototypist [Eric Strebel], he was perfecting the design of an eco-friendly wireless charger and turning his initial paper prototype into a chipboard version 2.0 that takes manufacturing concerns into consideration. At the end of this second video in a series, [Eric] was printing out the early versions of the form by which he would eventually make a brass screen mold for working with cardboard pulp. You know, the stuff that some egg cartons are made from.

Soldering brass screen into a mold.
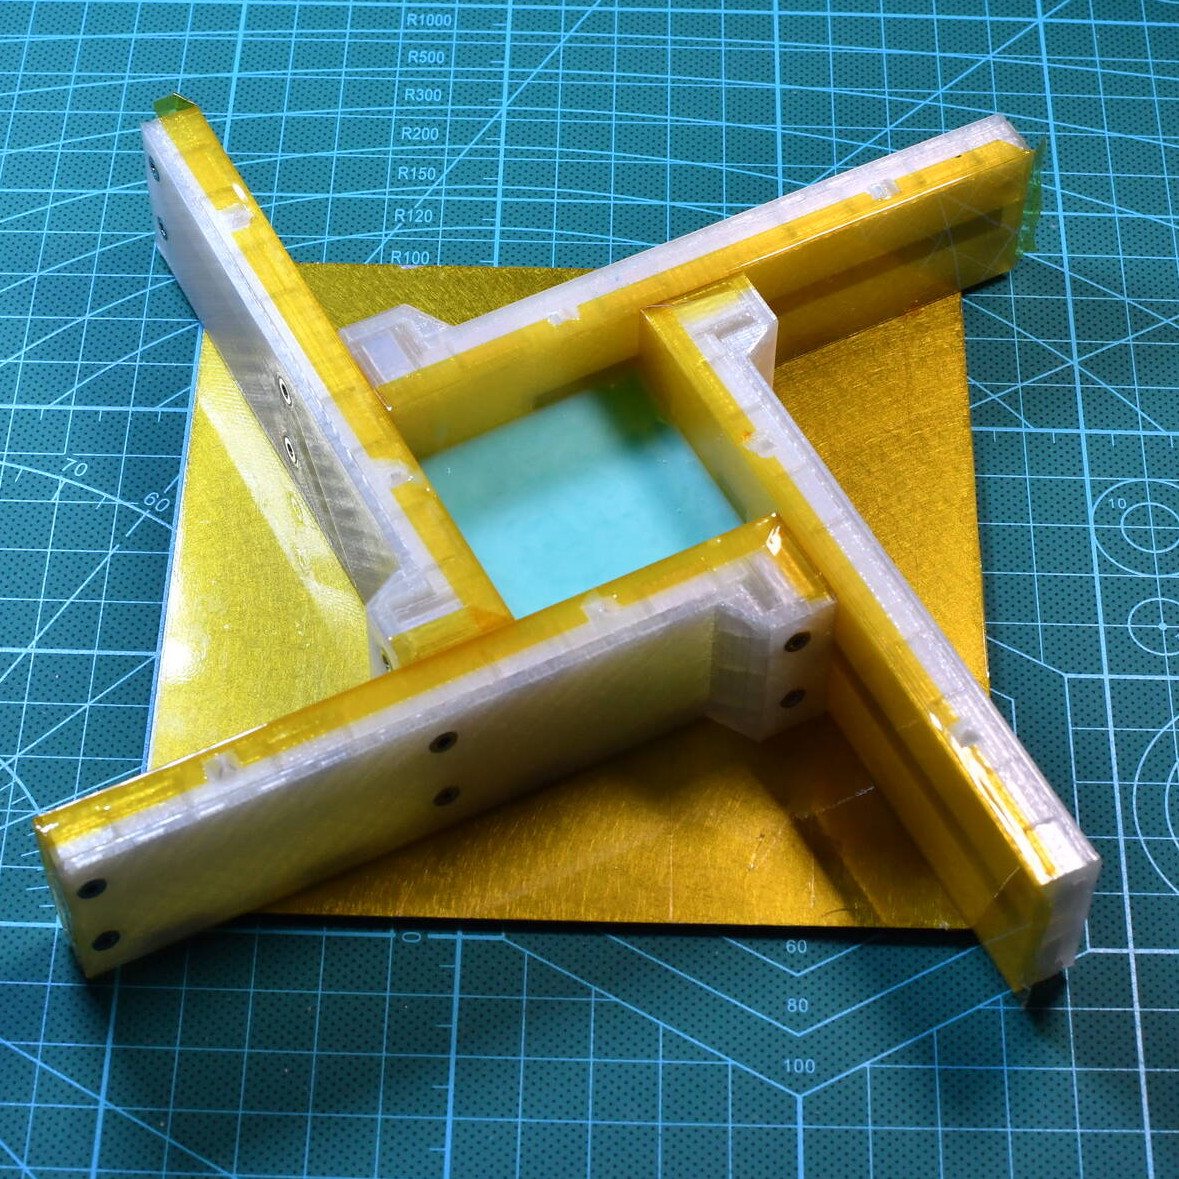
In the video below, it’s time to build the pulp mold by creating three smaller molds and then joining them into one horizontal mold. The result is a single piece that then gets folded up into a charging stand, much like the egg carton. [Eric] is using brass screen here, but says that copper would be a good choice, too.

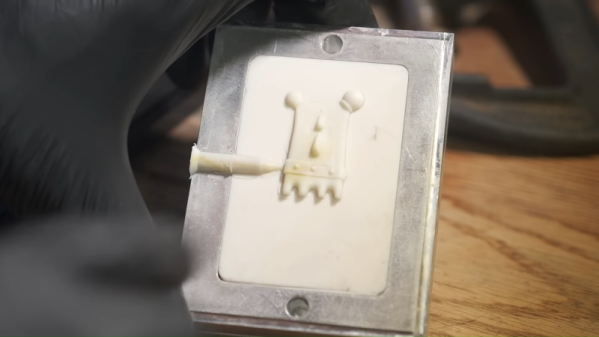
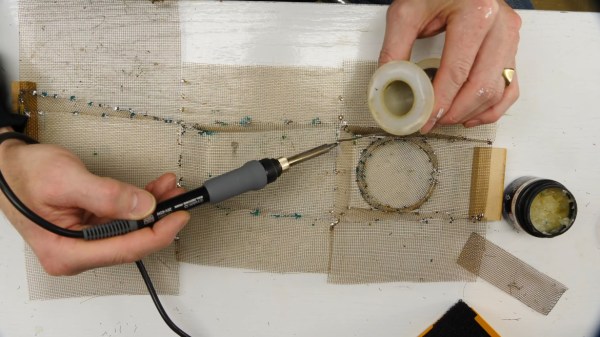
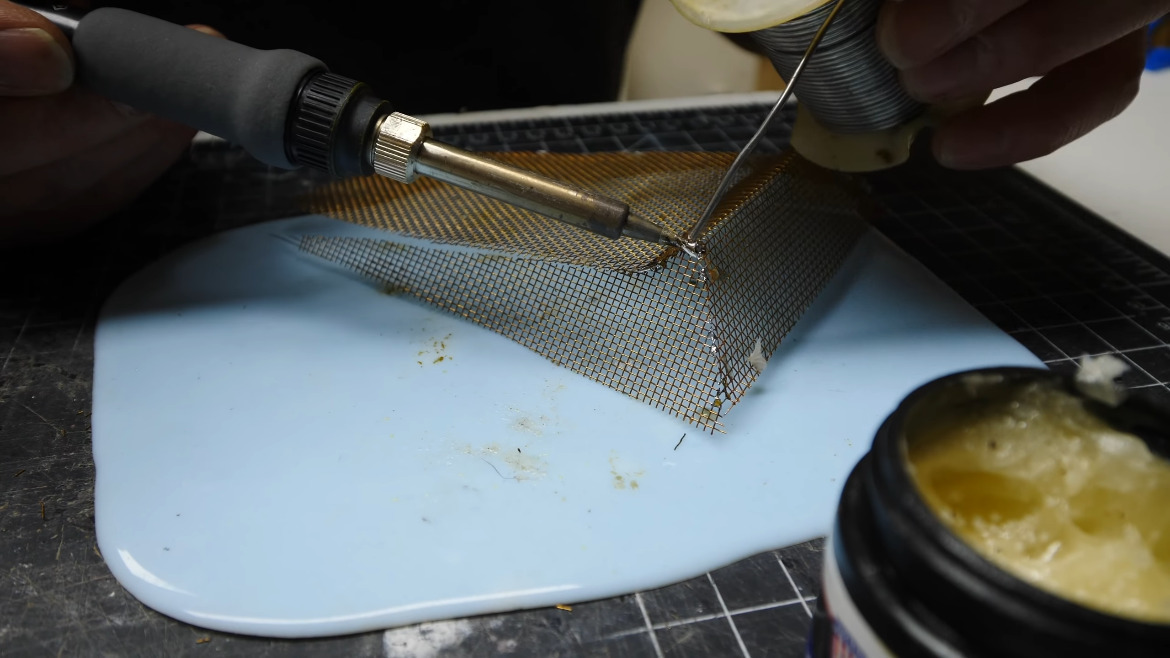
After cutting the brass with scissors and pounding them flat, he uses the 3D-printed molds from the previous video to press them into the correct shapes. Each of the three pieces needs a frame, which [Eric] makes from more brass screen, then stitches it to the mold piece with loose screen threads before securing the unions with solder.

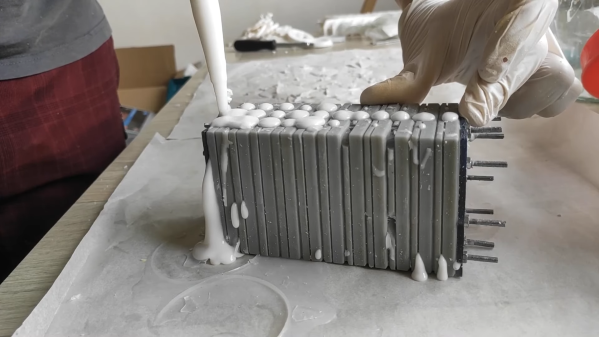
Since the weight of all the water would likely bend the brass out of shape, [Eric] finished off the mold by soldering on a frame of flat brass strip. Check out this awesome process below, and stay tuned for the next video when [Eric] pulps some cardboard and pumps out some eco-friendly chargers.

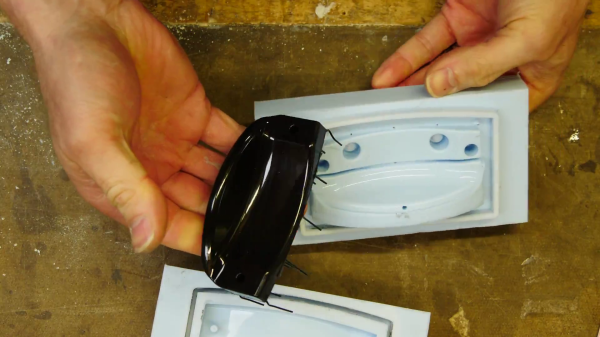
Does this look too complicated? You could always skip the whole mesh mold thing and shape your cardboard confetti directly into 3D printed parts.

Continue reading “How To Make A Classy, Brassy Cardboard Pulp Mold”

Pulp-Molding: A Use For Cardboard Confetti

We’re pretty sure that we don’t have to tell you how great cardboard is. You probably sing the praises yourself and use it for everything from a work surface protective layer to a prototype of your next amazing build. But if you still find yourself flush with cardboard even after all that, here’s one thing you can do with all those pieces that are too small to use for anything else– chuck them in an old blender, whip up some cardboard pulp, and press that gunk into some 3D-printed molds.

In addition to a step-by-step of the process, [flowalistik] offers a mold set of STL files for various useful items like a pencil holder, a box with a lid, a tray, and a coaster, as well as the Fusion 360 files in case you want to change them around. You might want to seal the coaster with something protective so that it doesn’t mold/disintegrate/bloom from condensation.

Each part consists of the walls, the wall clip that keeps them closed, but allows for de-molding and reuse, the bottom lid, and the top lid. All these prints need to be pretty high-res so that they can withstand the pressure of the clamp holding it all together. [flowalistik] recommends a layer height no larger than .03mm and a 20% infill.

The process of making the pulp itself is fairly simple, and the recipe only calls for water and some kind of binder. To start, remove all tape, coatings, staples, and anything else non-soluble from the cardboard. Cut it into bite-sized pieces your blender will enjoy, and add water and PVA glue or rice paste. Mix it up, remove the excess water by squeezing your pulp inside of a piece of cloth, and then use it to fill up your mold. You’ll want to press out the water as you go and fill it further, then finally apply the clamp. You can start de-molding parts on a schedule, starting with the clamp after about six hours. Once it’s fully dried in about two days, you can treat it like MDF and sand, cut, or even drill it. We think some of these would look pretty good with a coat of paint.

Need your objects to be more sturdy? Keep that printer warmed up — you can use prints to cast concrete, too.

Injection Molding Silicone Parts For Under $50

You’ve likely seen many tutorials on making silicone parts using 3D printed molds online. The vast majority of these methods use a simple pour method to fill the mold. This relies on careful degassing and gentle pouring to reduce the presence of bubbles in the final result. [Jan Mrázek] has been working on an alternative method however, that allows for injection molding at low cost in the home shop.

The process relies on the use of printed resin molds. [Jan] notes that this generally necessitates the use of condensation-cure silicones, as additive types don’t cure well in resin molds. The condensation silicone is mixed up, degassed, and poured into a standard cartridge. From there, it’s installed in a silicone delivery air gun, which uses compressed air to force the silicone out of the nozzle and into the waiting mold.

It’s basically using a bunch of home DIY gear to create a cheap injection molding solution for silicone parts. [Jan] notes that there are a few mods needed to mold design to suit the process, and that 400-800 kPa is a good pressure to inject the silicone at.

Having the silicone injected under pressure is great for complex mold designs, as it forces the material into all the little difficult nooks and crannies. Of course, we’ve seen other methods for making silicone parts before, too. Be sure to sound off in the comments with your own favored techniques for producing quality silicone parts. Video after the break.

Continue reading “Injection Molding Silicone Parts For Under $50”

Making High Quality Copies Of Existing Parts Using A Silicone Mold

3D printing has made it incredibly easy to produce small runs of plastic parts, but getting rid of the 3D printed look can be tricky and time-consuming. When you need a smooth and polished finish, or you want to make exact copies of an existing injection molded part, casting resin parts in silicone molds is an excellent option. [Eric Strebel] has plenty of experience with the process, and demonstrates it in detail while creating copies of violin chin rests that are no longer in production. It’s an interesting application, where 3D-printed layer lines are not just an aesthetic issue, but something that would irritate the user’s skin if present.

Creating silicone molds requires a bit of forethought about the mold design. You want to select the split line to make it as easy as possible to remove the finished parts, while also placing the resin pouring sprue and vents to prevent air bubbles from getting trapped in the mold. In [Erics] case, it’s impossible to use a simple planar split line, so he mounts the master part on a block of wood and uses cardboard and modeling clay to create a volume where the second side of the mold will protrude in the first side. It’s important to note that sulfur-free clay must be used, otherwise the silicone might not cure.

One side of the silicon mold is cast first, and after curing it is placed back in the mold box with the master part to allow casting the other side of the mold. At this point [Eric] super glues the sprue-former and vent rods to the master parts before molding the second side. A release agent consisting of petroleum jelly and naphtha is added wherever the two sides of the mold will touch, to prevent them from sticking together.

Bubbles are your enemy while resin casting, so ideally you need a vacuum chamber to degas the silicone and resin before casting, and a pressure chamber to allow the resin part to cure. While pouring the silicone for the molds, the mold box is placed on a vibration table to allow any bubbles to rise to the surface. While the entire mold-making and molding process is time-consuming, the copied parts are almost indistinguishable from the original.

[Eric] has also shown us how to make much larger silicone molds in the past. If you find yourself making lots of different-sized mold boxes, it might be worth building an adjustable mold box.

Continue reading “Making High Quality Copies Of Existing Parts Using A Silicone Mold”

Hackaday Podcast 128: 3D-Printing Injection Molds, Squiggly Audio Tape, Curvy Mirrors, And Space Cadets

Hackaday editors Elliot Williams and Mike Szczys bubble sort the best hardware hacks so you don’t miss ’em. This week we’re smitten by the perfection of a telephone tape loop message announcer. We enjoyed seeing Blender’s ray tracing to design mirrors, and a webcam and computer monitor to stand in for triple-projector-based fractal fun. There’s a bit of injection molding, some Nintendo Switch disassembling, and the Internet on a calculator. We close the show with a pair of Space stories, including the happy news this week that Wally Funk finally made it there!

Take a look at the links below if you want to follow along, and as always, tell us what you think about this episode in the comments!

Direct download (60 MB or so.)

Places to follow Hackaday podcasts:

Continue reading “Hackaday Podcast 128: 3D-Printing Injection Molds, Squiggly Audio Tape, Curvy Mirrors, And Space Cadets”

Injection Molds From Your 3D Printer

Last time we checked in with [CrafsMan] he had bought a benchtop injection molding machine. This time, he shows off how to 3D print molds. If you have ever had to spend to make tooling for injection molding, you’ll appreciate being able to make molds relatively inexpensively.

To test his workflow, [CrafsMan] created a little 3D figurine and brought it into TinkerCad. From there he created a mold and used Lychee Slicer to print it using resin.

Continue reading “Injection Molds From Your 3D Printer”

Modular Box Design Eases Silicone Mold-Making

Resin casting is a fantastic way to produce highly detailed parts in a wide variety of colors and properties, and while the process isn’t complicated, it does require a certain amount of care and setup. Most molds are made by putting a part into a custom-made disposable box and pouring silicone over it, but [Foaly] was finding the process of making and re-making those boxes a bit less optimized than it could be. That led to this design for a re-usable, modular, adjustable mold box that makes the workflow for small parts considerably more efficient.

The walls of the adjustable box are four identical 3D-printed parts with captive magnets, and the base of the box is a piece of laser-cut steel sheet upon which the magnetic walls attach. The positioning and polarity of the magnets are such that the box can be assembled in a variety of sizes, and multiple walls can be stacked to make a taller mold. To aid cleanup and help prevent contamination that might interfere with curing, the inner surfaces of each piece are coated in Kapton tape.

The result is a modular box that can be used and re-used, and doesn’t slow down the process of creating and iterating on mold designs. The system as designed is intended for small parts, but [Foaly] feels there is (probably) no reason it can’t be scaled up to some degree. Interested? The design files are available from the project’s GitHub repository, and if you need to brush up a bit on how resin casting works, you can read all about it here.