Making Mittens For A Smartphone

For those of us in the slightly inhospitable parts of the northern hemisphere, it’s freaking cold outside. Spring can’t come sooner, and smartphones won’t work if you’re wearing normal gloves. Smartphones will work if you sew a few bits of conductive thread into your gloves, but if you prefer mittens, you’re out of luck. That’s alright, because [Becky] at Adafruit has great guide for knitting your own smart phone mittens.

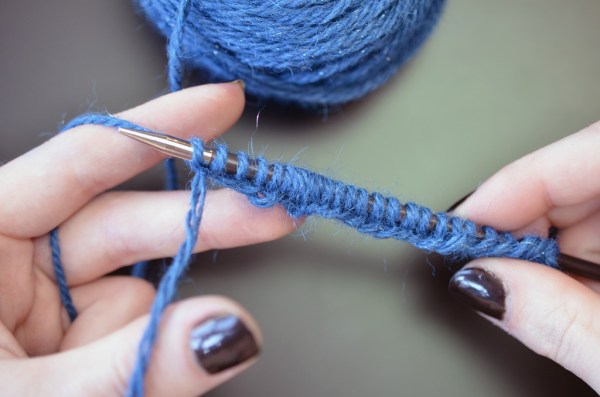
Intellectually, the concept of weaving fabric is fairly simple – it’s just interlaced threads that form a flexible sheet. Sewing, too, is fairly straightforward. Knitting, on the other hand, is weird. It’s a single string tied to itself that forms a 3D shell. If you’ve ever picked up a pair of knitting needles, you’ll soon realize whoever invented knitting is perhaps the greatest forgotten genius in all of human history. Lucky, then, that [Becky] has a lot of links that go through how to knit, and how to turn yarn into a pair of mittens with this pattern.

To make these mittens work with a smartphone, [Becky] is using a stainless conductive yarn stitched into the thumb and fingertips of the mitten. It works, and now you can use your touchscreen device no matter how cold it is.

Continue reading “Making Mittens For A Smartphone”

This One May Come As A Shock To Some

[Chris] seems to have commandeered a decent portion of the wife’s sewing room for his electronic adventures. As it is still her claim, she made it clear that his area needed some organization and a new desk. Dissatisfied with the look and feel of the replacement IKEA desk-like substance they acquired, he took it upon himself to ratchet up both the style and value by adding a copper laminate.

His decision is not purely based in aesthetic. If you’re following along, this means that his new electronics work surface is conductive. And yeah, it’s connected to ground at the wall. Although he doesn’t care for the stank of of anti-static mats or their susceptibility to fading and cracking, he does intend to use a tiny patch of it to keep his silicon happy.

[Chris] used a 20-gauge copper sheet that he cut and scored down to fit his Swedish sandwich wood base with enough margin for overhang. After scratching up one side of the copper sheet and one of the receiving base, he squidged down some adhesive nasty enough to require the rubber glove protocol and clamped it all together for several hours. Stay put the copper did, but stay flat it did not. After hammering down the overhang, [Chris] hand-burnished the copper in small swirls with a Scotch Brite pad to visually break up the slightly wavy surface. Instructional and hilarious play-by-play after the break.

Continue reading “This One May Come As A Shock To Some”

Boxing Trainer

Boxing Trainer Uses DIY Force Sensors

A team of Cornell students have designed and built their own electronic boxing trainer system. The product of their work is a game similar to Whack-A-Mole. There are five square pads organized roughly into the shape of a human torso and head. Each pad will light up based on a pre-programmed pattern. When the pad lights up, it’s the player’s job to punch it! The game keeps track of the player’s accuracy as well as their reaction time.

The team was trying to keep their budget under $100, which meant that off the shelf components would be too costly. To remedy this, they designed their own force sensors. The sensors are basically a sandwich of a few different materials. In the center is a 10″ by 10″ square of ESD foam. Pressed against it is a 1/2″ thick sheet of insulating foam rubber. This foam rubber sheet has 1/4″ slits cut into it, resulting in something that looks like jail bars. Sandwiching these two pieces of foam is fine aluminum window screen. Copper wire is fixed the screen using conductive glue. Finally, the whole thing is sandwiched between flattened pieces of corrugated cardboard to protect the screen.

The sensors are mounted flat against a wall. When a user punches a sensor, it compresses. This compression causes the resistance between the two pieces of aluminum screen to change. The resistance can be measured to detect a hit. The students found that if the sensor is hit harder, more surface area becomes compressed. This results in a greater change in resistance and can then be measured as a more powerful hit. Unfortunately it would need to be calibrated depending on what is hitting the sensor, since the size of the hitter can throw off calibration.

Each sensor pad is surrounded by a strip of LEDs. The LEDs light up to indicate which pad the user is supposed to hit. Everything is controlled by an ATMEGA 1284p microcontroller. This is the latest in a string of student projects to come out of Cornell. Make sure to watch the demonstration video below. Continue reading “Boxing Trainer Uses DIY Force Sensors”

First Ever Parts Emailed To Space

The shocking thing is not that this happened. The shocking thing is how normal it seems. An astronaut inside a space station needed a ratcheting socket wrench. Someone else on Earth drew it up on a computer then e-mailed the astronaut. The astronaut clicked a button and then the tool was squirted out of a nozzle. Then he picked up and used the tool for the job he needed done. No big deal.

The story itself is almost uneventful – of course we can do these things now. Sure, it happens to be the first time in mankind’s history we have done this. Yes, it is revolutionary to be able to create tools on demand rather than wait months for one to be built planet-side and put onto the next resupply rocket. But, amateurs living in places without even widespread electricity or running water have already built these machines from actual garbage.

Every once in a while a story slaps us with how much the future is now.

These particular 3d prints were duplicated on the ground, and both sets preserved for future comparative analysis to see if microgravity has any effect on 3d prints. They have an eye on sending them to Mars, a journey where resupply is more than just a couple-month inconvenience.

See the first link above for more detail and photos of NASA’s 3d printer and the Microgravity Science Glovebox in the Columbus laboratory module.

Illumination Captured In A Vacuum Jar

Experimentation with the unusual nature of things in the world is awesome… especially when the result is smokey glowing plasma. For this relatively simple project, [Peter Zotov] uses the purchase of his new vacuum pump as an excuse to build a mini vacuum chamber and demonstrate the effect his mosfet-based Gouriet-Clapp capacitive three-point oscillator has on it.

In this case, the illumination is caused due to the high-frequency electromagnetic field produced by the Gouriet-Clapp oscillator. [Peter] outlines a build for one of these, consisting of two different wound coils made from coated wire, some capacitors, a mosfet, potentiometer, and heat sink. When the oscillator is placed next to a gas discharge tube, it causes the space to emit light proportionate to the pressure conditions inside.

exploded

For his air tight and nearly air free enclosure, [Peter] uses a small glass jar with a latex glove as the fitting between it and a custom cut acrylic flange. With everything sandwiched snugly together, the vacuum hose inserted through the center of the flange should do its job in removing the air to less than 100 Pa. At this point, when the jar is placed next to the oscillator, it will work its physical magic…

[Peter] has his list of materials and schematics used for this project on his blog if you’re interested in taking a look at them yourself. Admittedly, it’d be helpful to hear a physicist chime in to explain with a bit more clarity how this trick is taking place and whether or not there are any risks involved. In any case, it’s quite the interesting experiment.

PoughkeepsieMMF

First Ever Poughkeepsie Mini Maker Faire

This past Saturday was the first Mini Maker Faire held in Poughkeepsie, NY. Although it was the first in the area, the event went extremely well having over 60 makers and countless attendees. It was held at the Poughkeepsie Day School and made use of a large percentage of the indoor area.

roboticarm

Ninth graders of the hosting school [Liam], [Johnson] and [Matt] were proudly displaying some of their projects. One of which was a robotic hand controlled by a glove the user wears. Flex sensors sewn into the glove detect how much each finger is bent. That information is read by an Arduino which then commands 5 independent servos to pull string ligaments to bend the fingers of the 3D printed robotic hand. The kids give credit to this Instructable which was the inspiration for their desire to build such a project.

No Maker Faire would be complete without some 3D printers. On hand was a father/son team that built a Mini Kossel. The design is simple and elegant, and apparently assembly is no problem for even the youngest maker. 3D printing guru [Ed] was on hand with his MakerGear M2 to show some practical uses for 3D printers. They are not just for making Yoda heads! [Ed] also gave a presentation on the matter, explaining why 3D printing is important and useful to people, even the common non-techno-nerd consumer.

Continue reading “First Ever Poughkeepsie Mini Maker Faire”

From Nerf Gun To RF Cannon: Building A Movie Prop

[David Windestål] is back in the USA, and this time he’s armed and dangerous! He’s built an incredible RF cannon prop (YouTube link) as part of his drone hunter wardrobe for the Rotor DR1 series. [David] is no stranger to Hackaday. We’ve previously seen him gliding R/C planes from the edge of space and building afterburners as part of the Flite Test crew.

[David’s] drone hunter character is armed with a nasty RF cannon designed to fry drones out of the sky. The hunter can then collect and sell their Arcanum pellet power sources. [David] started with a seriously big Nerf gun. He cut off the front half of the gun and replaced it with a helical antenna. This is the same type of antenna [David] uses in his video ground stations. Coupled with a laser cut wood frame, the coil looks downright dangerous. We’re glad it’s just for show.

[David] added a few more accessories to the gun, including switches, an old heat sink, some wires, and the all-important Arcanum reactor. We seriously love his RF shielded glove, which keeps the hunter’s barrel hand from getting fried. [David] added a layer of copper mesh to a thick chemical resistant glove. He soldered the copper together and added a wire to connect glove and gun. [David] then enlisted the help of DR1 director [Chad Kapper] to paint and weather the gun and shield glove. The results are simply stunning.

We love watching hackers step a bit outside their element and build props like this. They always add a few realistic features that make even the most futuristic sci-fi prop a bit more plausible.

Continue reading “From Nerf Gun To RF Cannon: Building A Movie Prop”