Great news everyone, Windows is not the only operating system with remote code execution via SMB. Linux has also its own, seven-year-old version of the bug. /s
This Linux remote execution vulnerability (CVE-2017-7494) affects Samba, the Linux re-implementation of the SMB networking protocol, from versions 3.5.0 onwards (since 2010). The SambaCry moniker was almost unavoidable.
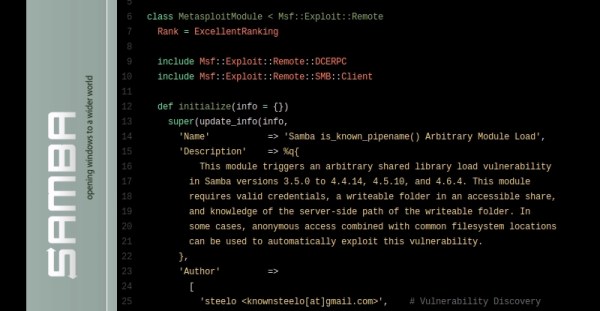
The bug, however, has nothing to do on how Eternalblue works, one of the exploits that the current version of WannaCry ransomware packs with. While Eternalblue is essentially a buffer overflow exploit, CVE-2017-7494 takes advantage of an arbitrary shared library load. To exploit it, a malicious client needs to be able to upload a shared library file to a writeable share, afterwards it’s possible for the attacker to cause the server to load and execute it. A Metasploit exploit module is already public, able to target Linux ARM, X86 and X86_64 architectures.
A patch addressing this defect has been posted to the official website and Samba 4.6.4, 4.5.10 and 4.4.14 have been issued as security releases to correct the defect. Patches against older Samba versions are also available. If you can’t apply the patch at the moment, the workaround is to add the parameter “nt pipe support = no” to the [global] section of your smb.conf and restart smbd. Note that this can disable some expected functionality for Windows clients.
Meanwhile, NAS vendors start to realise they have work on their hands. Different brands and models that use Samba for file sharing (a lot, if not all, of them provide this functionality) will have to issue firmware updates if they want to patch this flaw. If the firmware updates for these appliances take the same time they usually do, we will have this bug around for quite some time.