This hive tracker features a light sensor, a temperature sensor, and three strain gauges to measure the weight. There would be four, but a mouse decided to take a bite of the wires in the most nightmarish place to repair.
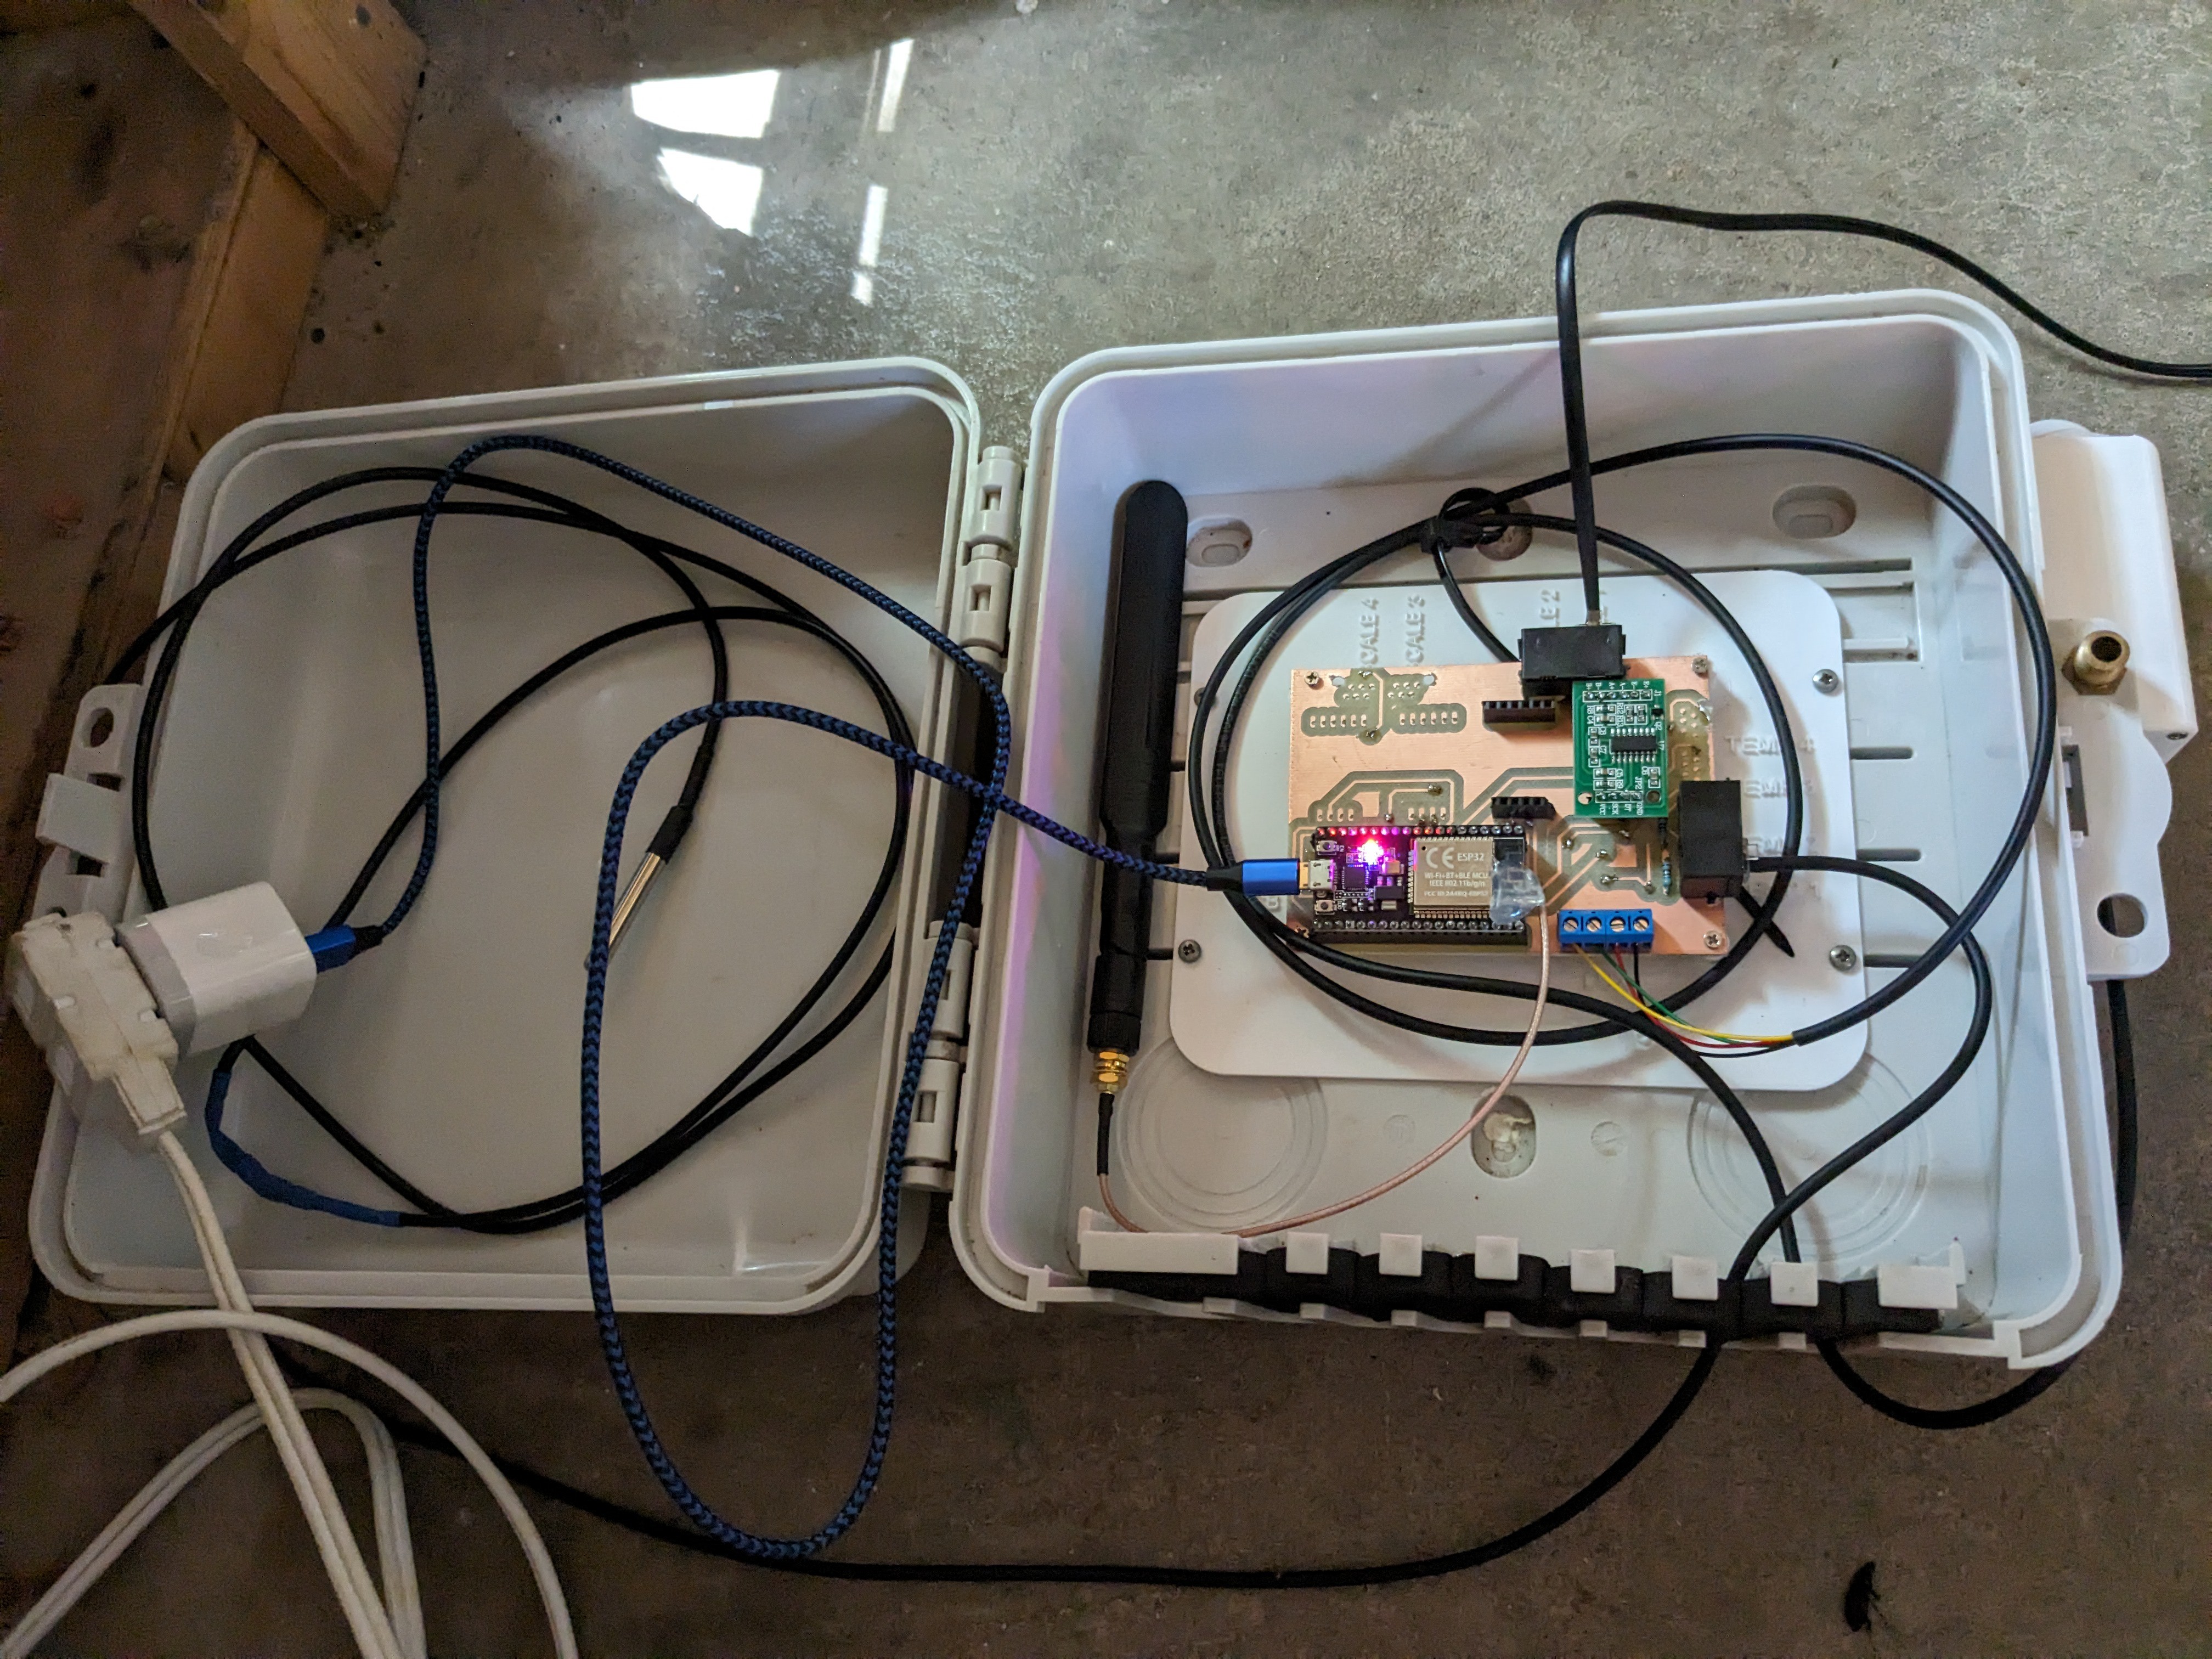
Everything runs off of an ESP32, and there’s an external antenna involved because the hive is nearly out of Wi-Fi range. The strain gauges are the affordable bathroom-scale type, and [Ben] has extras for if and when the number of hives goes up.
We like the combination of hard work and simplicity going on here — [Ben] milled and drilled the PCB himself, and used phone plugs to connect the temperature and weight sensors. Unfortunately, the plugs make the strain gauges a little finicky, so [Ben] says he would probably use screw terminals next time, or might be soldering the wires sooner rather than later. Consider this one a work in progress, and keep watching for updates as [Ben] works out the kinks.
If I could name one thing which has been the most transformative for our community over the last couple of decades, it would have to be the proliferation of hackerspaces. Ostensibly a place which provides access to tools and machinery, these organisations have become so much more. They bring together like-minded people, and from such a meeting of minds have come a plethora of high quality projects, events, and other good things.
Just What Is A Hackerspace?
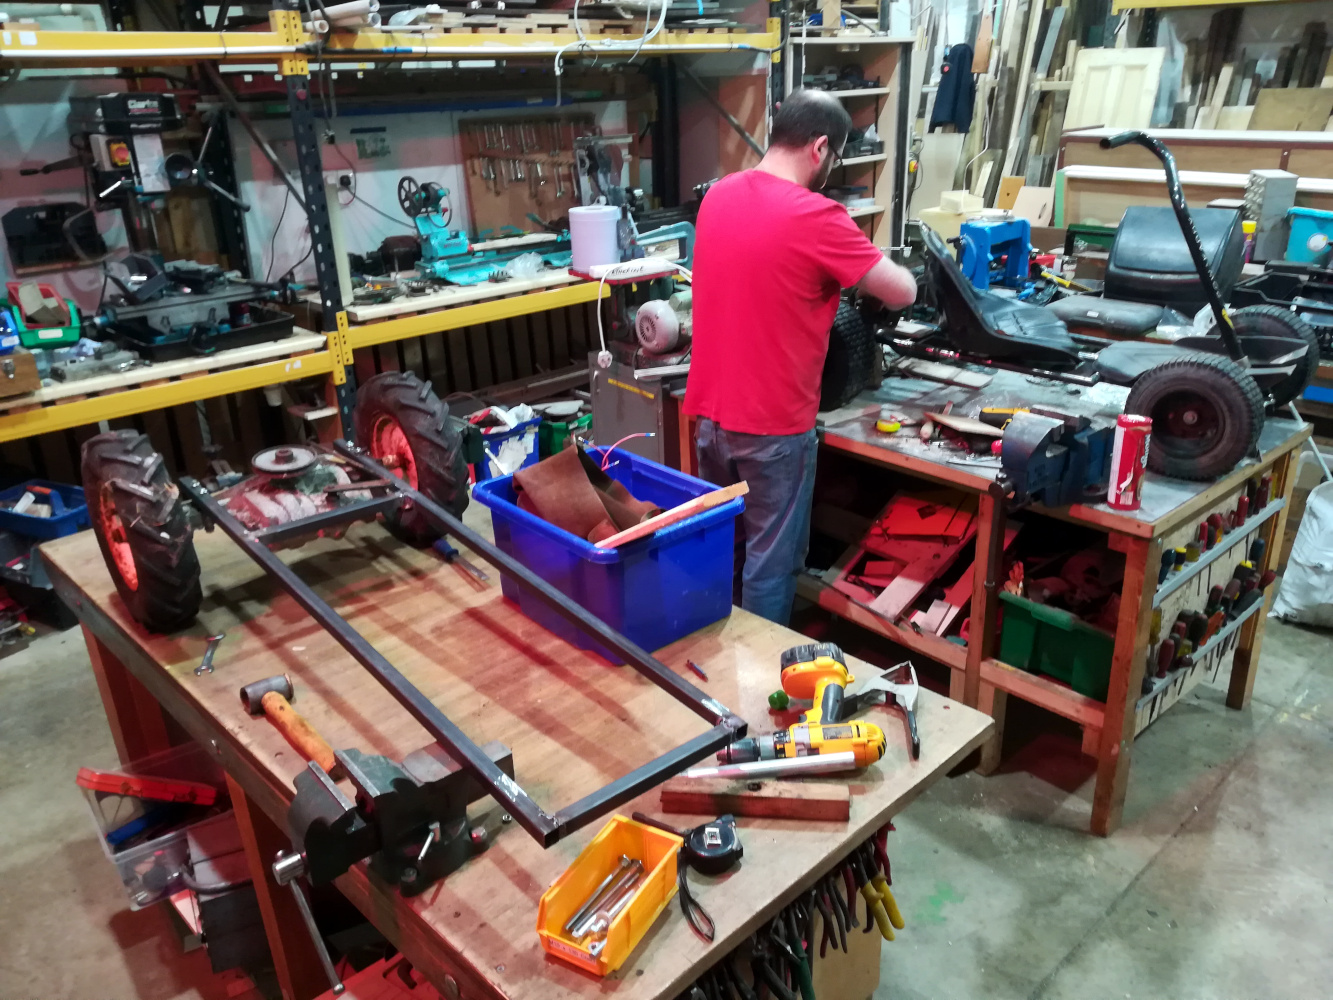
A Hacky Racer takes shape in the MK Makerspace workshop
Hackerspaces loosely come in many forms, from co-working spaces or libraries who have invested in a 3D printer and imagine themselves to be a hackerspace, through to anarchist collectives in abandoned warehouses who support their city’s alternative communities with technology. For me, hackerspaces must be community organisations rather than for-profit ones, so for the purposes of this article I’m not referring to closely-allied commercial spaces such as FabLabs.
So a good hackerspace for me is a group of tech enthusiasts who’ve come together, probably formed a non-profit association, and rented a dilapidated basement or industrial unit somewhere. The tools and machines inside aren’t shiny and new but they mostly work, and round that fridge stocked with Club-Mate you’ll find a community of friends, people who don’t think it’s odd to always want to know how things work. In a good hackerspace you’ll have found your place, and you can be much more than you would have been alone.
I visit plenty of hackerspaces across Europe as I wander the continent on an Interrail pass. I’m a member of three of them at the moment, though my main home in the UK is at Milton Keynes Makerspace. I’ve sat on recycled sofas drinking caffeinated beverages in more cities than I can count, and along the way I’ve seen close-up the many different ways a hackerspace can be run. I’ve seen spaces falling apart at the seams, I’ve seen ones a little too regimented for my taste, and others with too much of an emphasis on radical ideology, but mostly I’ve seen spaces that get it about right and I feel at home in. So perhaps it’s time to sit down and talk about what I think makes a good hackerspace. What is my space?
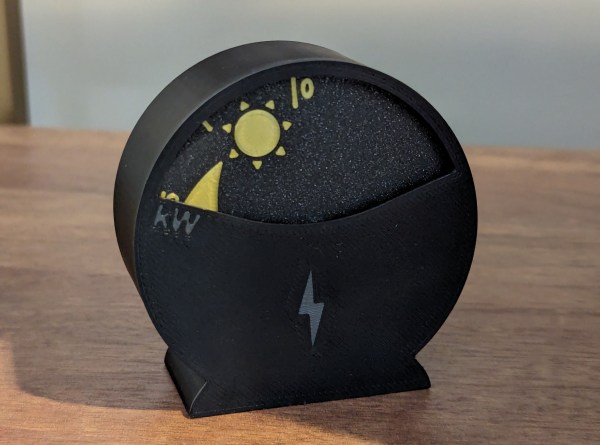
What’s the first thing you want after installing solar? All the sunshine you can get, of course. Especially if you did it in the wintertime. And what would be more fun than monitoring your power generation, especially leading up to the equinox, or start of spring? Probably not much, especially if you built a cute solar power gauge like [Ben] did to keep him from obsessively checking his phone.
At the heart of this build is the affordable Seeed Xiao ESP32C3, which controls an equally cost-effective automotive stepper via an L293D H-bridge driver. Then it was just a matter of hooking it into Home Assistant. As power is generated by the solar system, the cute little sun on the gauge rises and shows the kilowattage gained.
Unfortunately there’s no real data sheet for the stepper, so [Ben] opted to use the 5 V from the USB that’s powering the ESP32. However, it seems like this might not be enough power because the gauge appears to drift a bit. To fix this, [Ben] runs the stepper_init script twice a day, which cranks the dials all the way forward then all the way backward before settling on the last known value.
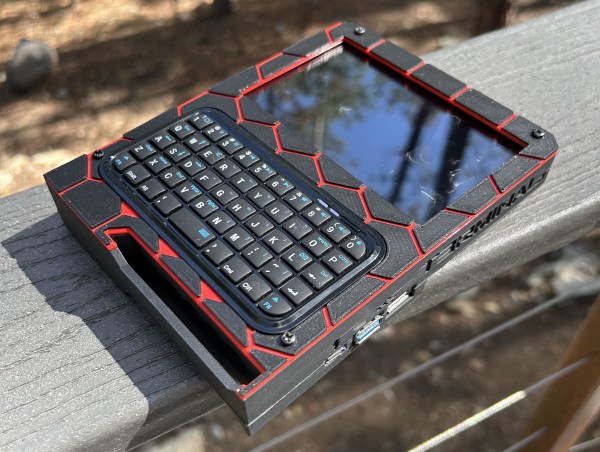
One of the greatest things about the hacker ecosystem is that whole standing-on-the-shoulders-of-giants thing. Somebody makes something and shares it, and then someone else takes that thing and remixes it, sometimes making it objectively better. For their T3rminal cyberdeck, [calebholloway08] was inspired by a number of projects and came up with something that looks simply fantastic.
Whether you want to call this beauty a cyberdeck or a mobile PC, the guts are what you might expect — a Raspberry Pi 4, an affordable mini keyboard, and a touch screen. But this one took some doing, as in [calebholloway08] had to do a little bit of surgery on the Pi 4, the PiSugar S plus power supply platform, and the display. But you shouldn’t let that stop you from standing on the shoulders of giants, as [calebholloway08] provides (or guides you towards) clear instructions for all three mods.
One thing [calebhollway08] would have done differently was to use something other than a 18650 battery for power, like a 21700. The question is, what will you do differently?
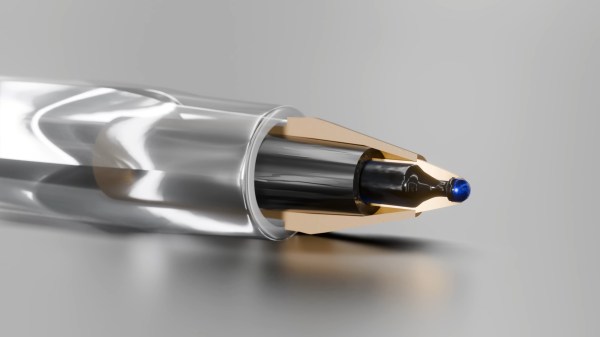
Look around you. Chances are, there’s a BiC Cristal ballpoint pen among your odds and ends. Since 1950, it has far outsold the Rubik’s Cube and even the iPhone, and yet, it’s one of the most unsung and overlooked pieces of technology ever invented. And weirdly, it hasn’t had the honor of trademark erosion like Xerox or Kleenex. When you ‘flick a Bic’, you’re using a lighter.
It’s probably hard to imagine writing with a feather and a bottle of ink, but that’s what writing was limited to for hundreds of years. When fountain pens first came along, they were revolutionary, albeit expensive and leaky. In 1900, the world literacy rate stood around 20%, and exorbitantly-priced, unreliable utensils weren’t helping.
In 1888, American inventor John Loud created the first ballpoint pen. It worked well on leather and wood and the like, but absolutely shredded paper, making it almost useless.
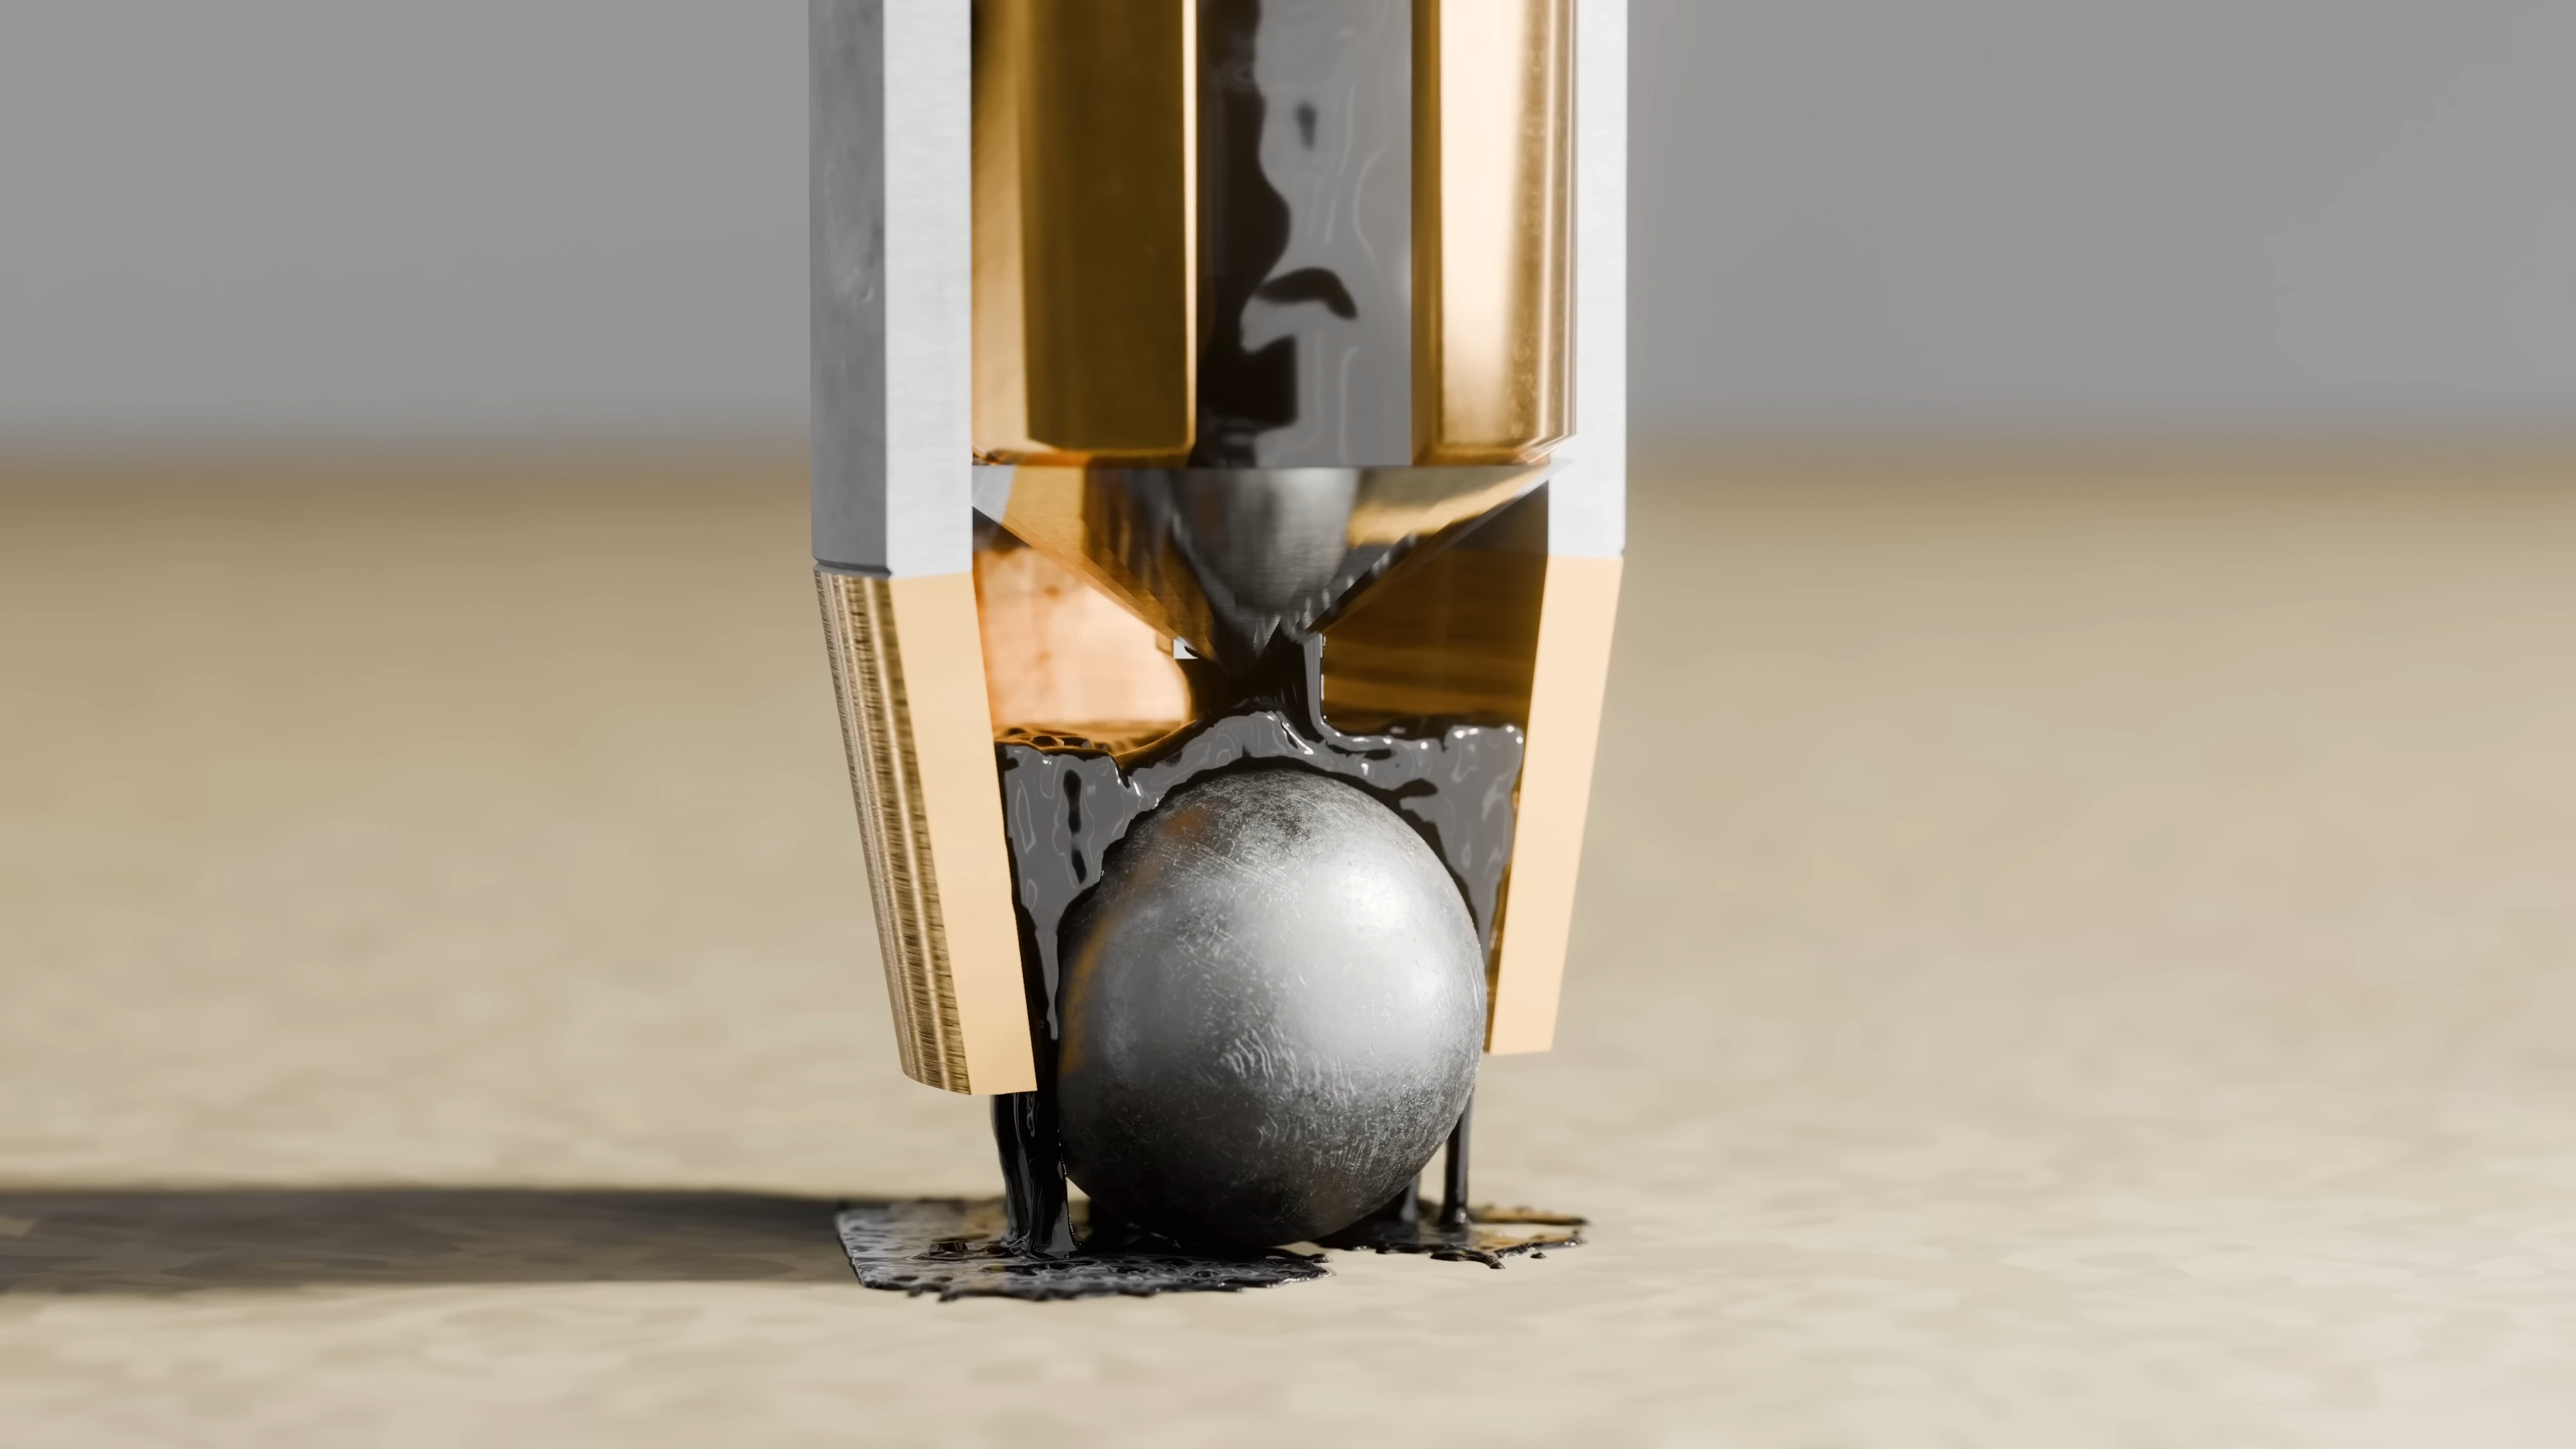
One problem was that while the ball worked better than a nib, it had to be an absolutely perfect fit, or ink would either get stuck or leak out everywhere. Then along came László Bíró, who turned instead to the ink to solve the problems of the ballpoint.
One of the most basic tools for tinkering with electronics is a multimeter. Today, even a cheap meter has capabilities that would have been either very expensive or unobtainable back in the 1970s. Still, even then, a meter was the most affordable way to do various tasks around the shop. Is this cable open? Are these two wires shorted? What’s the value of this resistor? Is the circuit getting power? Is the line voltage dropping? You can answer all those questions — and many more — with a basic meter. But there’s one thing that hasn’t changed much over the years: probes. That’s a shame because there are a lot of useful options.
The probes that came with your meter probably have much in common with the probes a 1970-era meter had. Yeah, the banana plugs probably have a little plastic cover, and the plastic itself might be a little different. Parts are small these days, so the tips might be a little finer than older probes. But if you sent your probes back in time, few people would notice them.
The Blinders Syndrome
One problem is that those probes are usually good enough. We’ve all clipped an alligator clip to a test probe. I’ve even fashioned super pointy probes out of syringes. Years ago, I bought an expensive kit with many attachments I rarely use, like little hooks and spade lugs. Then, I happened to go down the wrong aisle at Harbor Freight.
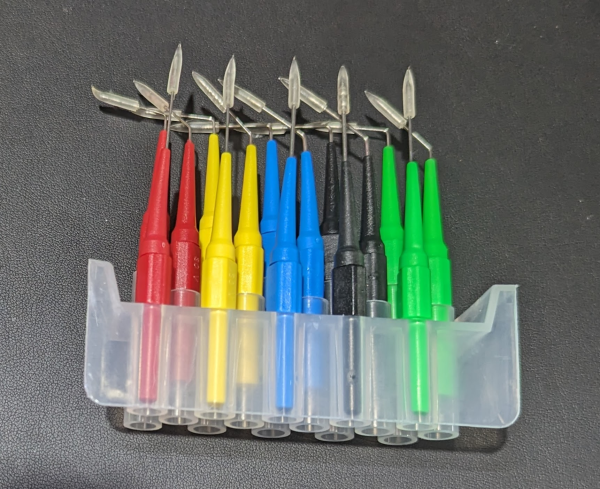
Back probes ready for action.
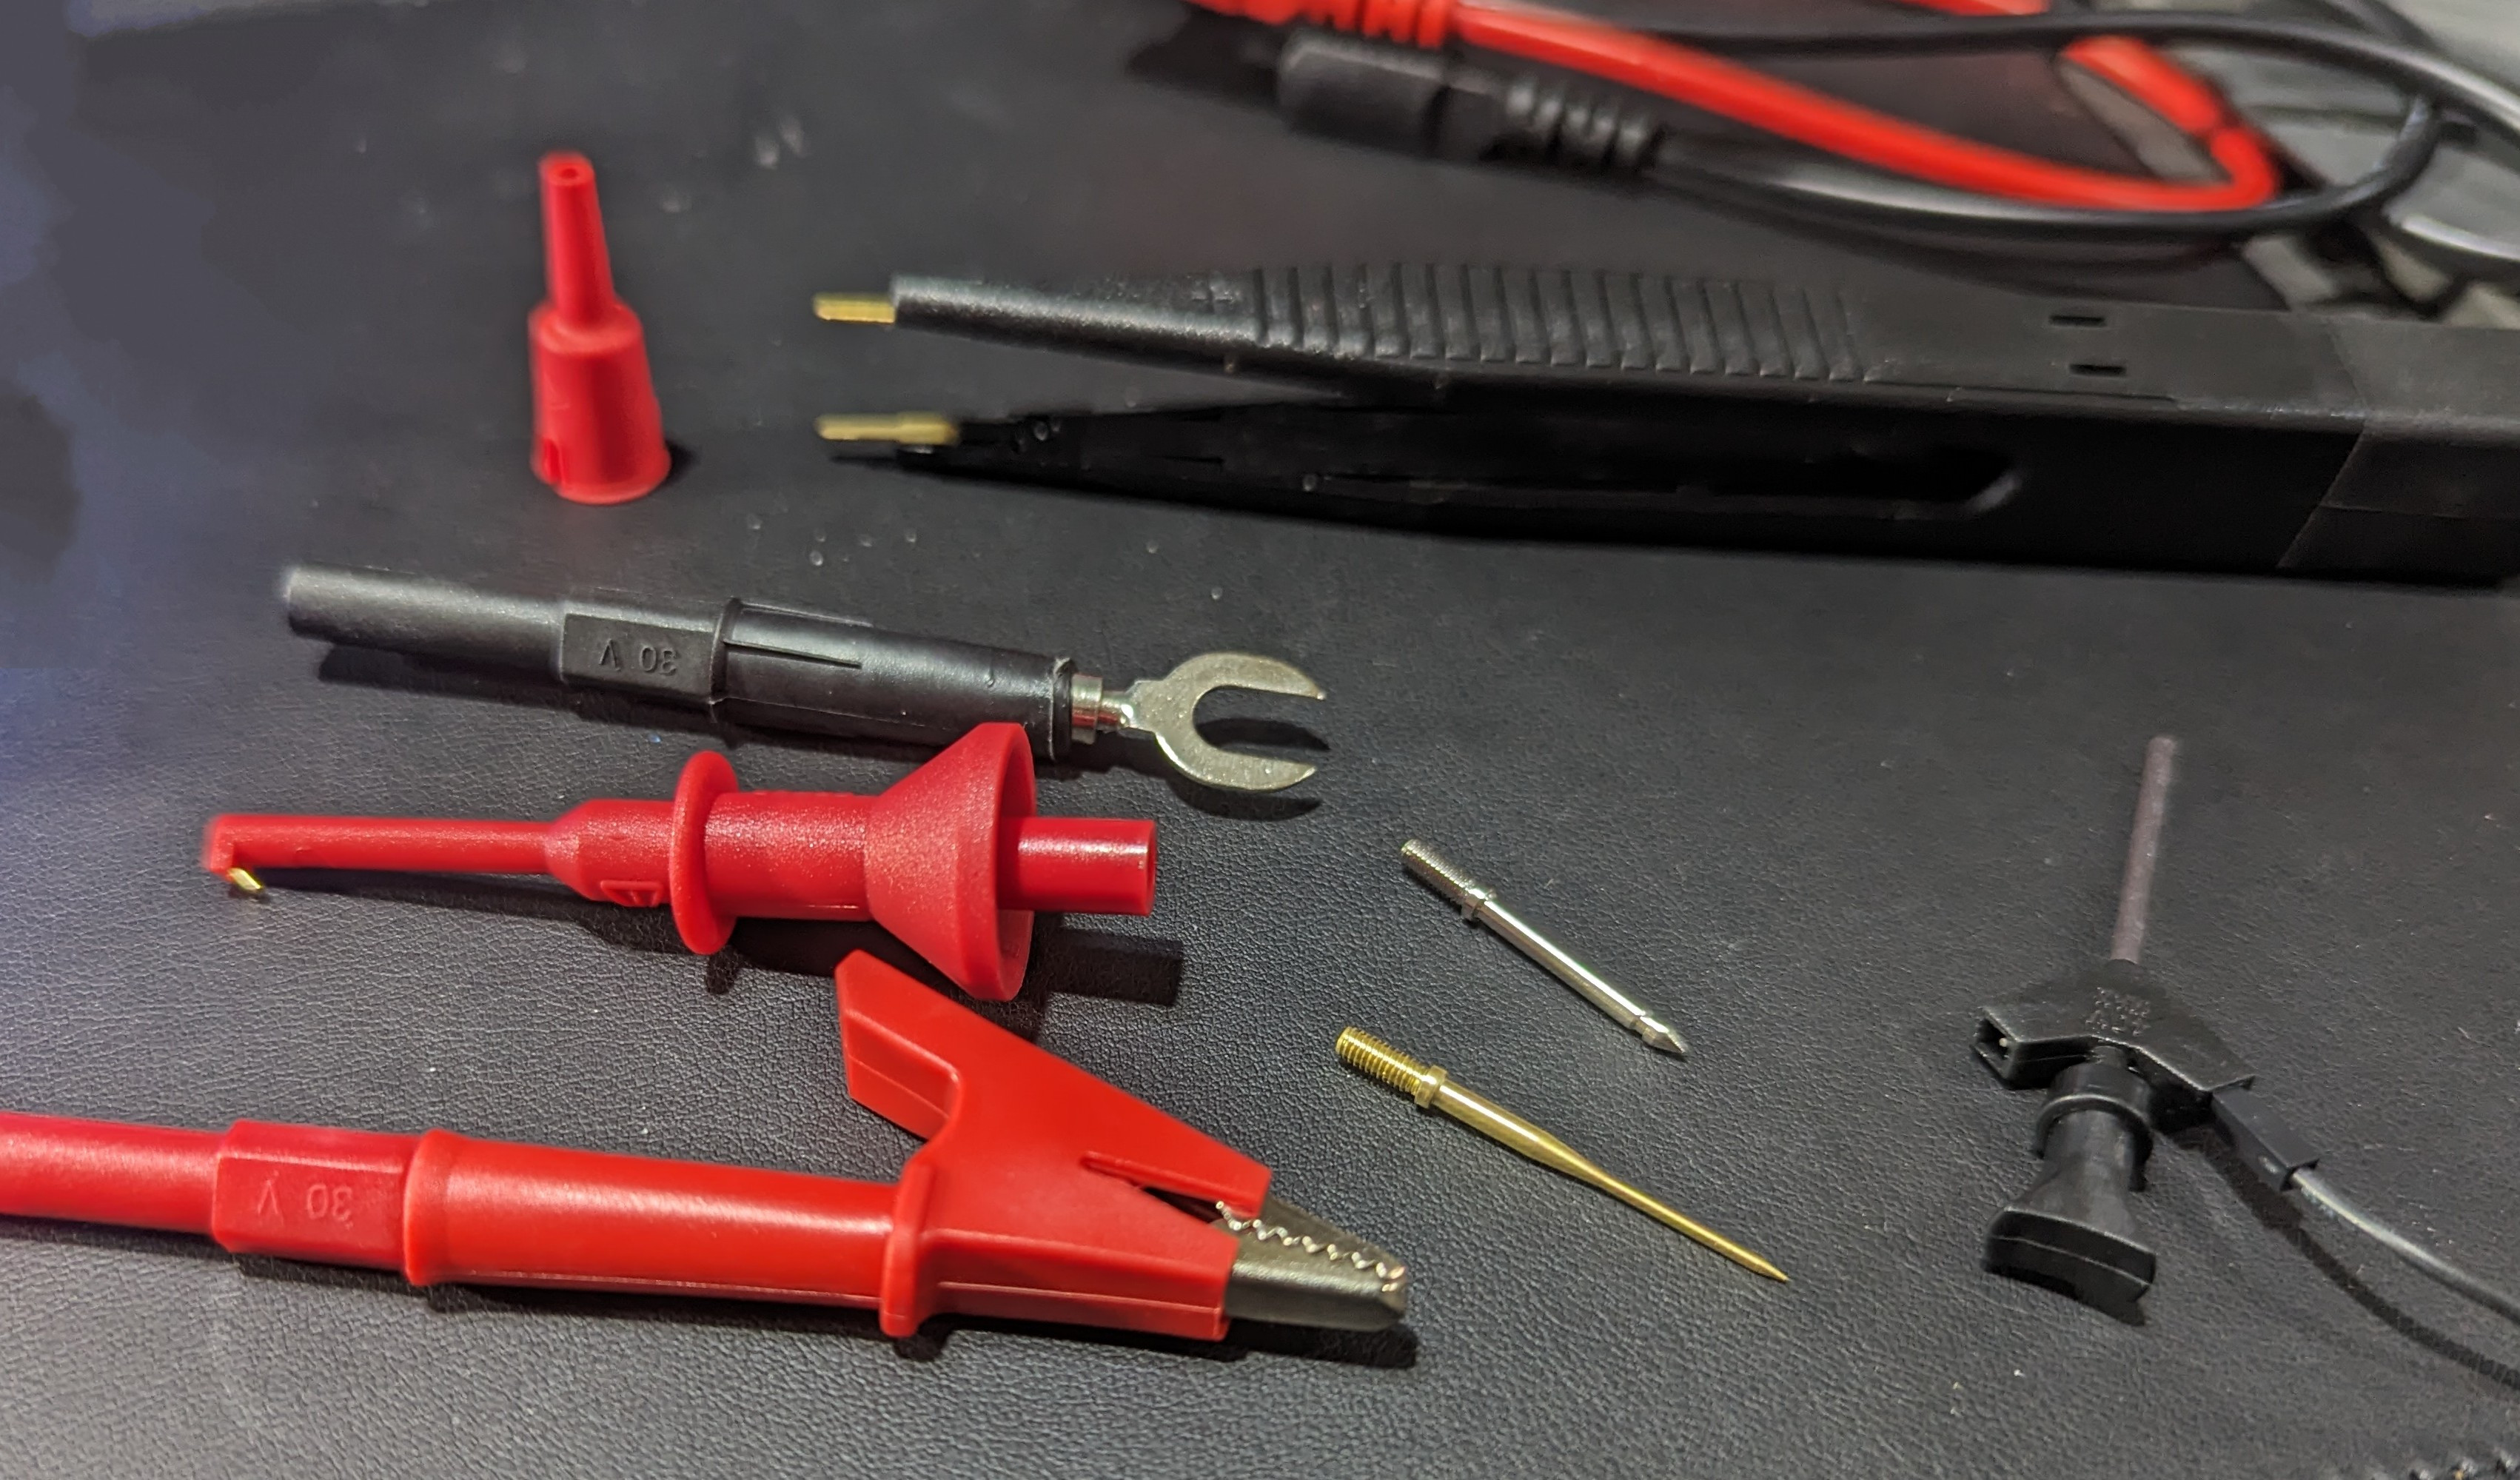
In the automotive section, I noticed a tidy plastic box labeled “22 pc. back probe kit.” I’d never heard the term “back probe,” but it was clearly some sort of wire. It turns out the kit has a bunch of very fine needles on banana jacks and some patch cables to connect them to your meter.
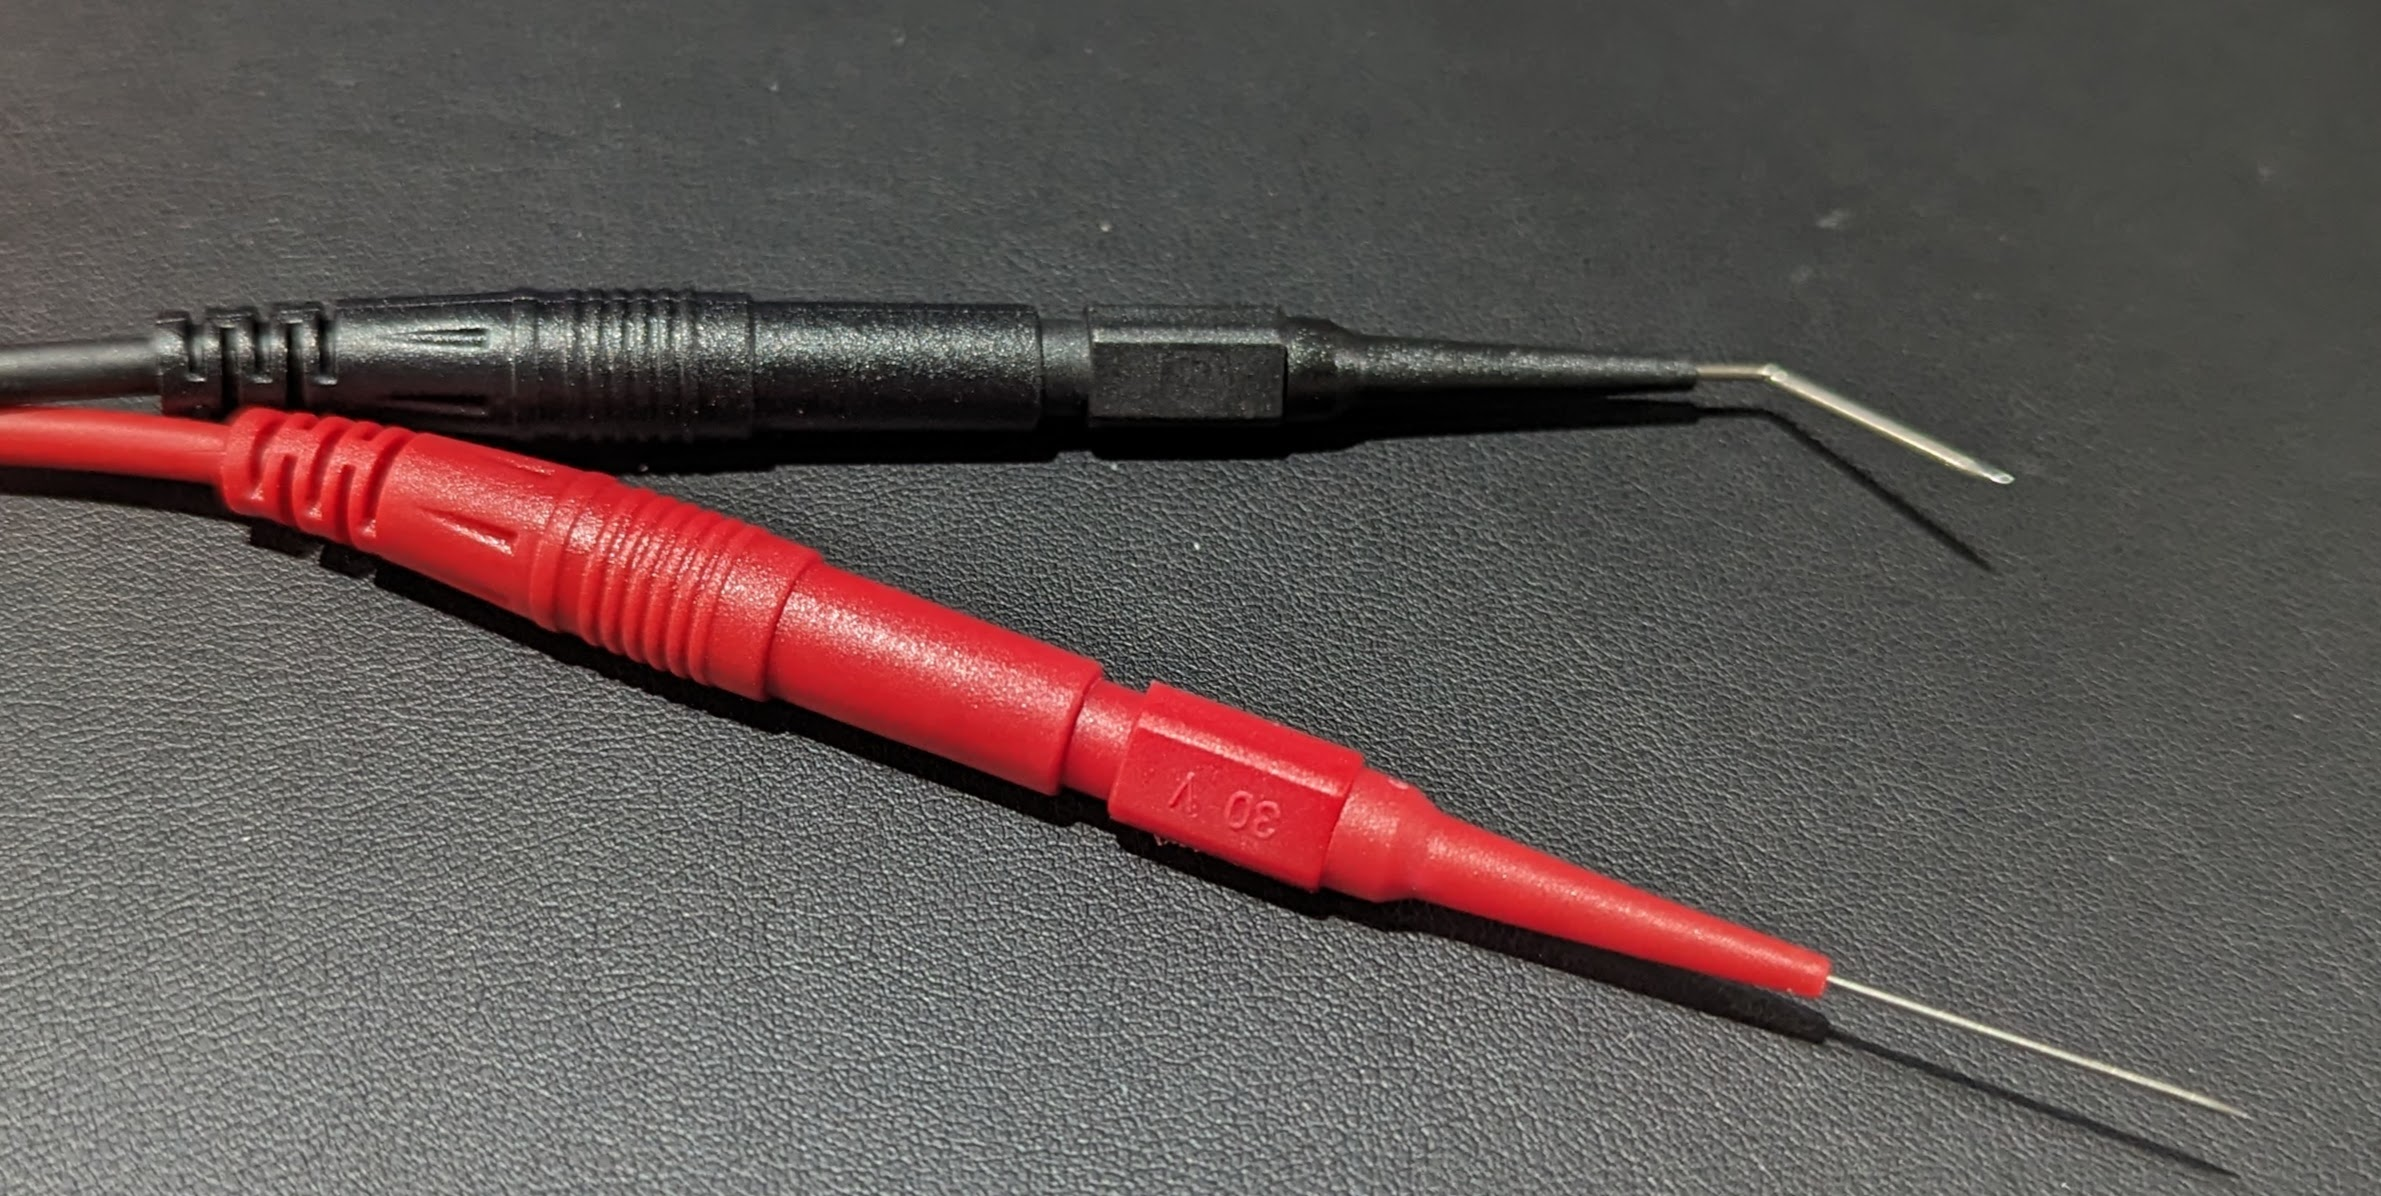
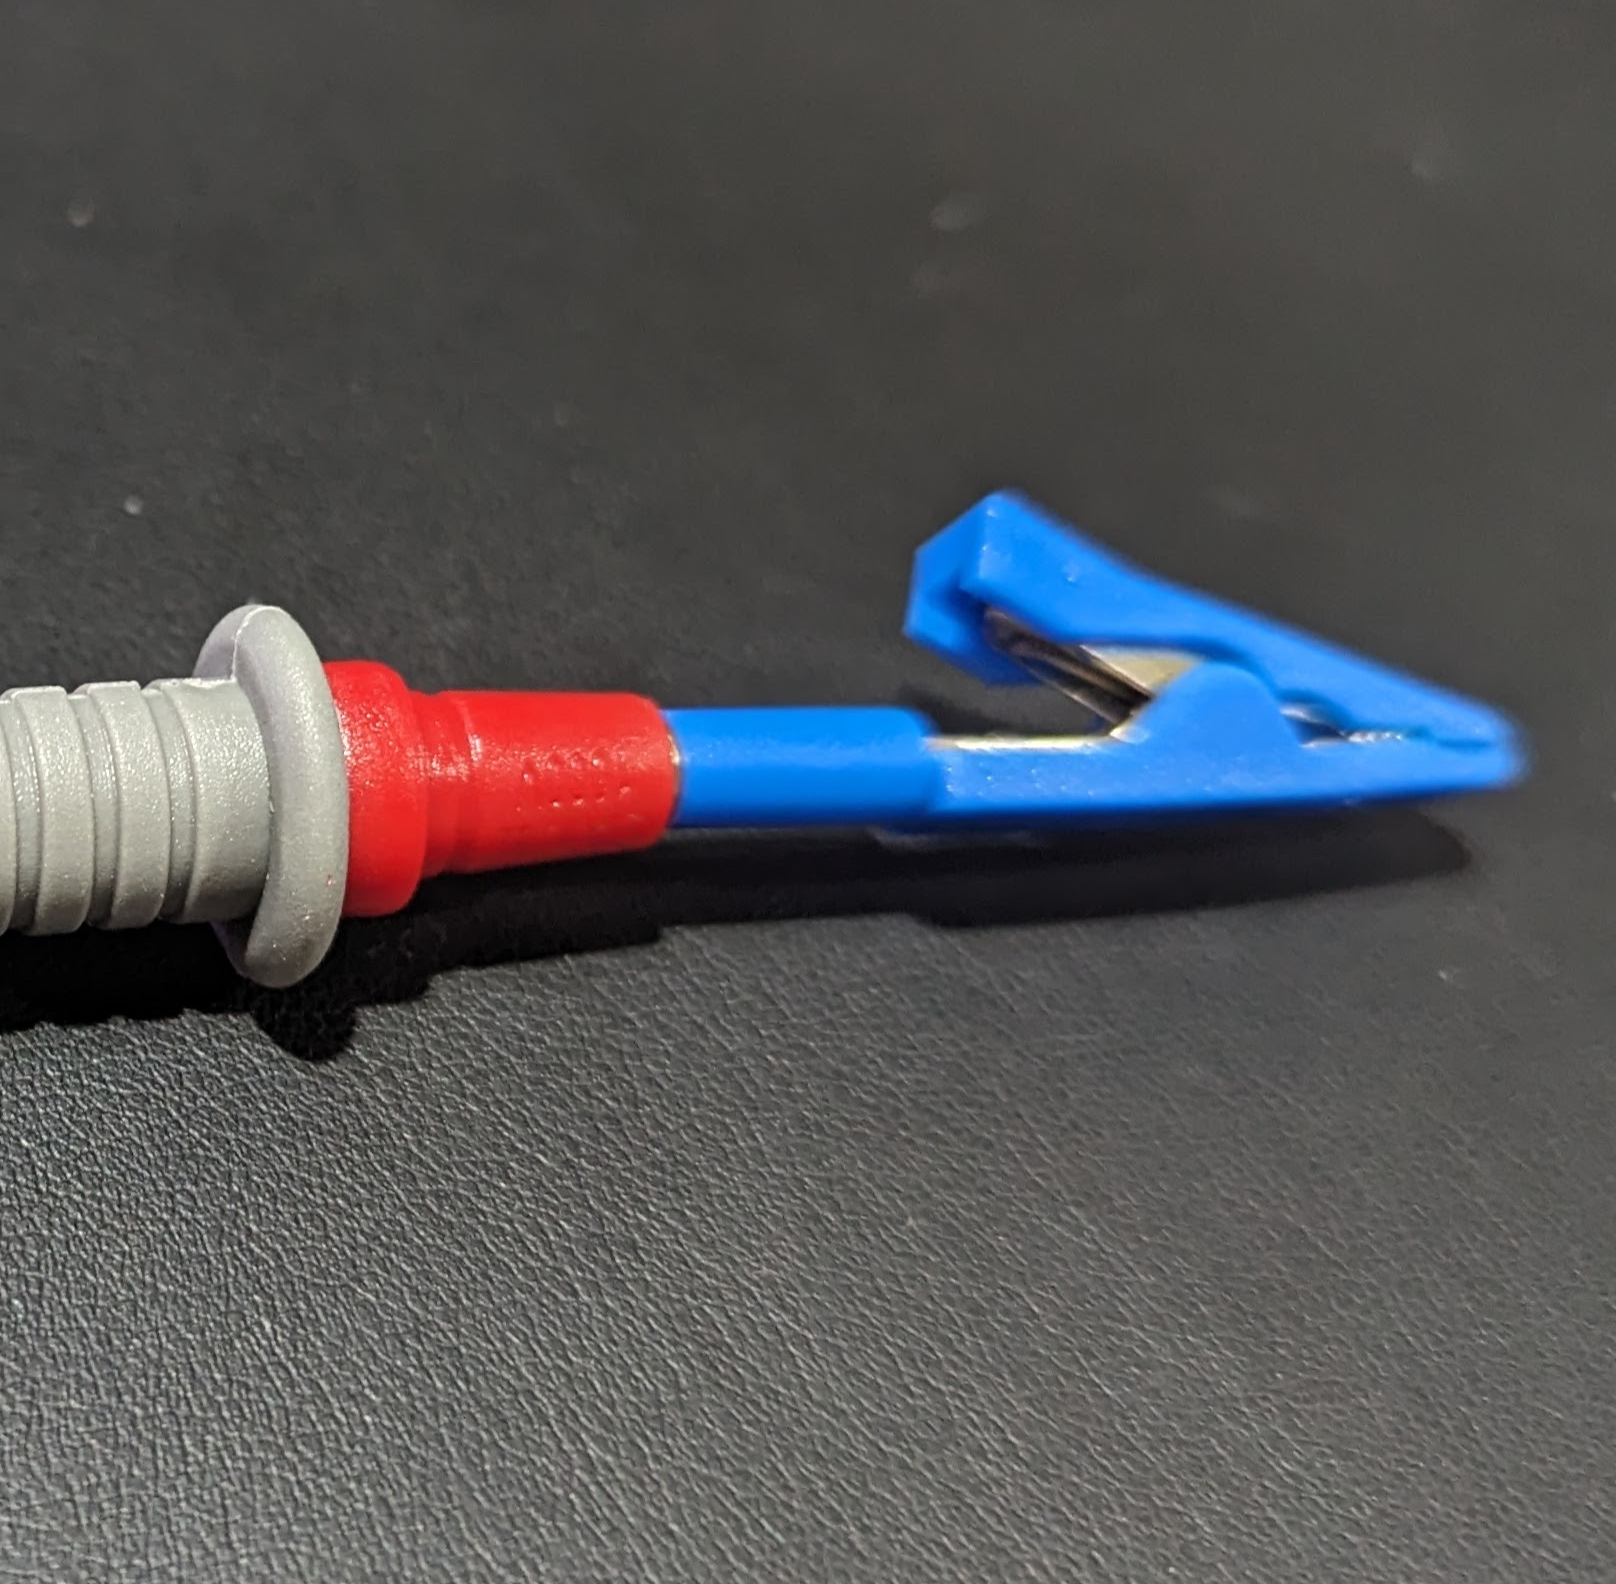
They are “back probes” because you can jam them in the back of connectors next to the wire. There are five colors of needles, and each color set has three items: a straight needle, a bent needle, and a 90-degree bend needle.
I’d never heard of this, and that started me down the rabbit hole of looking at what other exotic probes were out there. If you search the usual sources for “back probe,” you’ll see plenty of variations. There are also tons of inexpensive probe kits with many useful tips for different situations. Like everything, the price was much lower than I had paid for the rarely used kit I bought years ago. The only thing I really use out of that kit are the test hook clips and you can buy those now for a few bucks that just push over your probes.
Choices
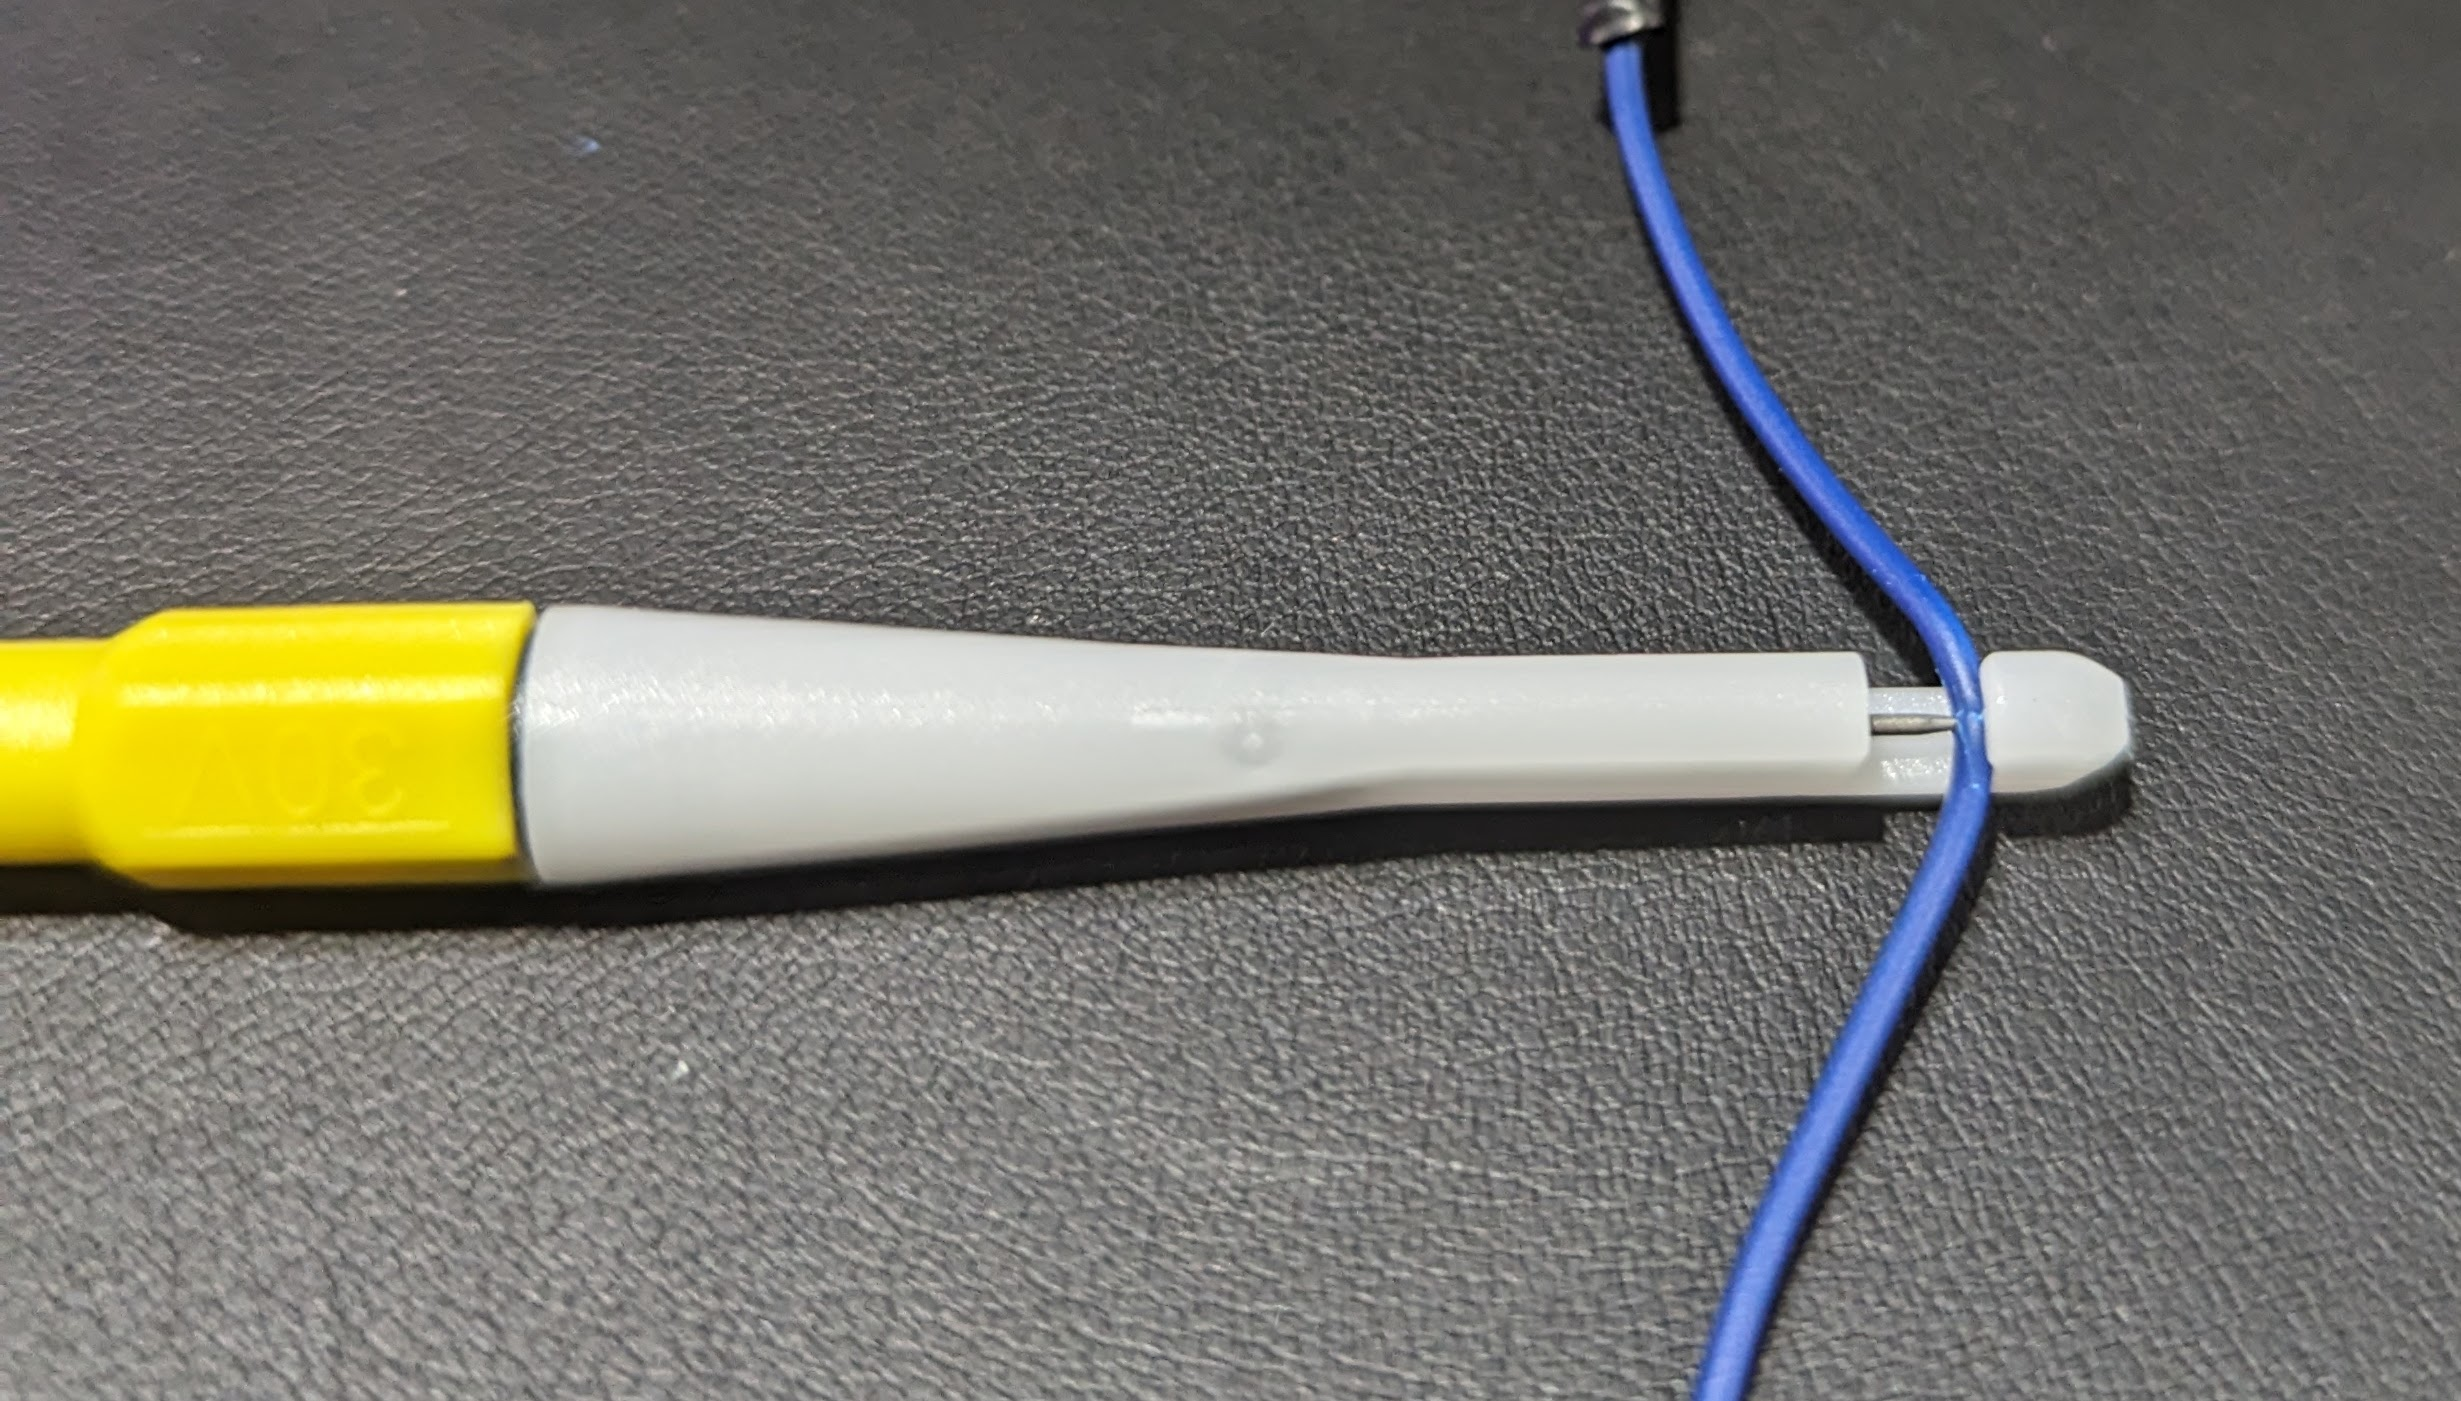
Wire-piercing probe works best for larger wires.
You could probably use the needles to stick through insulation, too. But if that’s your goal, they make piercing clip test probes specifically for that purpose. A little plastic holder has a hook for your wire and a needle that threads in to penetrate the wire.
These alligator clips fit over most probes.
I also picked up some little alligator clips that slide over standard 2mm probe tips. These are very handy and prevent you from having to clip a lead to your probe so you can clip the other end to the circuit. However, if you look for a “test lead kit,” you’ll find many options for about $20. One kit had interchangeable probe tips, alligator clips, spades, SMD tweezers, and tiny hooks for IC legs. The alligator clips on the one I bought are the newer style that has a solid insulating body — not the cheap rubbery covers. They feel better and are easier to handle, too.
Breadboarding
Some of the accessories in the test probe kit.
Of course, you can make your own solderless breadboard jumpers, and you’ve probably seen that you can buy jumpers of various kinds. But if you search, you can even find test probes with breadboard wire ends. The other end will terminate in a test hook or alligator clips. You can also get them with banana plugs on the end to plug right into your meter. You can usually find versions with the male pin for a breadboard or a female receptacle for connecting to pins.
The average Hackaday reader hardly needs to be reminded of the incredible potential of the modern microcontroller. While the Arduino was certainly transformative when it hit the scene, those early 8-bit MCUs were nothing compared to what’s on the market now. Multiple cores with clock speeds measured in the hundreds of megahertz, several MB of flash storage, and of course integrated WiFi capability mean today’s chips are much closer to being fully-fledged computers than their predecessors.
It’s not hard to see the impact this has had on the electronics hobby. In the early 2000s, getting your hardware project connected to the Internet was a major accomplishment that probably involved bringing some hacked home router along for the ride. But today, most would consider something like an Internet-connected remote environmental monitor to be a good starter project. Just plug in a couple I2C sensors, write a few lines of Python, and you’ve got live data pouring into a web interface that you can view on your mobile device — all for just a few bucks worth of hardware.
But just because we’re keenly aware of the benefits and capabilities of microcontrollers like the ESP32 or the Pi Pico, doesn’t mean they’ve made the same impact in other tech circles. In his talk Wireless Hacking on a $5 Budget, Alex Lynd goes over some examples of how he’s personally put these devices to work as part of his information security (infosec) research.
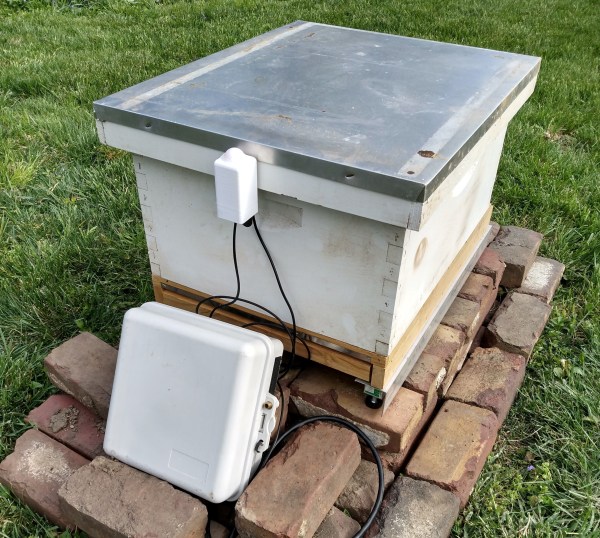
 This hive tracker features a light sensor, a temperature sensor, and three strain gauges to measure the weight. There would be four, but a mouse decided to take a bite of the wires in the most nightmarish place to repair.