Likely Everything You Need To Know Before Adopting A Drill Press

Oh sure, the thought of owning a happy whirring drill press of your very own is exciting, but have you really thought about it? It’s a big responsibility to welcome any tool into the home, even seemingly simple ones like a drill press. Lubricants, spindle runout, chuck mounts, tramming, and more [Quinn Dunki], of no small fame, helps us understand what it needs for happy intergration into its new workshop.

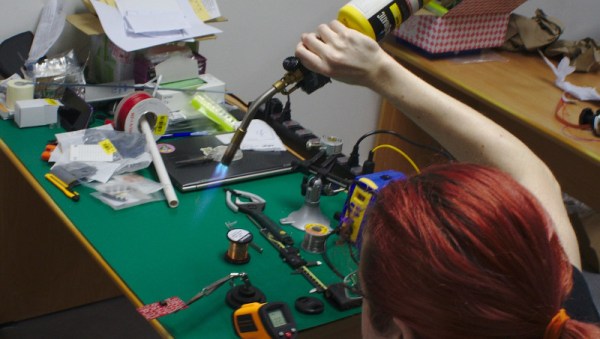
[Quin] covers her own drill press adventure from the first moments it was borne into her garage from the back of a truck to its final installation. She chose one of the affordable models from Grizzly, a Washington based company that does minimal cursory quality control on import machinery before passing on the cost to the consumer.

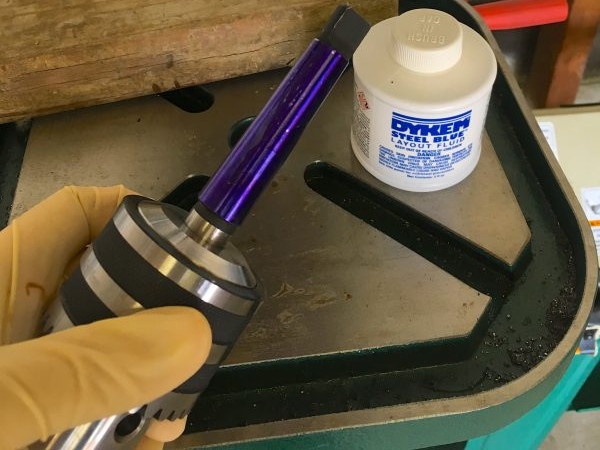
The first step after inspection and unpacking was to remove all the mysterious lubricants and protectants from the mill and replace them with quality alternatives. After the press is set-up she covers some problems that may be experience and their workarounds. For example, the Morse taper on the chuck had a few rough spots resulting in an incomplete fit. The chuck would work itself loose during heavier drilling operations. She works through the discovery and repair of this defect.

Full of useful tips like tramming the drill press and recommended maintenance, this is one of the best guides on this workshop staple that we’ve read.


Blowtorch SMD Reflow

result
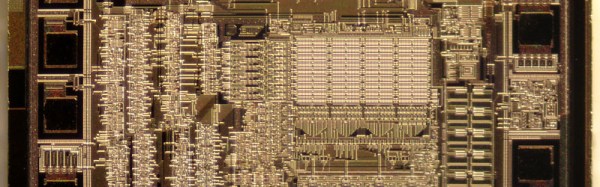
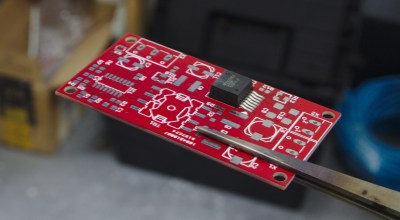
[whitequark] has been experimenting with a blowtorch for SMD reflow. Having just moved 8,000 km [whitequark] was stuck without any of the usual reflow tools. They did however have a blowtorch handy, and gave it a go.

When [whitequark] mentioned attempts on Twitter, we figured the results would mostly involve charred PCBs, smoke-filled rooms, and a possible trip to the local hospital. But [whitequark] is more sensible than we are, and by carefully monitoring the temperature and gauging the distance was able to get pretty decent results.

[whitequark]’s made a couple of further attempts and has had varying results. Overall, I’m not sure it’s a technique that I’m interested in trying myself, but it goes to show that in a pinch, a hacker will always find a creative way to get the job done.

How To Make Your Weller Wireless

On occasion I have encountered portable soldering irons and my impressions of them have ranged from nearly usable to total rubbish. While using a popular butane powered model and pondering if it was really any better than a copper wire and a candle a thought occurred to me. A regular old Weller station runs on 24 volts AC and performs all of its temperature regulation in a magnetically activated thermostatic fashion and all of that goodness occurs within the hand piece itself. It stood to reason that it could perform just as well with a DC source.

In this instance we are ignoring the negative effects of switching DC current over AC current on mechanical contacts. After all we are “In the Trenches” wherever we might have need for such a device. Using a couple of gel cell 12 volt 7 amp hour batteries freshly removed from a UPS I strung them up, and there you have it, a totally battery operated  iron with performance equal to that of the one at my bench.

Connecting SMPS to the Weller Iron
Connecting Power to the Weller Iron

Right at 24 volts the iron Thermocycles at the same rate as it would be while using the bench top supply for it. Just sitting under no load it cycles about every ten seconds and there was no perceptible difference in heat capacity or performance. A fully charged pair of batteries will last all day. The on state current draw from a full charge (13.5 volts on each of the batteries) yielded about a 2 amp draw. As the voltage began to decrease the current off cycle would get shorter as one would expect, but no drop in heat transfer was noticed until the batteries were well depleted and that took most of a work day.

For this instance I used the hand piece from the venerable Weller WTCPT station. For ongoing use I would not recommend this due to the use of a mechanical contact within the unit and switching of DC can reduced the life of most mechanical switches. Currently I am awaiting the arrival of some cheap eBay Hakko handpieces; I am sure they are knockoffs, but fine to experiment with a simple PWM with a feedback loop controller as the basic Hakko design also utilizes a 24 volt source. An automatic shut off timer would also be handy to avoid premature battery abuse due to a forgetful operator.

IMG_2505

How To Use Docker To Cross Compile For Raspberry Pi (and More)

It used to be tedious to set up a cross compile environment. Sure you can compile on the Raspberry Pi itself, but sometimes you want to use your big computer — and you can use it when your Pi is not on hand like when on an airplane with a laptop. It can be tricky to set up a cross compiler for any build tools, but if you go through one simple step, it becomes super easy regardless of what your real computer looks like. That one step is to install Docker.

Docker is available for Linux, Windows, and Mac OS. It allows developers to build images that are essentially preconfigured Linux environments that run some service. Like a virtual machine, these images can run together without interfering with each other. Unlike a virtual machine, Docker containers (the running software) are lightweight because they share the same underlying kernel and hardware of the computer.

The reality is, setting up the Raspberry Pi build environment isn’t any easier. It is just that with Docker, someone else has already done the work for you and you can automatically grab their setup and keep it up to date. If you are already running Linux, your package manager probably makes the process pretty easy too (see [Rud Merriam’s] post on that process). However, the nice thing about the images is it is a complete isolated environment that can move from machine to machine and from platform to platform (the Windows and Mac platforms use a variety of techniques to run the Linux software, but it is done transparently).

Continue reading “How To Use Docker To Cross Compile For Raspberry Pi (and More)”

Cat-Operated Cat Food Dispenser

Tired of being harassed by your cat? [MomWillBeProud] made a cheap, effective — and more importantly cat-operated — cat food dispenser.

The feeder is of an efficient construction — a double cat food dish, one container to store the electronics, and a Pringles can to act as the hopper. A simple servo rotates the hopper thirty degrees and back on each button press; using gravity to drop food through an opening that appears due to this motion. The button itself is an old IKEA timer and a piece of plastic large enough for a hungry cat to swat.

An Arduino controls the servo, and while [MomWillBeProud] skips over going into detail on his code, you can check it out here.

Continue reading “Cat-Operated Cat Food Dispenser”

How The Human Brain Stores Data

Evolution is one clever fellow. Next time you’re strolling about outdoors, pick up a pine cone and take a look at the layout of the bract scales. You’ll find an unmistakable geometric structure. In fact, this same structure can be seen in the petals of a rose, the seeds of a sunflower and even the cochlea bone in your inner ear. Look closely enough, and you’ll find this spiraling structure everywhere. It’s based on a series of integers called the Fibonacci sequence. Leonardo Bonacci discovered the sequence while trying to figure out how many rabbits he could make starting with just two. It’s quite simple — add the right most integer to the previous one to get the next one in the sequence. Starting from zero, this would give you 0-1-1-2-3-5-8-13-21 and so on. If one was to look at this sequence in the form of geometric shapes, they can create square tiles whose sides are the length of the value in the sequence. If you connect the diagonal corners of these tiles with an infinite curve, you end up with the spiral that you saw in the pine cone and other natural objects.

fib_01
Source via Geocaching

So how did mother nature discover this geometric structure? Surely it does not know math. How then can it come up with intricate and sophisticated structures? It turns out that this Fibonacci spiral is the most efficient way of squeezing the most amount of stuff in the least amount of space. And if one takes natural selection seriously, this makes perfect sense. Eons of trial and error to make the most copies of itself has stumbled upon a mathematical principle that permeates life on earth.

fb_02
Source via John Simmons

The homo sapiens brain is the product of this same evolutionary process, and has been evolving for an estimated 7 million years. It would be foolish to think that this same type of efficiency natural selection has stumbled across would not be present in the current homo sapiens brain. I want to impress upon you this idea of efficiency. Natural selection discovered the Fibonacci sequence solely because it is the most efficient way to do a particular task. If the brain has a task of storing information, it is perfectly reasonable that millions of years of evolution has honed it so that it does this in the most efficient way possible as well. In this article, we shall explore this idea of efficiency in data storage, and leave you to ponder its applications in the computer sciences.

Continue reading “How The Human Brain Stores Data”

How I²C EEPROM Talks To The Bus

You will probably be familiar with I²C, a serial bus typically used for not-very-fast communication with microcontroller peripherals. It’s likely though that unless you are an I²C wizard you won’t be intimately familiar with the intricacies of its operation, and each new device will bring a lengthy spell of studying data sheets and head-scratching.

If the previous paragraph describes you, read on. [Clint Stevenson] wrote a library for interfacing I²C EEPROMs to Arduino platforms, and when a user found a bug when using it on an ATtiny85, he wrote up his solution. The resulting piece is a clear explanation of how I²C EEPROMs talk to the bus, the various operations you can perform on them, and the overhead each places on the bus. He then goes on to explain EEPROM timing, and how since it takes the device a while to perform each task, the microcontroller must be sure it has completed before moving to the next one.

In the case of [Clint]’s library, the problem turned out to be a minor incompatibility with the Arduino Wire library over handling I²C start conditions. I²C has a clock and a data line, both of which are high when no tasks are being performed. A start condition indicates to the devices on the bus that something is about to happen, and is indicated by the data line going low while the clock line stays high for a while before the clock line starts up and the data line carries the I²C command. He’s posted samples of code on the page linked above, and you can find his library in his GitHub repository.

If you want to know more about I²C, take a look at Hackaday Editor [Elliot Williams’] masterclasses on the subject: What could go wrong, I²C edition, and Embed With Elliot, I²C bus scanning.

Serial EEPROM die picture, By Epop (Own work) [CC0], via Wikimedia Commons.