Almost exactly two years ago, shocking news thundered across the electronics blogosphere. There was a new WiFi module on the block. It was called the ESP8266, a simple serial device capable of taking care of an 802.11 network and a WiFi stack, giving any project with a microcontroller access to the Internet. Earlier modules to connect microcontrollers were sufficient for the task, but nothing could beat the ESP8266 on price.
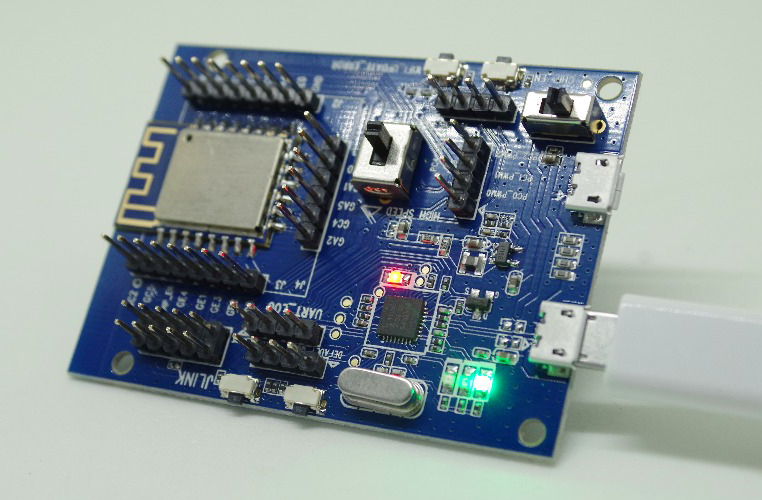
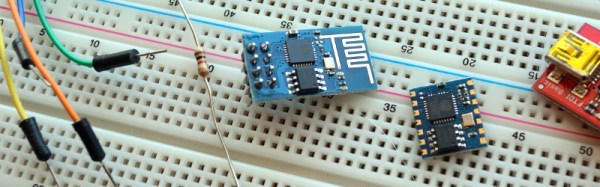
Now, there’s a new module that’s even cheaper and more powerful than the ESP8266, and just like all of our favorite parts from China, it inexplicably shows up on eBay and AliExpress before anywhere else. It’s the Realtek RTL8710, available on eBay, on AliExpress, and elsewhere around the web for about $1.50 per device. There’s also a dev kit for the device featuring breakouts, an additional microcontroller, and a few switches and buttons for about $15.
As you would expect, there is zero English-language data available about the RTL8710, everything is in Chinese. There is a forum of sorts going over this new chip, and the Google Translatrix is good enough to glean a little bit of info about the new chip.
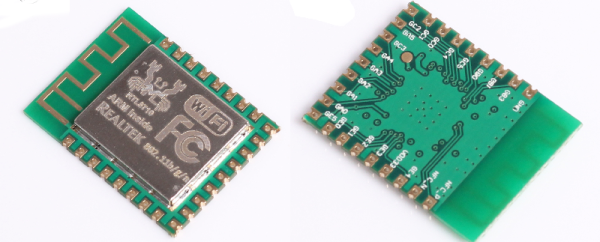
The RTL8710 features an ARM processor clocked at 166MHz. Stock, this module is running FreeRTOS. There’s 1MB of Flash, 48k of RAM available to the user, up to 21 GPIOs, 3 I2C, 4 PWM pins, and 2 PCM. This module also comes with an FCC logo, but I can’t find anything on the FCC website about this module.
If anything, the Realtek RTL8710 isn’t meant to be a competitor to the ESP8266. While extremely popular and still very useful, the ‘next gen’ ESP32 is due to be released in a month or so, and with the exception of Bluetooth on the ESP32, this Realtek module should match its capabilities quite well. Whether anyone can get an English datasheet is another matter, but if history is any indication a few English language RTL8710 forums will pop up a few hours after this is posted.
Thanks [sabas] for sending this in