What Makes The Perfect Hardware Badge

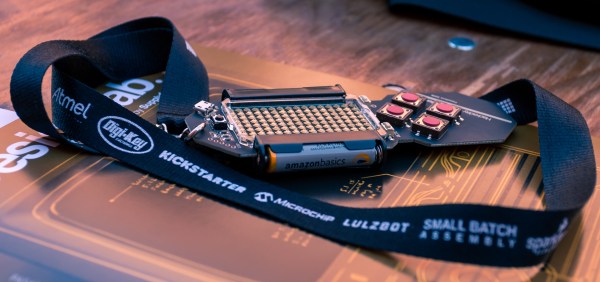
There are only a handful of people who can say they’ve built several successful electronic badges for conferences. Voja Antonic is not just on that list, he’s among the leaders in the field. There are a lot of pressures in this type of design challenge: aesthetics, functionality, and of course manufacturability. If you want to know how to make an exposed-PCB product that will be loved by the user, you need to study Voja’s work on the 2016 Hackaday SuperConference Badge. The badge is completely open, with all the design files, firmware, and a manual on the badge project page.

Between travelling from Belgrade to Pasadena and guiding production of 300 badges across the finish line before the conference deadline Voja took ill. He made it to the conference but without a voice he asked me to give his badge design talk for him. You can check that talk out below but let’s touch briefly on why Voja’s design is so spectacular.

Continue reading “What Makes The Perfect Hardware Badge”

Filtering Noisy Data With An Arduino

One of the first frustrating situations a beginning microcontroller programmer will come across is the issue of debouncing switches. Microcontrollers are faster than switches, and the switch has yet to be built that can change state in zero time like they can on paper. This hurdle is easily overcome, but soon we are all faced with another issue: filtering noise from an analog signal. Luckily [Paul Martinsen] has put together a primer of three different ways to use an Arduino to filter signals.

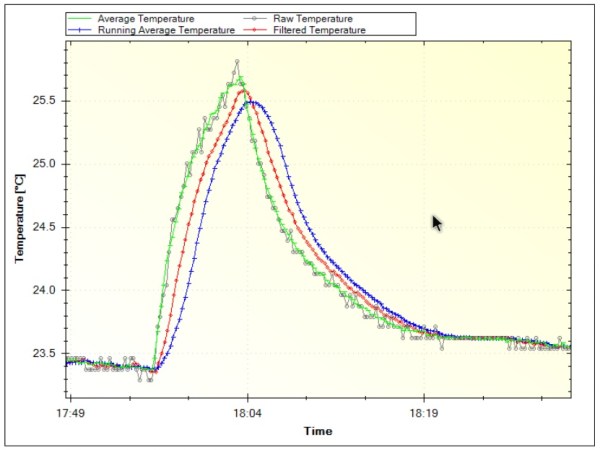
The first (and fastest, simplest, etc.) way to filter an analog signal is to sample a bunch of times and then average all of the samples together. This will eliminate most outliers and chatter without losing much of the information. From there, the tutorial moves on to programming a running average to help increase the sample time (but consume much more memory). Finally, [Paul] takes a look at exponential filters, which are recursive, use less memory, and can be tweaked to respond to changes in different ways.

[Paul] discusses all of the perks and downsides of each method and provides examples for each as well. It’s worth checking out, whether you’re a seasoned veteran who might glean some nuance or you’re a beginner who hasn’t even encountered this problem yet. And if you’re still working on debouncing a digital input, we have you covered there, too.

Breathing New Life Into An Old Key

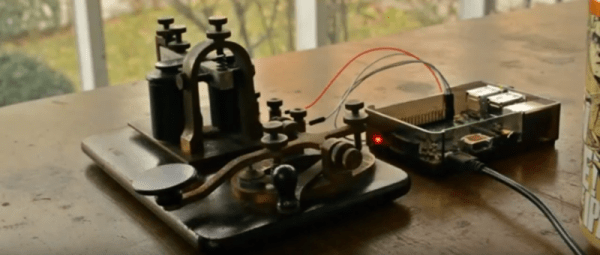
For most of us who have experimented with Morse code, the oldest key we are likely to have used will have been a piece of military surplus kit from the Second World War era. [Kyle Gabriel] however is a lucky man. His grandfather left him his key-on-board telegraph practice set, a vintage key and telegraph sounder arrangement used to learn Morse code in the days when the telegraph was king. Rather than keep the set merely as an heirloom, [Kyle] set about bringing it up to date by interfacing it to a Raspberry Pi and writing a Morse reader program.

Along the way [Kyle] had to contend with debouncing the switching signal from the key, considering an RC network before settling on a software debounce timer. He provides a brief synopsis of the mechanics of Morse decoding software, and a demonstration of the code in action which you can see in the video below the break.

[Kyle’s] decoding software, beatbybeat, is on GitHub. We can see it will be a useful tool for anyone interested in Morse, or who is writing their own Morse software.

Morse code has featured on these pages more than a few times over the years. Of relevance to this piece are an Arduino decoding Morse code, a more up-to-date practice oscillator with a home-made key, and a couple of other vintage telegraphs reading RSS feeds and reading emails.

Continue reading “Breathing New Life Into An Old Key”

The Flowing Pixels Of Time Wait For No Man

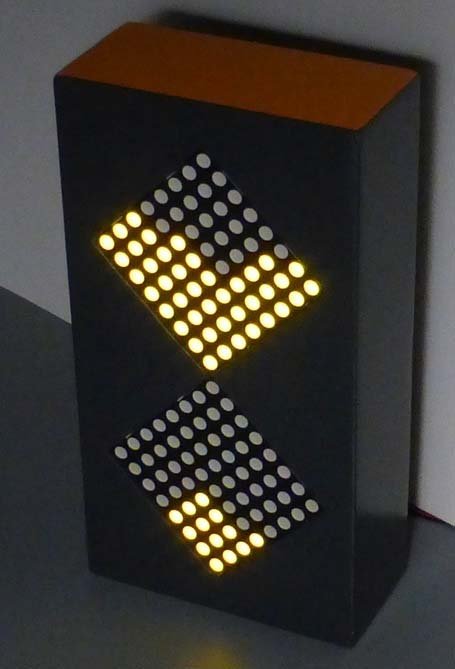
The hourglass dramatically depicts the flow of time; gravity pulling grains of sand inevitably downward. So it is with the Bits of Time project by [Frank Andre]. The pixels drop, stopping only when the battery dies. Or, when your eggs are ready. (Pssst, it’s also on Hackaday.io.)

317661453832865647
Look, Ma! No GIF!

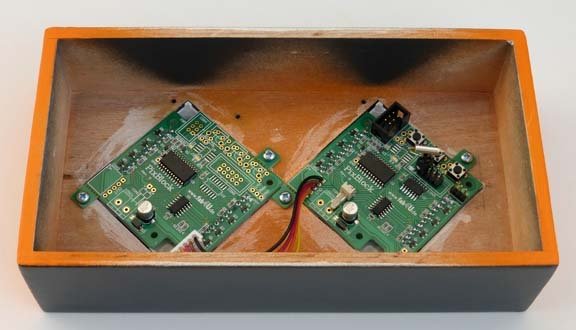
The project starts with a couple of [Frank’s] PixBlocks. A processor is added to one PixBlock to serve as the controller for both after they are connected via the serial bus. A tilt switch, with a debouncing circuit, is connected to an IO pin. This tells the processor the orientation of the box and therefore which way the pixels should flow.

Two  switches set the duration of the timer in 15 second increments. A third starts the timer. When the box is rotated the pixels start flowing in the opposite direction. With code available on GitHub the system can be programmed for other effects such as changing colors, flickering, or even text display.

You’ll agree this is a bit less intimidating than the MacGyver-ish kitchen timer we covered last year.

Continue reading “The Flowing Pixels Of Time Wait For No Man”

Touch Piano Hits All The Right Notes

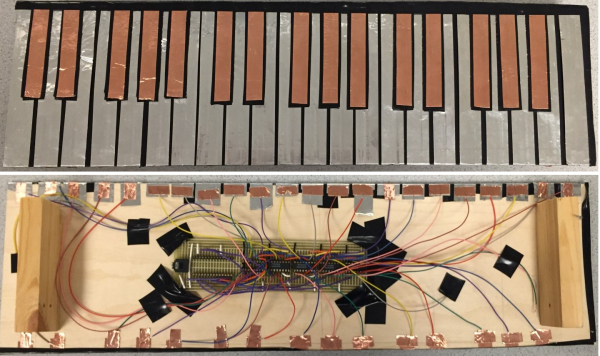
We love a good musical build, and this one is no exception. For their ECE4760 final project, [Wendian Jiang], [Hanchen Jin], and [Lin Wang] of Cornell built the nicest-looking touch piano we’ve seen in a while. It has five 4051 multiplexers that take input from 37 capacitive touch keys fashioned from aluminium foil and copper tape. Thanks to good debounce code, the sounds are clean even though the keyboard is capable of four-note polyphony.

A PIC32 and a Charge Time Measurement Unit (CTMU) module generate a small, steady current that charges up the keys. The PIC scans the pins continuously waiting for touch input. When human capacitance is detected, the value is compared with the base capacitance using the ADC and the sound is generated with the Karplus-Strong algorithm.

The group’s original plans for the project included a TFT screen to show the notes on a staff as they are played. While that would have been awesome, there was just too much going on already to be able to accurately capture the notes as well as their duration. Check it out after the break.

Continue reading “Touch Piano Hits All The Right Notes”

This PCB Business Card Is Logically Different

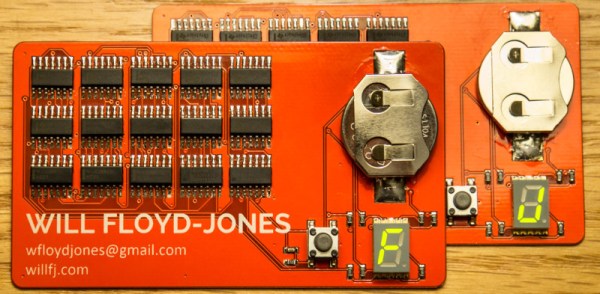
Having seen a number of PCB business cards [Will] decided to go against the more popular choice of a micro-controller based design and show some character with a logic based finite state machine. [Will] uses a single 7-segment display to scroll through the letters of his name with a state machine that outputs the desired combination of 1’s and 0’s to the LED display each time the tactile button is pushed.

[Will] uses a 4-bit counter made up of D Flip-Flops for the clock signal as a conditional input to 6 of the 4-input AND gates. He doesn’t go into the painful details of displaying each character through the process (thankfully) but he does mention that he uses the Quine-McCluskey technique for reduction instead of Boolean algebra. Since his name is 11 characters long and the 4-bit binary counter goes from 0000 to 1111 leaving 5 more pushes of the button before rolling the count back to 0000, during which time the display is left blank. [Will] kindly includes the eagle and Gerber files for your downloading pleasure over at his blog if you’re interested in getting a little deeper into the design.

Continue reading “This PCB Business Card Is Logically Different”

Before Arduino There Was Basic Stamp: A Classic Teardown

Microcontrollers existed before the Arduino, and a device that anyone could program and blink an LED existed before the first Maker Faire. This might come as a surprise to some, but for others PICs and 68HC11s will remain as the first popular microcontrollers, found in everything from toys to microwave ovens.

Arduino can’t even claim its prominence as the first user-friendly microcontroller development board. This title goes to the humble Basic Stamp, a four-component board that was introduced in the early 1990s. I recently managed to get my hands on an original Basic Stamp kit. This is the teardown and introduction to the first user friendly microcontroller development boards. Consider it a walk down memory lane, showing us how far the hobbyist electronics market has come in the past twenty year, and also an insight in how far we have left to go.

Continue reading “Before Arduino There Was Basic Stamp: A Classic Teardown”