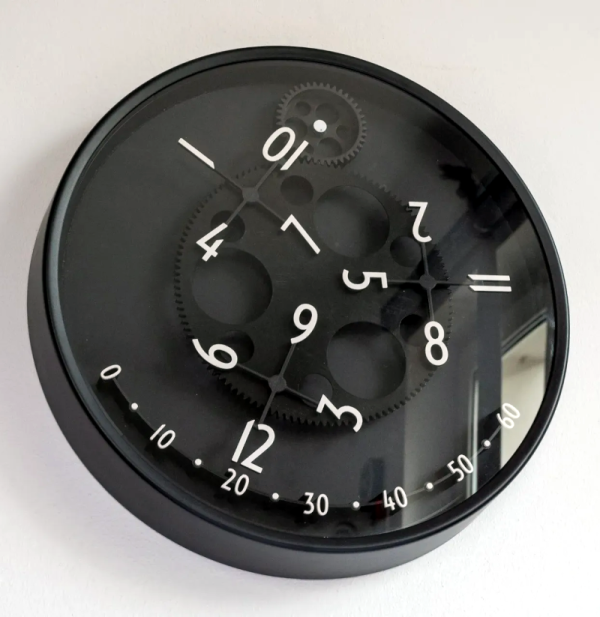
Kinetic Clock Is A Clean Modern Way To Tell Time

Hackers and makers aren’t usually too interested in basic round analog clocks. They tend to prefer building altogether more arcane and complicated contraptions to display numbers for the telling of time. [alstroemeria] did just that with this nifty kinetic clock build.

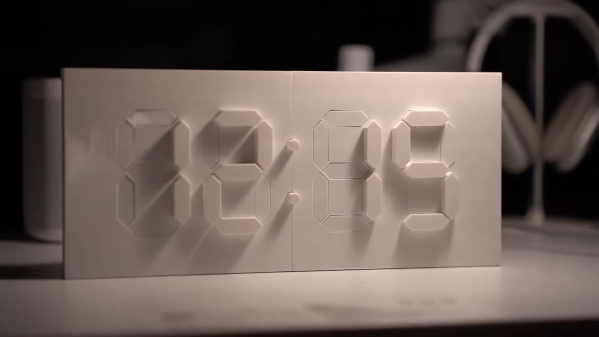
The basic concept of the kinetic clock is to have a flat plate, which individual segments raise out of to create a physical (instead of illuminated) 7-segment display. This is achieved with servos which push the segments in and out using a small rack mechanism. It’s not a sophisticated build; it simply uses 30 servos to handle all the segments needed to tell time. Thus, the Arduino Mega was the perfect tool for the job. With a sensor shield added on, it has an abundance of IO, driving a ton of servos is a cinch. There’s also a DS3231 real time clock to help it keep accurate time.

Incidentally, it’s a hefty thing to print, according to YouTuber [Lukas Deem] who replicated the project. It took around 85 hours to print, and a total of 655 grams of filament – not counting mistakes and trashed parts.

And if you think you’re having deja-vu, you might well be. We’ve seen a take on this exquisite design before. We liked it then, and we like it now.

Overall, it’s a stylish build that looks as good as your 3D printer’s output will allow. A resin printer would be a massive boon in this regard. Video after the break.

Continue reading “Kinetic Clock Is A Clean Modern Way To Tell Time”

Clock Escapement Uses Rolling Balls

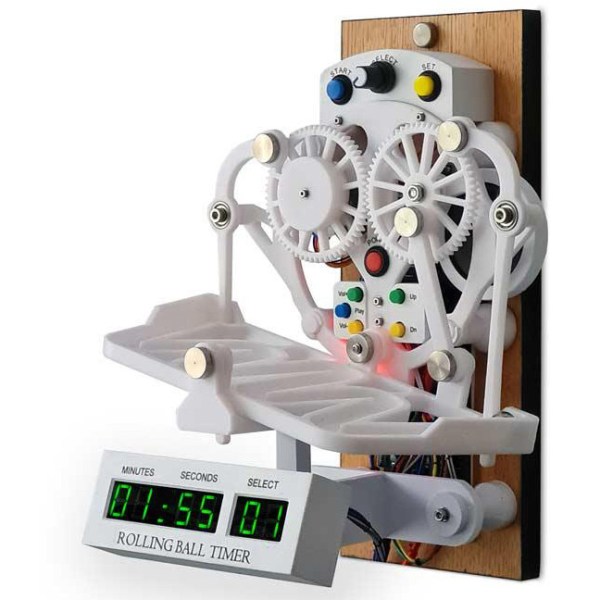
The escapement mechanism has been widely used for centuries in mechanical clocks. It is the mechanism by which a clock controls the release of stored energy, allowing it to advance in small, precise intervals. Not all mechanical clocks contain escapements, but it is the most common method for performing this function, usually hidden away in the clock’s internals. To some clockmakers, this is a shame, as the escapement can be an elegant and mesmerizing piece of machinery, so [Brett] brought his rolling ball escapement to the exterior of this custom clock.

The clock functions as a kitchen timer, adjustable in 10-second increments and with several preset times available. The rolling ball takes about five seconds to traverse a slightly inclined, windy path near the base of the clock, and when it reaches one side, the clock inverts the path, and the ball rolls back to its starting place in another five seconds. The original designs for this type of escapement use a weight and string similar to a traditional escapement in a normal clock. However, [Brett] has replaced that with an Arduino-controlled stepper motor. A numerical display at the bottom of the clock and a sound module that plays an alert after the timer expires rounds out the build.

The creation of various types of escapements has fascinated clockmakers for centuries, and with modern technology such as 3D printers and microcontrollers, we get even more off-the-wall designs for this foundational piece of technology like [Brett]’s rolling ball escapement (which can also be seen at this Instructable) or even this traditional escapement that was built using all 3D-printed parts.

Continue reading “Clock Escapement Uses Rolling Balls”

Low-Power Challenge: Making An Analog Clock Into A Calendar With A 50-Year Life

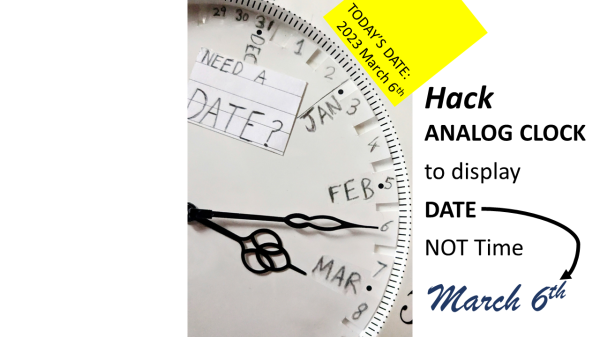
You have to be pretty ambitious to modify a clock to run for 50 years on a single battery. You also should probably be pretty young if you think you’re going to verify your power estimates, at least in person. According to [Josh EJ], this modified quartz analog clock, which ticks off the date rather than the time, is one of those “The March of Time” projects that’s intended to terrify incentivize you by showing how much of the year is left.

Making a regular clock movement slow down so that what normally takes an hour takes a month without making any mechanical changes requires some clever hacks. [Josh] decided to use an Arduino to send digital pulses to the quartz movement to advance the minute hand, rather than let it run free. Two pulses a day would be perfect for making a 30-day month fit into a 60-minute hour, but that only works for four months out of the year. [Josh]’s solution was to mark the first 28 even-numbered minutes, cram 29, 30, and 31 into the last four minutes of the hour, and sort the details out in code.

As for the low-power mods, there’s some cool wizardry involved with that, like flashing the Arduino Pro Mini with a new bootloader that reduces the clock speed to 1 MHz. This allows the microcontroller and RTC module to run from the clock movement’s 1.5 V AA battery. [Josh] estimates a current draw of about 6 μA per day, which works out to about 50 years from a single cell. That’s to be taken with a huge grain of salt, of course, but we expect the battery will last a long, long time.

[Josh] built this clock as part of the Low-Power Challenge contest, which wrapped up this week. We’re looking forward to the results of the contest — good luck to all the entrants!

Decorative Clock Uses LED Strips To Beautiful Effect

Clocks used to be dowdy old things with mechanical hands and sometimes even little cuckoo birds that would pop out to chime the hour. [David] built something altogether more modern that uses shifting colors on LED strips to tell the time.

The core of the build is an ESP8266, which queries an NTP time server to keep itself synced up with the current time as accurately as possible. It then controls a WS2812B LED strip to display the time. The strip itself is hidden in a 3D-printed housing behind an opaque wooden ring, with the light from the LEDs diffusing out nicely on to the wall upon which the clock is mounted.

The display shows three “hands” in the colors it projects on the wall. The red second hand is projected inside and outside the ring. The minute hand is green, and projects outside the ring. Meanwhile, the hour hand is blue, and projects inside the ring. Without any numerical markings, you won’t get an exact reading of the time, but you can figure it out closely enough. As a bonus, the clock looks like a stylish light-based wall sculpture and your guests may not even realizes it tells the time.

We’ve featured [David’s] work before too, in the form of the handy ESP8266 breadboard socket. Video after the break.

Continue reading “Decorative Clock Uses LED Strips To Beautiful Effect”

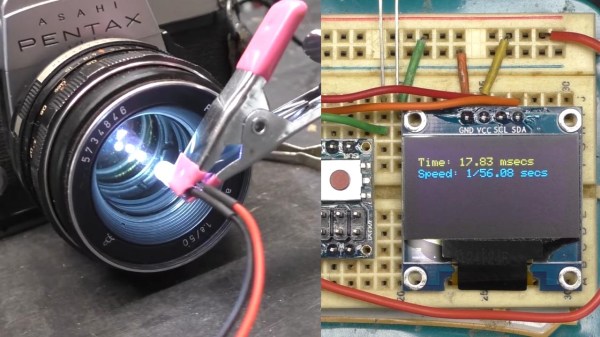
A vintage film camera with a bright light emitting diode shining through it, next to electronic equipment to measure the shutter speed

Clock Your Camera With This Shutter Speed Tester

Camera shutter speed is an essential adjustment in photography – along with the aperture, the shutter moderates the amount of light entering the camera. Older cameras (and some newer ones) use mechanical shutters that creep out-of-spec over the years, so [Dean Segovis] built a handy shutter speed tester.

With just a handful of basic components, this project is a great one for beginners to sink their teeth into. The tester is based around a photoresistor that measures light from another source (a flashlight) that travels through the camera body. When the shutter on the camera is released, the shutter speed can be measured and displayed on the OLED screen. An Arduino naturally handles all the computational duties. The whole thing can be easily assembled on a breadboard in just a couple of minutes.

The original project by [hiroshootsfilm] is over on Project Hub, however [Dean] takes a deeper dive with some code troubleshooting, as well as trying out a variety of old film cameras with the breadboard tester. His testing revealed that the photoresistor was better able to detect shutter speed when the camera lens was removed, which is a hot tip for anyone else that wants to try this.

While it’s not surprising that these older cameras are having trouble with their mechanical shutters, this little tester would be an invaluable tool when it comes time to start tweaking shutter mechanisms. If this project has brought out the shutterbug in you, make sure to check out this brain transplant for a Polaroid 100-series Packfilm camera that we covered way back in 2011.

Continue reading “Clock Your Camera With This Shutter Speed Tester”

Ikea Clock Gets Wanderlust

We always enjoy unique clocks, and a recent 3D print from [David Kingsman] caught our eye. It converts an Ikea clock into a very unusual-looking “wandering hour” clock that uses a Geneva drive to show a very dynamic view of the current time. The concept is based on an earlier wandering clock, but [David] utilized a different mechanism.

To read the clock, you note which hour numeral is in range of the “minute arc” and read the time directly. So if the 12 hour is over the 20-minute mark, the time is 12:20. Besides the clock, you need a fair number of printed parts, although they all look like relatively simple prints. You’ll also need 13 bearings and some metric hardware. A piece of cardboard used for the face rounds out the build.

Modifying the clock is more than just taking it apart. There is a template file to print, and you’ll need to align it and drill holes as indicated.

If you haven’t seen a Geneva drive before, it translates a continuous rotation into intermittent rotation. This isn’t the first clock we’ve seen use this kind of drive, although the last one we saw represented time differently. If you want something even more mechanical, try a chain-driven clock.

An Atomic Pendulum Clock Accurate Enough For CERN

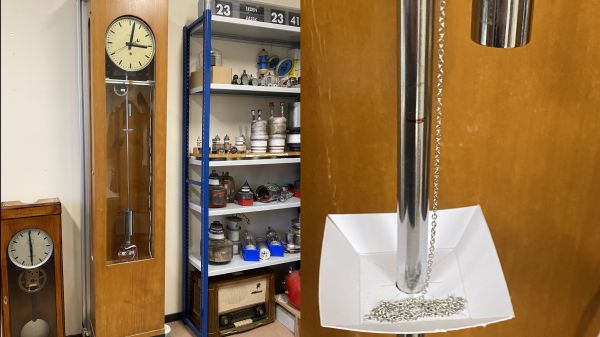
That big grandfather clock in the library might be an impressive piece of mechanical ingenuity, and an even better example of fine cabinetry, but we’d expect that the accuracy of a pendulum timepiece would be limited to a sizable fraction of a minute per day. Unless, of course, you work at CERN and built  “the most accurate pendulum clock on the planet.”

While we’re in no position to judge [Daniel Valuch]’s claim, we’re certainly inclined to believe him, mainly because the 1950s-era Czechoslovakian pendulum clock his project was based on, the Elektročas HH3, was built specifically as a master clock for labs, power plants, and broadcast use. The pendulum of this mid-century beauty is made of the alloy invar, selected for its exceptionally low coefficient of thermal expansion. This ensures the pendulum doesn’t change length with temperature, but it still only brings the clock into the 0.1 second/day range.

Clearly that’s not good enough for a clock at CERN, the European Laboratory for Nuclear Research, where [Daniel] works as an RF engineer. With access to a 10-MHz timebase from a cesium fountain atomic clock — no less a clock than the one that’s used to define the SI second, by the way — [Daniel] looked for ways to sync the clock up to it. Now, we know what you’re thinking — he must have used some kind of PLL to give an electromagnetic “kick” to the bob to trim the pendulum’s period. Good guess on the PLL, but the trimming method is a little cruder — [Daniel] uses a stepper motor attached to the clock’s frame to pay out or retract a length of fine chain into a cardboard dish attached to the pendulum’s rod. The change in mass changes the pendulum’s center of gravity, which changes its effective length, and allows the clock to be tuned a couple of seconds per day.

It seems like [Daniel] is claiming that his chain-corrected clock won’t drift more than a second from the cesium clock for 158 million years. Again, we’ll take his word for it, but it’s a wonderfully ad hoc approach to tuning the clock, and we appreciate its simplicity.