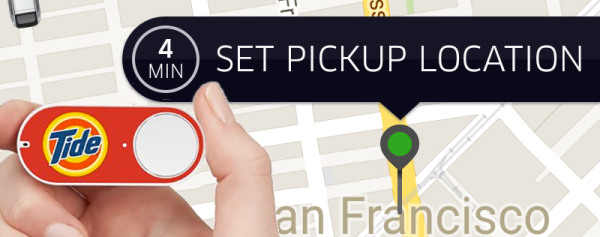
Prevent Failed Prints With A Filament Speed Sensor

If you have used a 3D printer for any length of time, you’ve probably experienced a failed print caused by a clogged nozzle. If you’re not around to stop the print and the nozzle stays hot and full of filament for hours, the clog gets even worse. [Florian] set out to solve this issue with an encoder that measures filament speed, which acts as an early warning system for nozzle clogs.

static1.squarespace.com[Florian] designed a small assembly with a wheel and encoder that measures filament movement. The filament passes under the encoder wheel before it’s fed into the 3D printer. The encoder is hooked up to an Arduino which measures the Gray code pulses as the encoder rotates, and the encoder count is streamed over the serial port to a computer.

When the filament slows down or stops due to a nozzle clog, the Python script plays a notification sound to let you know that you should check your nozzle and that your print might fail. Once [Florian] works out some of the kinks in his setup, it would be awesome if the script could stop the print when the nozzle fails. Have any other ideas on how to detect print failures? Let us know in the comments.

Come To Our Shenzhen Meetup And Tell Your Friends

This Saturday we’ll be in Shenzhen hosting a meetup at Bionic Brew at 19:00. Join us there and bring along your own hardware projects to show around. Everyone loves hearing about that latest build!

Even if you’re not in the area you can help us out by spreading the word. Tell your friends, share on your social media, and let us know about anyone in town who you think we should reach out to. Here’ s a poster if you want to print it out and hang it at your hackerspace, workplace, or other area where awesome people congregate.

The things you can do at this meetup: Laugh, drink, eat, and be happy. Talk excitedly about datasheets and timing diagrams. Pretend you hate talking about timing diagrams while being secretly giddy that someone wants to hear what you think of them. Recount your epic battles to meet production deadlines. Show off that latest blinky LED project you just got working. Meet a ton of awesome people. You can RSVP here to tell us you’re coming. See you soon!

Get Up, Stand Up. With A Little Help From The Mindfulness Bracelet

[Becky Stern] has created the mindfulness bracelet, a wearable which looks great and serves an important purpose. The bracelet buzzes every hour to remind you to stand up and take a break from work, soldering, gaming, or whatever it is you may be doing. The bracelet is made up of interlinked figure 8 shapes of leather, though [Becky] says rubber from a bicycle inner tube works great as well. The final shape reminds us of the link belts sometimes found on lathes or other industrial equipment. The links are the perfect size to slip an Arduino Gemma in, along with a battery and vibrating motor. A NPN transistor, diode, and resistor round out the entire bill of materials for this design. This bracelet is a heck of a lot cheaper than the Apple watch feature which inspired it!

The time interval is set in the code to 1 hour, and can be adjusted by the user. Although the times are stored in milliseconds, the design does use the ATtiny85’s Watchdog Timer (WDT) to conserve power. This means the time can drift up to 30 seconds per hour, which is fine in this application.

Click past the break to see the bracelet in action!

Continue reading “Get Up, Stand Up. With A Little Help From The Mindfulness Bracelet”

Hackaday Prize Entry: An Open Source Graphics Card

For last year’s Hackaday Prize, [PK] tried to build a video card for microcontrollers and headless Linux systems. It was only 640×480 resolution VGA, but the entire project was designed around a CPLD communicating with a microcontroller over SPI. This prize entry was, by [PK]’s own admission, a failure. It was late, but now he’s had an entire year to perfect his design. That means he can enter version two of his VGATonic in The Hackaday Prize.

The VGATonic version 2 uses a Xilinx XC95144XL CPLD for the VGA timing, and an ATTiny 2313a to read the SPI bus. Video memory is four megabits of static RAM. That’ls pretty much all you need for the most basic VGA graphics card, and all of this is packed onto a 3×3 inch PCB.

You can do a lot with 640×480 8-bit graphics running at 25FPS. In the video below, [PK] has a ‘hello world’ of sorts, Doom, running on a Raspberry Pi 2 with his SPI graphics card. Yes, it’s a graphics card for the Raspberry Pi, and it looks really good.

Further refinements of the design will include some primitive graphics routines. Not OpenGL or anything fancy, just something to reduce the number of writes on the SPI bus. It’s a great project, and perfect if you want to add video out to an Intel Galileo or other microcontroller project. [PK] has a video demo, you can check that out below.


The 2015 Hackaday Prize is sponsored by:

Continue reading “Hackaday Prize Entry: An Open Source Graphics Card”

USB Switch

Reverse Engineering How A USB Switch Switches

[Daniel] found himself with a need to connect a single USB device to two Linux servers. After searching around, he managed to find an inexpensive USB switch designed to do just that. He noticed that the product description mentioned nothing about Linux support, but he figured it couldn’t be that hard to make it work.

[Daniel] started by plugging the device into a Windows PC for testing. Windows detected the device and installed an HID driver automatically.  The next step was to install the control software on the Windows system. This provided [Daniel] with a tray icon and a “switch” function. Clicking this button disconnected the HID device from the Windows PC and connected the actual USB device on the other side of the USB switch. The second computer would now have access to the HID device instead.

[Daniel] fired up a program called SnoopyPro. This software is used to inspect USB traffic. [Daniel] noticed that a single message repeated itself until he pressed the “switch” button. At that time, a final message was sent and the HID device disconnected.

Now it was time to get cracking on Linux. [Daniel] hooked up the switch to a Linux system and configured a udev rule to ensure that it always showed up as /dev/usbswitch. He then wrote a python script to write the captured data to the usbswitch device. It was that simple. The device switched over as expected. So much for having no Linux support!

Game And Watch

Give In To Nostalgia With A Retro Game And Watch

One of the earliest Nintendo products to gain popularity was the Game and Watch product line. Produced by Nintendo between 1980 and 1991, they are a source of nostalgia for many an 80s or 90s kid. These were those electronic handheld games that had pre-drawn monochrome images that would light up to make very basic animations. [Andrew] loved his old “Vermin” game as a kid, but eventually he sold it off. Wanting to re-live those childhood memories, he decided to build his own Game and Watch emulator.

The heart of [Andrew’s] build is a PIC18F4550 USB demo board he found on eBay. The board allows you to upload HEX files directly via USB using some simple front end software. [Andrew] wrote the code for his game in C using MPLAB. His device uses a Nokia 5110 LCD screen and is powered from a small lithium ion battery.

For the housing, [Andrew] started from another old handheld game that was about the right size. He gutted all of the old parts and stuck the new ones in their place. He also gave the housing a sort of brushed metal look using spray paint. The end result is a pretty good approximation of the original thing as evidenced by the video below. Continue reading “Give In To Nostalgia With A Retro Game And Watch”

King Of Clever Reads 4-Pin Rotary Encoder With One Analog Pin

Rotary encoders are pretty interesting pieces of technology. They’re a solid way to accurately measure rotation including the direction. [David] recently wrote some software to handle these input devices, but unlike everyone else, his application can get by on only one microcontroller pin.

Most people will use three pins to handle a rotary encoder with a microcontroller: one to handle the switch and two to handle the quadrature inputs. With only one pin left available on his project [David] had to look for another solution, and he focused on the principle that the encoder pins behaved in very specific ways when turning the shaft. He designed a circuit that generates an analog voltage based on the state of those pins. He also wrote a program that can recognize the new analog patterns produced by his rotary encoder and his new circuit.

If you’ve been stuck on a project that uses a rotary encoder because you’ve run out of pins, this novel approach may help you get un-stuck. It’s a pretty impressive feat of circuit design to boot. Just think of how many other projects use these types of input devices and could benefit from it!

[via Hackaday.io Project Page go give it a Skull!]