IPhone-Controlled Daft Punk Helmet

A few years ago, [Marc] had access to a really big, very expensive 3D printer. Daft Punk helmets were – and still are – extremely cool builds, so with a bit of modeling, [Marc] and his friend [Alex] put together a model and printed out a Daft Punk [Thomas] helmet with the intention of turning it into the keystone of a great costume. A few things got in the way, and the [Thomas] helmet was left on a shelf for a few years. Fast forward to a few months ago and [Marc] took up the project again. The result is a 3D printed Daft Punk helmet loaded up with 320 WS2811 LEDs.

The 3D printed helmet was modeled well and printed in polycarbonate, but with any extrusion-based printer, there will be ridges and layers to sand, fill, prime and paint. This task was delegated to another friend, [Shaggy], while [Marc] got busy on the electronics.

The LEDs for the visor and ‘earmuffs’ are WS2811 LEDs, but not the SMD versions we’re so used to seeing. These are 8mm through-hole LEDs mounted in a lasercut piece of acrylic. Control of the LEDs is done with a Teensy 3.1 with [Paul Stoffregen]’s OctoWS2811 library. With the matrix wired up, batteries installed, WiFi capability added, and the helmet painted (not chromed; that will probably happen later, though), [Marc] had a copy of the [Thomas] helmet controllable through an iPhone.

If you’d like to check out more of [Marc]’s work, we posted something on his RGB LED suit and pneumatic Star Trek doors a few years ago.

Video below.

Continue reading “IPhone-Controlled Daft Punk Helmet”

A Full IP Webcam With A Raspberry Pi

A Dropcam will run you about $150. Price out a Raspberry Pi, camera sensor, and a CCTV camera housing found on eBay, and it starts to look like there may be a cheaper replacement for a Dropcam sitting around on workbenches, if only someone can figure out the software. [Antoine] did just that, giving any Raspberry Pi the ability to stream H.264 video over a network.

[Antoine]’s software is based on the raspivid tool distributed from the foundation, but that only takes care of capturing and encoding H.264 video from the camera sensor. To add IP camera support, the Live555 RTSP library was mixed in and combined to stream video over the Raspi’s network connection.

With a camera dome enclosure from the usual outlets, [Antoine]’s project really starts to look professional. The specs are respectable, too: it can output a 1080 stream, and with a small modification to an Ethernet cord, this webcam has PoE. Future updates include the ability to record videos based on a trigger and possibly a webserver on the Pi for configuration. [Antoine] says he really isn’t up to speed with Javascript, so any help would be appreciated.

Discovering The Protocol In A USB VoIP Phone

[Daniel] picked up a cheap USB handset to use with his VoIP provider, and included in the box was a CD with all the software that would make this handset work with Windows. [Daniel] is running Linux on his main battlestation, rendering the included CD worthless. Using the handset under Linux would be a problem; although the speaker and mic worked, the buttons and screen did not. No problem, then: [Daniel] just played around with the command line until he figured it out.

The handset presented itself to the Linux box as a soundcard and HID device. The soundcard was obviously the speaker and mic, leaving the buttons and display as the HID device. [Daniel] checked this out by running a hexdump on the HID device and pressed a few buttons. His suspicions were confirmed, and he could easily read the button with a little bit of Python.

With the speaker, mic, and buttons on the handset figured out, [Daniel] turned his attention to the one bit of electronics on the phone he hadn’t yet conquered: the display. After firing some random data at the phone, the display blinked and showed a messy block of pixels, confirming the display was controlled through the HID driver. Loading up usbsnoop to see what the original software does to update the screed showed [Daniel] the data format the display accepts, allowing him to control everything in this VoIP phone.

A Watercooled Headlamp, Because Why Not?

There are extremely high powered LEDs out there, and most of the ‘creative’ uses of these are extremely high-powered flashlights, complete with heatsinks, forced air cooling, and beefy power supplies. [Christian] wanted to play around with one of these LEDs, but he wanted something a little more unique. He chose a headlamp, a build that is made even more impressive by the fact it is watercooled.

The body of the headlamp was milled out of aluminum, with a space for the LED in the front and channels in the back for coolant. Also in this enclosure are two buttons, a temperature sensor, and a port for the hose that carries the tubes and wires.

This hose connects to a large battery pack that houses four large lithium phosphate batteries and a boost converter built around an Arduino. The pack also houses a pump and reservoir that is able to keep the LED cool even at 130W.

Hackaday Links Column Banner

Hackaday Links: November 2, 2014

Russians blowing up capacitors! As we all know, electronics only work because of blue smoke. [kreosan] is releasing this blue smoke from a few hundred caps. Fun times, even if they are a large number of inert tube shields in their collection of caps.

[mayhugh1] over on the home model engine machinist forum has built an 18 cylinder radial engine. It’s based on the Hodgson 9-cylinder radial engine that has been around for a while. The crank case is machined from a 5″ diameter rod of aluminum. There’s a Picassa album of the engine being constructed as well.

[Richard] wanted a Minecraft server, but not just any Minecraft server; this one demanded a custom case. A grass block was the inspiration, acrylic the medium, and a quad-core Mini-ITX the guts of the project.

Halloween was last Friday, and as always the tip line filled up with costume builds. [Leif] built a Ghostbusters costume complete with Muon trap, [Jeff] printed out some steampunk post-apocolyptic goggles, and [Green Gentleman] made a death-a-corn, although we’re struggling to figure out why the last one isn’t called an acorn-‘o-lantern.

[Matthias Wandel], a.k.a. the woodgears.ca dude,  is well-known in certain circles for being a wizard of wood. One of the first projects that put him on the map was a pantorouter – a router to cut mortises and tenons. He’s going back to his roots and building a bigger version. This version uses models of routers that are available outside North America, and in the latest video [Matthias] has it dialed in very well.

The Open Source Remote Control was an entry for The Hackaday Prize that didn’t make the final cut. It’s now an indiegogo project, and has some really cool tech we can’t wait to see in mainstream RC transmitters.

Using Cell Phone Screens With Any HDMI Interface

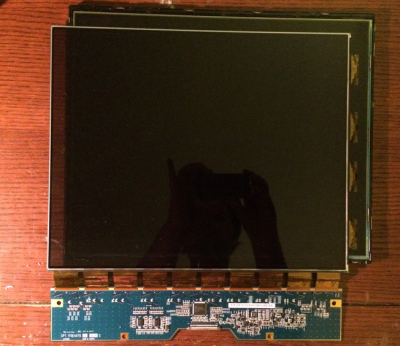
Thanks to the worldwide proliferation of smartphones, tiny high-resolution displays are common and cheap. Interfacing these displays with anything besides a phone has been a problem. [twl] has a board that does just that, converting HDMI to something these displays can understand, and providing a framebuffer so these displays can be written to through small microcontrollers.

[twl] is using a rather large FPGA to handle all the conversion from HDMI to the DSI the display understands. He’s using an Xilinx Spartan-6-SLX9, one of the most hobbyist friendly devices that is able to be hand soldered. Also on the board is a little bit of SDRAM for a framebuffer, HDMI input, and a power supply for the LCD and its backlight.

On the things [twl] has in his ‘to-do’ list, porting Doom to run on a cellphone display is obviously right at the top. He also wants to test the drawing commands for the Arduino side of his board, allowing any board with the suffix ~’ino to paint graphics and text on small, cheap, high-resolution displays. That’s a capability that just doesn’t exist with products twice [twl]’s projected BOM, and we can’t wait to see what he comes up with.

You can check out the demo video of [twl]’s board displaying the output of a Raspberry Pi below. If you look very closely, you’ll notice the boot/default screen for the display adapter is the Hackaday Jolly Wrencher.

Continue reading “Using Cell Phone Screens With Any HDMI Interface”

AVR Programmer

Inexpensive AVR Programmer Made From Five Components

If you want to program an AVR chip as inexpensively as possible, then [Ian’s] solution might just be for you. He built an AVR programmer using only four components. This design is based on the vusbtiny AVR programmer design, with a few components left out.

[Ian’s] design leaves out two of the resistors and two diodes, leaving just four components. These include a 1.5k resistor, a small capacitor, a USB connector, a six pin header, and an ATtiny45. He admits that this may not be exactly up to USB spec, but it does work.

This is one of those projects that is really an exercise in “will it work?” more than anything else. The fact that you need to first program an AVR chip means that this wouldn’t be useful in a pinch, because you would already have to have a working programmer. Nonetheless, it’s always fun to see what can be done with as little as possible.