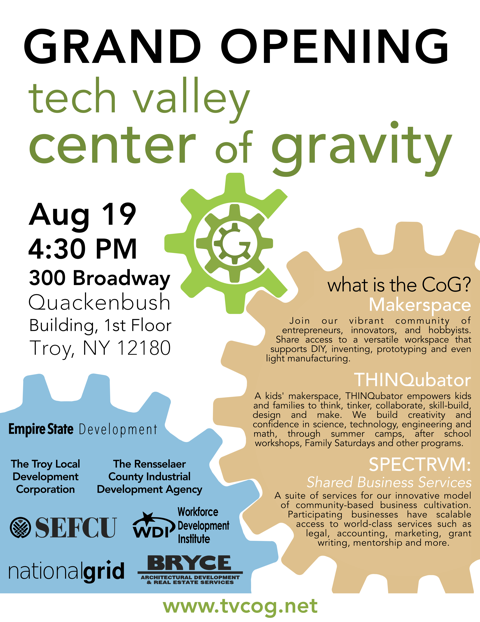
 Last week we got an invitation in the Hackaday tip line to attend the grand opening of a hackerspace in Troy, New York. Styling itself the Tech Valley Center of Gravity, the group seemed intriguing – a combination of makerspace and business incubator. But what was this about a grand opening? Hackerspaces don’t open – they just occupy a found space and grow by accretion until they reach a critical mass of equipment and awesomeness. I decided I needed to see this for myself, and being only a two-hour drive from my home, I headed off with my kids in tow and a small pile of Hackaday swag to see what a ribbon cutting for a hackerspace would be like. Plus I absolutely had to find out what in the world a “Quackenbush Building” was.
I was not disappointed. The Center of Gravity is a really special group of folks with an incredible vision of what it means to be hackers. Hackerspaces make a lot of things – great projects and gadgetry, plus sawdust, metal chips, and the occasional puff of Magic Blue Smoke. The Center of Gravity makes all of that, but it also makes entrepreneurs, businesses, and actual products. And it can reasonably claim to have a hand in community renewal.
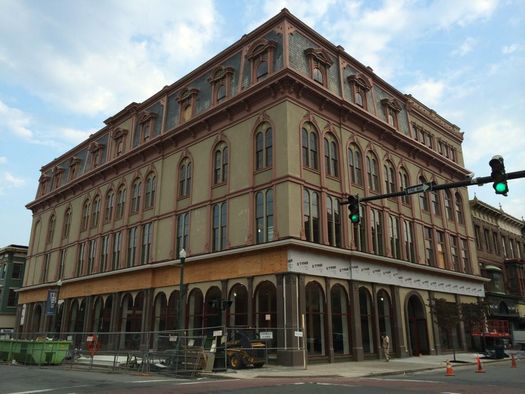
The Quackenbush
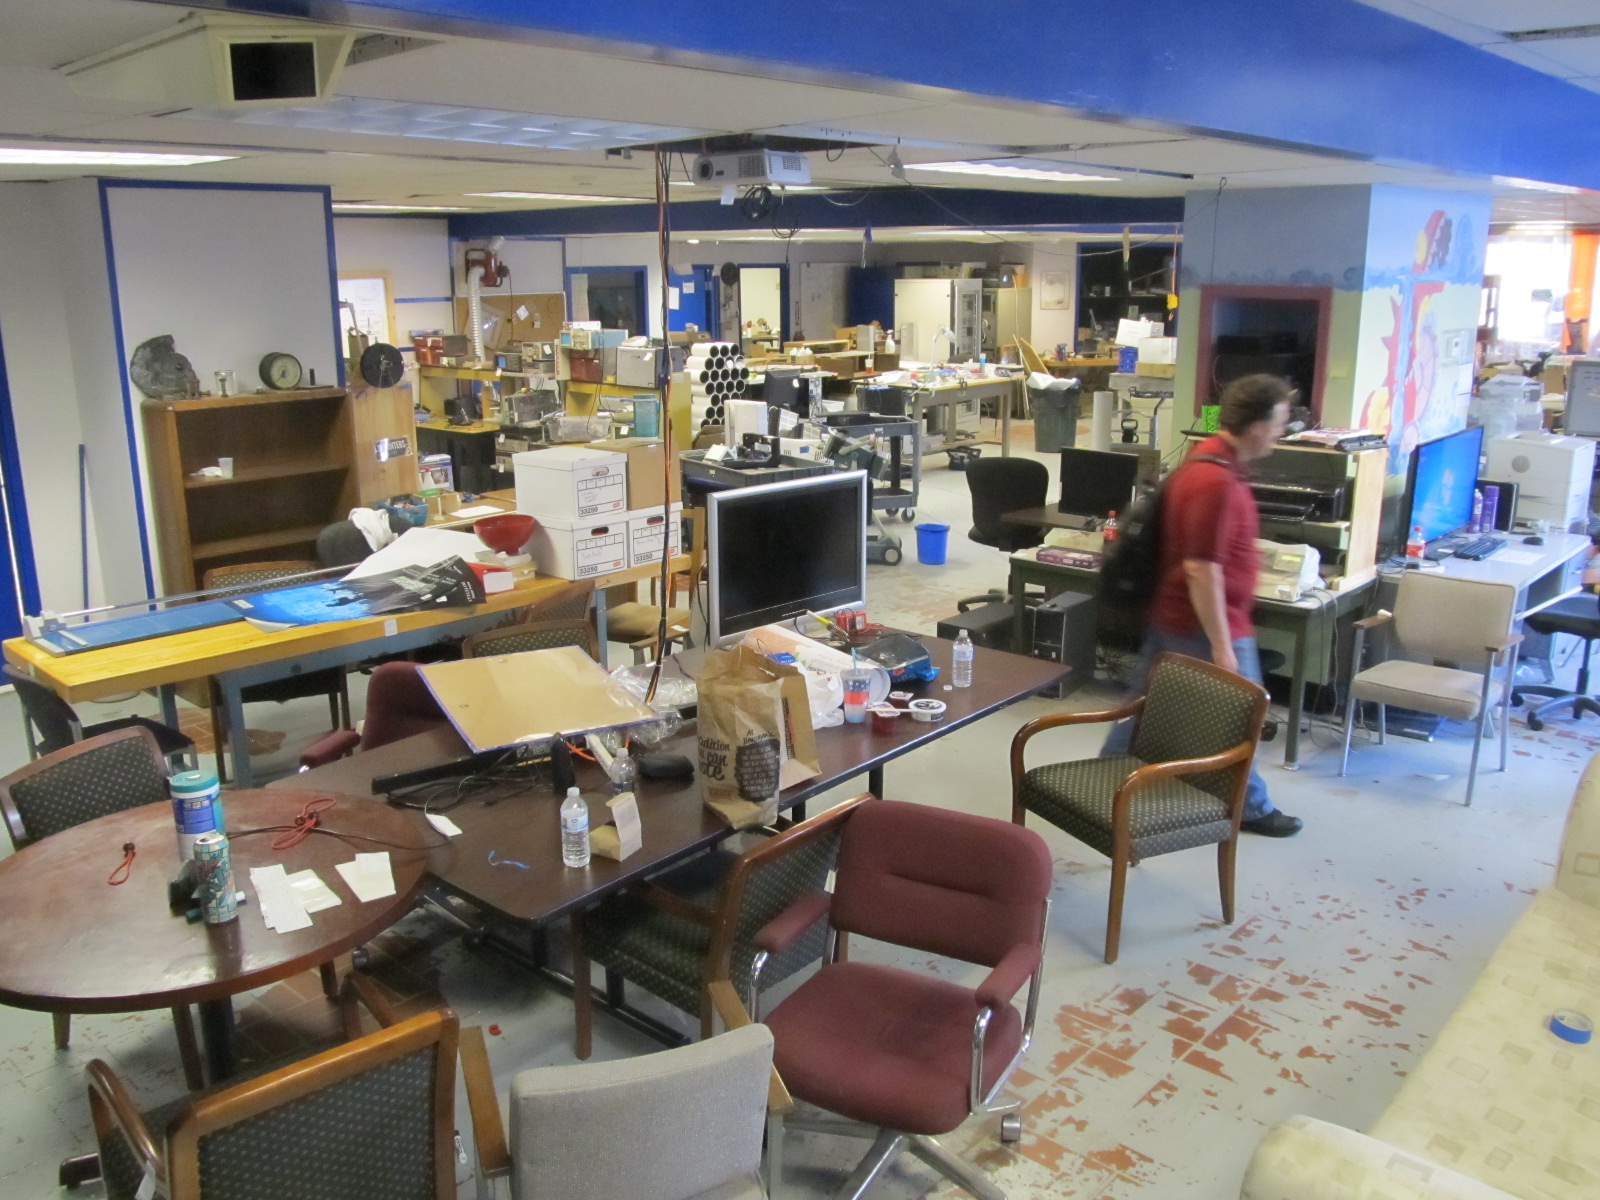
Disappointed, I headed down the stairs to the basement, which was mercifully cooler than the first floor. Ah, ha! Here were the shops – huge and brand new, with separate areas for woodwork and metalwork. And here I met [Bob Bownes], vice president of CoG, serial entrepreneur, and the fellow who invited me. And this is where I finally learned the full story of what was going on.

The ribbon cutting that was going on upstairs – the ribbon being a copper braid and the scissors being a MIG welder – was the official start of the CoG’s residency in its new space in the renovated Quackenbush Building. Built in the 1850s, it was home to the Quackenbush Department Store until the 1930s, when it switched hands to another chain. It finally became a Rite Aid pharmacy which, in a sign of the hard times Troy would fall upon, closed in the early 2000s. The beautiful old building was purchased by a local developer, renovated with the help of various state grants, and its 48,000 square feet were turned over to the CoG group, who could now move out of their cramped and confining home in the bottom of a parking garage that was once a McDonald’s and an off-track betting parlor.
Making Businesses
It wasn’t just good fortune that lead to the CoG being able to expand so dramatically. As [Bob] explained, the CoG had been designed from the ground up to be a business incubator as well as a hackerspace. If you have an idea, you can turn it into a product in the CoG hackerspace, then turn the product into a business in the incubator. The upper two floors of the Quackenbush are devoted to the incubator, which provides fledgling companies with access to administrative functions, provides conference and office space, and helps get businesses off the ground.
One such business is Vital Vio, a maker of visible light disinfection fixtures. Vital Vio got its start in the aforementioned former McDonald’s, and will take advantage of the 3,000 square foot light manufacturing swing space in the basement of the Quackenbush to ramp up its production. The goal is to have Vital Vio and the companies that will no doubt follow it move on to space of their own, at which point the next company will take over the swing space for their first manufacturing operation – hack, rinse, repeat. With quite a few businesses already in the incubator stage, it should be exciting to watch what comes out of the CoG over the next few years.
Making Community
I had been to Troy a few times back in the ’80s and ’90s, and I wasn’t impressed. It always seemed seedy and run down to me, like so many towns and cities in the northeast US that had their manufacturing hearts ripped out of them in the 1970s. But the Troy we saw on Wednesday was a totally different place – vital and happening, with bistros and bakeries and funky public spaces. [Bob] explained that CoG had plenty to do with that – at least six new companies had relocated to the area around the Quackenbush specifically because of CoG. And it’s hoped that the businesses that spin off the incubator will choose to stay close to the nest, which will attract more businesses and more people to the area. That’s quite a change from the point where even a McDonald’s and an off-track betting parlor are no longer viable.
My trip to the Tech Valley Center of Gravity was not your typical hackerspace tour, but the CoG is not your typical hackerspace. There’s a lot to be said for the vision that created this place, and the model they’ve adopted for churning out businesses really seems to be working. Almost the entire incubator space is spoken for already, so there are plenty of companies waiting to be born there. That’s not to say that the average hacker who just wants a place to play won’t feel at home in the CoG – there’s plenty of room for them too, and the CoG even welcomes families with special memberships and STEM outreach programs. But if you have the germ of an idea, it can go from product to business with the help of a place like this, and that’s a pretty cool idea.
My thanks to [Bob], [Matt] and [Tait] for taking so much time out of their celebration to show us around. I hope we can visit again once everything is moved and you’re settled into your awesome new home.