Why Is Continuous Glucose Monitoring So Hard?

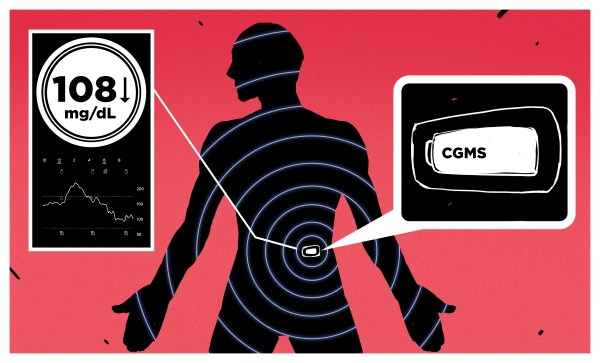
Everyone starts their day with a routine, and like most people these days, mine starts by checking my phone. But where most people look for the weather update, local traffic, or even check Twitter or Facebook, I use my phone to peer an inch inside my daughter’s abdomen. There, a tiny electrochemical sensor continuously samples the fluid between her cells, measuring the concentration of glucose so that we can control the amount of insulin she’s receiving through her insulin pump.

Type 1 diabetes is a nasty disease, usually sprung on the victim early in life and making every day a series of medical procedures – calculating the correct amount of insulin to use for each morsel of food consumed, dealing with the inevitable high and low blood glucose readings, and pinprick after pinprick to test the blood. Continuous glucose monitoring (CGM) has been a godsend to us and millions of diabetic families, as it gives us the freedom to let our kids be kids and go on sleepovers and have one more slice of pizza without turning it into a major project. Plus, good control of blood glucose means less chance of the dire consequences of diabetes later in life, like blindness, heart disease, and amputations. And I have to say I think it’s pretty neat that I have telemetry on my child; we like to call her our “cyborg kid.”

But for all the benefits of CGM, it’s not without its downsides. It’s wickedly expensive in terms of consumables and electronics, it requires an invasive procedure to place sensors, and even in this age of tiny electronics, it’s still comparatively bulky. It seems like we should be a lot further along with the technology than we are, but as it turns out, CGM is actually pretty hard to do, and there are some pretty solid reasons why the technology seems stuck.

Continue reading “Why Is Continuous Glucose Monitoring So Hard?”

Mac Mini Teardown Late 2018

What’s Inside That New Mac Mini Anyway?

It’s been four long years since Apple has refreshed their entry-level desktop line. Those that have been waiting for a redesign of the Mac Mini can now collectively exhale as the Late 2018 edition has officially been released. Thanks to [iFixit] we have a clearer view of what’s changed in the new model as they posted a complete teardown of the Mac Mini over on their website.

Mac Mini Teardown Late 2018 RAM Slots

One of the most welcomed changes is that the DDR4 RAM is actually user upgradeable this time around. Previously RAM was soldered directly to the motherboard, and there were no SO-DIMM slots to speak of. The 2018 Mac Mini’s RAM has also been doubled to 8GB compared to the 4GB in the 2014 model. Storage capacity may have taken a hit in the redesign, but the inclusion of a 128GB PCIe SSD in the base model fairs better than the 500GB HDD of old. The number of ports were flip-flopped between the two model generations with the 2018 Mini featuring four Thunderbolt ports along with two USB 3.0 ports. Though the biggest upgrade lies with the CPU. The base 2018 Mac Mini comes with a 3.6GHz quad-core Intel Core i3 as compared to the 2014’s 1.4GHz dual-core Intel Core i5.

Although Apple lacked “the courage” to drop the 3.5mm headphone jack this time around, they did retain the same footprint for Mac Mini redesign. It still provides HDMI as the default display out port, although the additional Thunderbolt ports provide additional options via an adapter. A quick overview of the spec differences between the 2018 and 2014 base Mac Mini models have been summarized below.

Model 2018 Mac Mini 2014 Mac Mini
CPU 3.6GHz quad-core Intel Core i3 1.4GHz dual-core Intel Core i5
Storage 128GB PCIe SSD 500GB HDD
RAM 8GB DDR4 @ 2666MHz 4GB DDR3 @ 1600MHz
Graphics Intel UHD 630 Intel HD 5000
Ports Thunderbolt 3 (x4), USB 3.0 (x2) Thunderbolt 2 (x2), USB 3.0 (x4)
Card Slot N/A SDXC
WiFi 802.11a/b/g/n/ac 802.11a/b/g/n/ac
Audio 3.5mm Headphone Jack 3.5mm Headphone Jack
Video HDMI HDMI
Price from $799 from $499

Source [MacWorld]

Helium Can Stop Your IPhone — Maybe Other MEMS, Too

Sometimes hacking isn’t as much about building something, it’s about getting to the root of a particularly difficult problem. [Erik Wooldrige] was facing a problem like that. He’s a system specialist at a hospital near Chicago. Suddenly a bunch of iPhones and Apple watches were failing or glitching. The only thing anyone could think of was the recent install of an MRI machine.

Sure, an MRI machine can put out some serious electromagnetic pulses, but why would that only affect Apple products? Everything else in the hospital, including Android phones, seemed to be OK. But about 40 Apple devices were either dead or misbehaving.

Continue reading “Helium Can Stop Your IPhone — Maybe Other MEMS, Too”

Hackaday Links Column Banner

Hackaday Links: Remember, Remember

Buckle up, buttercup because this is the last weekly Hackaday Links post you’re getting for two weeks. Why? We have a thing next weekend. The Hackaday Superconference is November 11th and 12th (and also the 10th, because there’s a pre-game party), and it’s going to be the best hardware con you’ve ever seen. Don’t have a ticket? Too bad! But we’ll have something for our Internet denizens too.

So, you’re not going to the Hackaday Supercon but you’d like to hang out with like-minded people? GOOD NEWS! Barnes & Noble is having their third annual Mini Maker Faire on November 11th and 12th. Which Barnes & Noble? A lot of them. Our reports tell us this tends to be geared more towards the younger kids, but there are some cool people doing demonstrations. Worst case scenario? You can pick up a copy of 2600.

PoC || GTFO 0x16 is out! Pastor Laphroaig Races The Runtime Relinker And Other True Tales Of Cleverness And Craft! This PDF is a Shell Script That Runs a Python Webserver That Serves a Scala-Based JavaScript Compiler With an HTML5 Hex Viewer; or, Reverse Engineer Your Own Damn Polyglot.

In, ‘Oh, wow, this is going to be stupid’ news, I received an interesting product announcement this week. It’s a USB C power bank with an integrated hand warmer. Just think: you can recharge your phone on the go, warm your hands in the dead of winter, and hope your random battery pack from China doesn’t explode in your pocket. I’m not linking to this because it’s that dumb.

You can now cross-compile ARM with GCC in Visual Studio.

The iPhone X is out, and that means two things. There are far too many YouTube videos of people waiting in line for a phone (and not the good kind), and iFixit did a teardown. This thing is glorious. There are two batteries and a crazy double-milled PCB stack with strange and weird mezzanine connectors. The main board for the iPhone X is completely unrepairable, but it’s a work of engineering art. No word yet on reusing the mini-Kinect in the iPhone X.

Speaking of irreparable computers, the Commodore 64 is not. [Drygol] recently came across a C64 that was apparently the engine controller for a monster truck found on the bottom of the ocean. This thing was trashed, filled with rust and corrosion, and the power button just fell off. Prior to cleaning, [Drygol] soldered a new power button, bowered it up, and it worked. The crappiest C64 was repairable. A bit of cleaning, painting the case, and the installation of an SD2IEC brought this computer back to life, ready for another thirty years of retrogaming and BASIC.

The Zynq from Xilinx is one of the most interesting parts in recent memory. It’s a dual-core ARM Cortex A9 combined with an FPGA with a little more than a million reconfigurable gates. It’s been turned into a synth, a quadcopter, all of British radio, and it’s a Pynq dev board. Now there’s a new part in the Zynq family, an RFSoC that combines the general ARM/FPGA format with some RF wizardry. It’s designed for 5G wireless and radar (!), and one of those parts we can’t wait to see in use.

Do you keep blowing stuff up when attaching a USB to UART adapter to a board? Never fear, because here’s one with galvanic isolation. This is done with a neat digital isolator from Maxim

Fail Of The Week: How Not To Repair A MagSafe Charging Cable

So I made an awful, kludgey, “there I fixed it” level repair, and I need to come clean. This is really a case of an ill-advised ground.

My thirteen-year-old daughter asked for help repairing her Macbook charging cable. Macbook chargers really aren’t meant to flex around a lot, and if you’re the kind of person who uses the laptop on, well, the lap, with the charger in, it’s gonna flex. Sooner or later the insulation around the plug housing, where it plugs into the laptop, cracks and the strands of wire can be seen. This type of cable consists of an insulated lead wire surrounded by a stranded ground wire. The problem with this configuration is that the stranded ground also gets flexed until it breaks, one strand at a time, until the cable stops working.

So it was with my daughter’s Macbook cable. I didn’t have the money to buy her a new one, and I figured we could repair the break. We busted out her WLC100 and sat down to get our solder on. She started off working while I supervised, then I took over later on.

We began by using an Xacto to cut away enough insulation to expose about half an inch of the stranded wire. We pulled the wire away from the insulated lead wire and twisted it into a single stranded wire parallel to the lead wire. Grabbing for the iron, we tinned the ground and soldered a length of 22-gauge solid wire to it. The way the ground connects to the plug is by passing through a conductive ring. My idea was to solder the other end of the 22-gauge wire to the metal ring. Here’s where things started to go wrong. This is, by the way, the part where I took over so you can blame me and not my kid.

My daughter was using the WLC100’s default tip. I should have grabbed my own iron, a WES51, or at least swapped in its ninja-sharp tip. The WLC100’s default tip is a big fat wedge and it was too big to put next to the plug, and the conductive ring quickly got covered in melted plastic and I couldn’t solder anything to it. Worse, I had accidentally burned through the insulation protecting the lead wire, and had to cover it in electrical tape.

iFixit cracked it open and started from scratch.

What now? We were left with not being able to use the cable at all. One option was to wait until the goop had cooled and burnish it clean with a Dremel, then attempt to re-solder using an appropriate tip. However, that sounded like a lot of work. The solid wire was still securely soldered to the ground, so instead of trying to attach it to the cable side of the plug, I could connect it to the computer side, by shoving it into the socket alongside the plug. The business end of the plug has a big silver ground surrounding small gold positive leads, and touching the ground with the wire should work just fine, right?

It did. The computer charged up as happy as you’d like. And yet, I was left with the distinct feeling the solution could have been, I don’t know, cleaner. Certainly, the iFixit route shown here comes out much cleaner by sliding off the housing, clipping the damaged wire, and beginning anew. Clean as this is, it’s just waiting to happen the same way again.

So, brethren and sistren, lay on with brickbats and tell what I did wrong. What approaches have you used to fix cables broken where they meet the plug housing, and how do you improve the situation for the future?

Tearing Down The Boss Phone

Poke around enough on AliExpress, Alibaba, and especially Taobao—the Chinese facing site that’s increasingly being used by Westerners to find hard to source parts—and you’ll come across some interesting things. The Long-CZ J8 is one of those, it’s 2.67 inch long and weighs just 0.63 ounces, and it’s built in the form factor of a Bluetooth headset.

A couple of months ago Cory Doctorow highlighted this tiny phone, he’d picked up on it because of the marketing. The lozenge-shaped phone was being explicitly marketed that it could “beat the boss”. The boss in question here being the B.O.S.S chair—a scanning technology that has been widely deployed across prisons in the U.K. in an attempt to put a halt to smuggling of mobile phones to inmates.

The Long-CZ J8 is just 2.67 inch (6.8cm) long.

I wasn’t particularly interested in whether it could make it through a body scanner, or the built-in voice changer which was another clue as to the target market for the phone. However just the size of the thing was intriguing enough that I thought I’d pick one up and take a look inside. So I ordered one from Amazon.

Continue reading “Tearing Down The Boss Phone”

Hands On With The Pinebook

The Pine A64 was a 64-bit Quad-Core Single Board Computer which was kickstarted at the tail end of 2015 for delivery in the middle of 2016. Costing just $15, and hailed as a “Raspberry Pi killer,” the board raised $1.7 million from 36,000 backers. It shipped to its backers to almost universally poor reviews.

Now they’re back, this time with a laptop—a 11.6-inch model for $89, or a 14-inch model for $99. Both are powered by the same 64-bit Quad-Core ARM Cortex A53 as the original Pine A64 board, but at least Pine are doing a much better job this time around of managing user expectations.

Continue reading “Hands On With The Pinebook”