Spinning CRT Makes A 360 Degree Audio Oscilloscope

A question for you: if the cathode ray tube had never been invented, what would an oscilloscope look like? We’re not sure ourselves, but it seems like something similar to this mechanical tachyscope display might worked, at least up to a point.

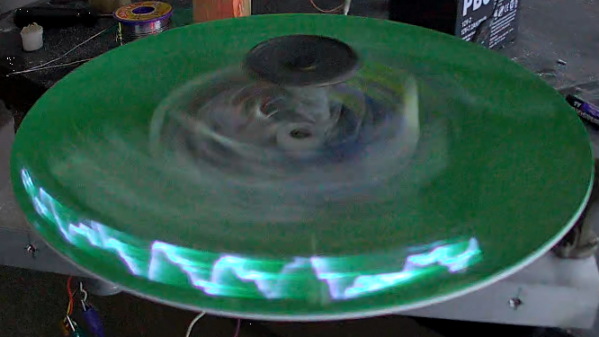
What’s ironic about this scenario is that the tachyscope [Daniel Ross] built actually uses a CRT from a defunct camcorder viewfinder as the light-up bit of what amounts to a large POV display. The CRT’s horizontal coil is disconnected while the vertical coil is attached to the output of a TEA205B audio amplifier. The CRT, its drive electronics, and the amp are mounted to a motorized plastic platter along with a wireless baby monitor, to send audio to the CRT without the need for slip rings — although a Bluetooth module appears to be used for that job in the video below.

Speaking of slip rings, you’d expect one to make an appearance here to transfer power to the platter. [Daniel] used a slip ring for his previous steampunk tachyscope, but this time out he chose a hand-wound air core transformer, with a stationary primary coil and secondary coil mounted on the platter. With a MOSFET exciter on the primary and a bridge rectifier on the secondary, he’s able to get the 12 volts needed to power everything on the platform.

Like most POV displays, this one probably looks better in person than it does in video. But it’s still pretty cool, with the audio waveforms sort of floating in midair as the CRT whizzes around. [Daniel] obviously put a lot of work into this, not least with the balancing necessary to get this running smoothly, so hats off for the effort.

Continue reading “Spinning CRT Makes A 360 Degree Audio Oscilloscope”

Retro Gadgets: The 1974 Breadboard Project

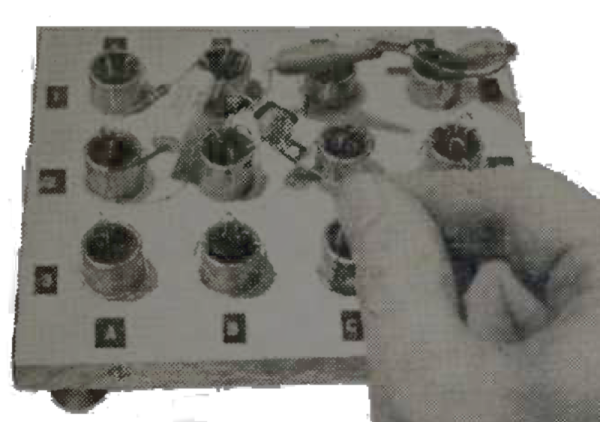
It is hard to imagine experimenting with electronics without the ubiquitous solderless breadboard. We are sure you have a few within arm’s reach. The little plastic wonders make it easy to throw together a circuit, try it, and then tear it down again. But, surprisingly, breadboards of that type haven’t always been around, and — for a while — they were also an expensive item. Maybe that’s what motivated [R. G. Cooper] to build Slip-n-Clip — his system for quickly building circuits that he published in a 1974 edition of the magazine Elementary Electronics.

The system isn’t really what you would think of as a breadboard today, but it was effective and certainly cheap to build. The biggest problem? It wasn’t something you’d use with DIP ICs. But in the early 1970s, you might not be building very much with ICs, and the ones you used might be in oddball transistor-like packages. Things were strange in the 70s!

A Brief History of Breadboards

In the very old days, people built radios and such on wooden substrates that were actually bread-cutting boards. That’s where the name came from. It was common to draw a diagram with the physical layout you had in mind, glue it to the board, and use it as a guide for building and troubleshooting. Wood was easy to drill and cut. A nail or a thumbtack would make dandy terminals. Probably the last time we saw that done was about a dozen years ago in Make Magazine. Even then, it was only a novelty — few people still build circuits like this, but you can see how [Colin] did it in the video below.

Continue reading “Retro Gadgets: The 1974 Breadboard Project”

Dual Channel POV Display Also Has Nixie Tubes

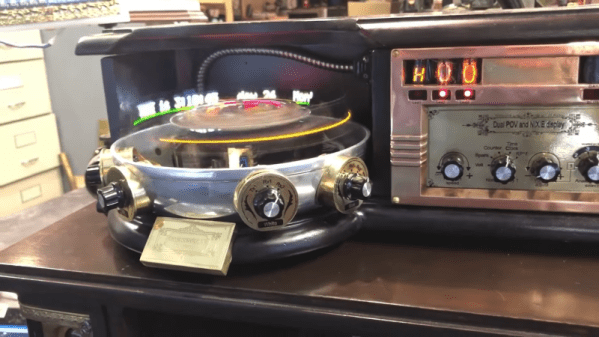
What’s a tachyscope? According to [Daniel Ross], it is an animated display from an alternate timeline circa 1880. The real ones, of course, didn’t have LEDs and microcontrollers. The control unit looks like an old-timey radio, complete with Nixie tubes. The spinning part has blue and white LEDs, each accepting data from one of two serial ports. You can select to see data from one port, the other, or both. You can see the amazing contraption in the video below.

The LEDs are surface mounted and placed inside a glass test tube. Each display has its own processor. The project appears to have a PCB, but it is just a piece of fiberglass with a color print on top of it and holes drilled with a rotary tool. The board has no actual conductors — everything is point-to-point wiring. The base of the unit is old cookware. The slip ring is pretty interesting, too. It uses an old video tape head, D-cell batteries cut up, and contacts from a relay.

You might remember [Daniel] from his steampunk Victorian computer project, including a punk teletype and a magic eye tube. If you want some theory on these kinds of displays, we can help. If you just want a simple display, it doesn’t have to cost much.

Continue reading “Dual Channel POV Display Also Has Nixie Tubes”

Typewriter Mashup Becomes 120-Year-Old Teletype

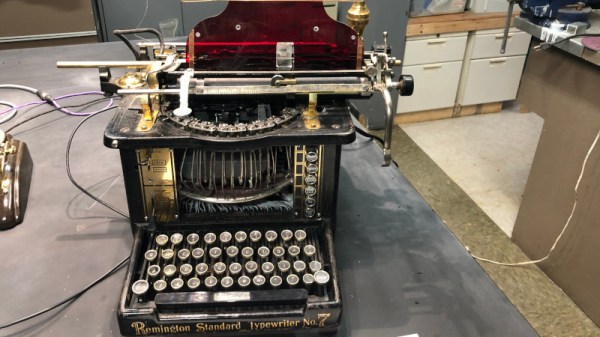
Vintage typewriters can be beautiful and elegant devices. But there’s a limit to their value if, as with the 1903 Remington owned by [Daniel Ross], they are fire-damaged and have a seized mechanism. What did he do with what was essentially a piece of scrap metal? Produce an unholy mashup of the vintage machine and a 1988 Sharp daisy wheel typewriter to make a steampunk-style teletype, of course!

Stripping down both machines was evidently no easy task, and the result he’s achieved has the Sharp’s printer mechanism at 90 degrees to its original orientation sitting below the roller in the space once occupied by the Remington’s type bars. We’re sad to see that the keyboard on the older machine appears to be inoperable, but on the other hand each letter does light up as it’s typed.

Meanwhile at the electronics side the components from the Sharp have been transferred to a custom PCB, and the whole can be driven from a 300-baud serial line. As can be seen from the video below the break, the result is an unholy love-child of two typewriters that could scarcely be more different, but somehow it works to make an impressive whole.

If this project looks a little familiar to Hackaday readers, it’s because we’ve mentioned it in passing before. It’s hooked up to his COSMAC Elf retrocomputer, and we saw it in passing a couple of years ago at a much earlier stage of construction before the custom PCB and light-up keyboard.

Continue reading “Typewriter Mashup Becomes 120-Year-Old Teletype”

The Times They Are A-Chaining

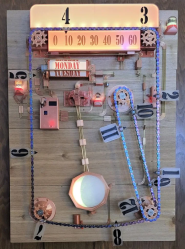
If [Bob Dylan] had seen [Pgeschwi]’s bike chain clock, it might have influenced the famous song. The clock uses a stepper motor and a bike chain to create a clock that has a decidedly steampunk vibe. Despite the low-tech look, the build uses 3D printing and, of course, a bike chain.

A full view of the bike chain clock.

The clock doesn’t just show the time. There is a contraption to show the day of the week, and a pendulum shows the current phase of the moon. The visible wiring is all old-school brass wire on the wood base. [Pgeschwi] is considering changing out all the 3D printed parts for brass ones, so this may be just an early prototype of the final product, but it still looks great.

The design used common tools, including Tinkercad and an online gear generation tool. There are a lot of details you wouldn’t suspect until you tried to build something like this yourself. For example, making the chain reliably go in both directions required a timing belt to synchronize the top gears. Getting the numbers on the chain to pass by the gears.

It is hard to tell from the picture, but there’s an LED under the 10-minute marks that shows the unit’s digits of the time. There are no markings for it yet,  but in the picture, the time is actually 4:09.

We love unusual clocks, and we see plenty of them. From Fibonacci clocks to magnetic field line clocks, we love them all.

A man and a woman stand at opposite ends of a wooden-framed bicycle. It has 20" tires and a long, black seat. A rack extends over the front tire for carrying small items.

Plywood Bicycle Makes Frame Building More Accessible

Bike frames are simple on the surface, but can quickly become complicated if you want to fabricate one yourself. Brazing and welding tend to be less common skills than knowing how to bolt things together, so [Arquimaña] has brought us the OpenBike to make the process accessible to more people.

An open-source set of files designed for CNCs and 3D printers, the OpenBike uses readily available materials like sheet plywood to make a sturdy, if unconventional-looking, bicycle. Like many other consumer goods, most bike frames are currently built in Asia. This allows for economies of scale, but removes locals from the design process. By using simpler tools, OpenBike allows for more local direction of what features might be needed for a particular region.

Shifting even a small portion of trips to more active forms of transport is an important part of lowering carbon emissions, so making bikes a more attractive means of transportation is always welcome. What might be important in one region might be superfluous and expensive in another (multiple gears in a hilly region, for example). OpenBike could be especially useful as a way to rapid-prototype different feature sets for a particular region before committing to a more traditional frame-building technique for larger batches of bikes.

If you want to see some other bike hacks, why not check out this extending bicycle, this steampunk recumbent trike, or these bike hacks from around the world?


via Yanko Design

New Venue Gives Philly Maker Faire A Fresh Start

When we last checked in with the Philadelphia Maker Faire in 2019, one couldn’t help but be impressed with what the organizers had pulled off with just a fraction of the budget and resources it took to put on the defunct World Maker Faire in New York. We came away absolutely certain the event was on the verge of explosive growth, and that next year would be even bigger and better.

But of course, that didn’t happen. The COVID-19 pandemic meant that by the time the 2020 Faire should have kicked off, the logistics of holding a gathering much larger than a family dinner had become a serious hurdle. Philadelphia implemented strict rules on indoor and outdoor events to try and contain the spread of the virus, to the point that even when they were relaxed in 2021, it still didn’t make sense to try and put on a Faire under those conditions.

Thankfully things are largely back to normal-ish now, and as such the Philadelphia Maker Faire had something of a rebirth this year. Organizers decided to move the event to the Independence Seaport Museum, with vendor and exhibitor tables distributed throughout the museum’s three floors. This made the ticket price a great two-for-one value, especially if you had enough time left over to head out to the docks so you could explore the 130-year-old cruiser USS Olympia, and the USS Becuna, one of the last surviving WWII Balao-class submarines.

As you’d expect, the event was packed with fascinating projects and demonstrations, to the point that trying to list them all here would be impossible. But for those who couldn’t make the trip out to see what the 2022 Philadelphia Maker Faire had to offer, let’s take a look at a handful of the standout exhibits.

Continue reading “New Venue Gives Philly Maker Faire A Fresh Start”