Homebuilt Laser Cutter Ideas

Laser-Cutter

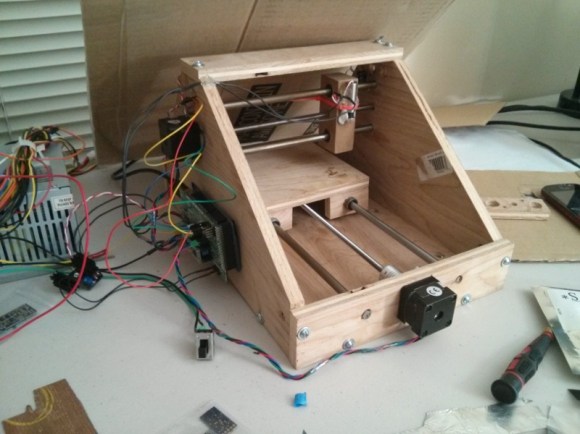
[Wuzabear] wrote in to tell us about this “DIY Laser Cutter for PCB Stencils.” While a full BOM and step-by-step build instructions aren’t provided for the frame, pictures of the build are available, and some different options for construction are discussed. One other option that was especially interesting would be to use a ready-built RepRap or other 3D printer to act as the laser motion controller. Apparently this has been experimented with, and we’d love to see any versions that or readers have come up with!

Besides some different ideas and resources for the moving parts of the cutter, there is some information on how to hook up a laser for this purpose, as well as  for the software and calibration required. It should be noted that you should always wear the appropriate safety goggles if you’re working with a high-powered laser. Although any machine-tool can be dangerous, lasers provide some safety issues that should be treated with extreme caution.


Upgrading A Router With Impeccable Soldering Skills

router

[Necromant] recently acquired a router that was nearly free. Looking his gift horse in the mouth, he hooked up a serial port to see if it could run some updated firmware such as OpenWRT. The initial findings were promising; it used the same CPU as the very popular WR703N, but this free router only had 2 MiB of Flash and 8 MiB of RAM – barely enough to do anything. His solution to this problem is in the true hacker tradition: just solder some more chips onto the router.

Upgrading the RAM was comparatively easy; [Necromant] found an old stick of RAM, desoldered one of the chips, and replaced the measly 8 MiB chip with a new 64 Megabyte chip.

The Flash, though, proved more difficult. Without the right code in the Flash for the radio test, the router wouldn’t be useful at all. The solution was to read the original 2 MiB chip, read the Flash from a  WR703, and combined the two with a simple dd command. This was written to a new SPI flash chip with a buspirate and a home etched board.

Powering The Oculus Rift With USB

rift

Oculus Rift dev kits are starting to make their way onto the workbenches of makers around the globe. Some are even going so far as to tear open the hardware and see how they can improve it. [Mike] didn’t like the fact the Oculus Rift needed a wall wart power supply, so he modded it so it can be powered over a USB port.

The key insight for this mod comes after [Mike] put a Kill-a-Watt between his outlet and the Rift’s power adapter. He found only 600 mA of current was being used by the Rift, assuming 100% efficiency in the adapter. A USB port is supposed to provide 500 mA of current, so with a soldering gun, [Mike] bridged the DC input jack and the USB port on the Rift. Perhaps unsurprisingly, everything worked perfectly.

In case you’ve forgotten, Hackaday is getting one of these Oculus Rift dev kits. We’ll post a teardown when [Caleb] learns to share. You can check out a video of [Mike]’s modded Rift and some dolla dolla billz after the break.

Continue reading “Powering The Oculus Rift With USB”

Embedded Web Server Is All About Clever Formatting

embedded-web-server

Take a look around here and you’ll find all kinds of embedded web servers. This one doesn’t look all that interesting, especially because it’s just a NIC plugged into a development board. But for us the interesting part is in how [Andrew Rossignol] chose to format the webpage assets to best utilize the under-powered server.

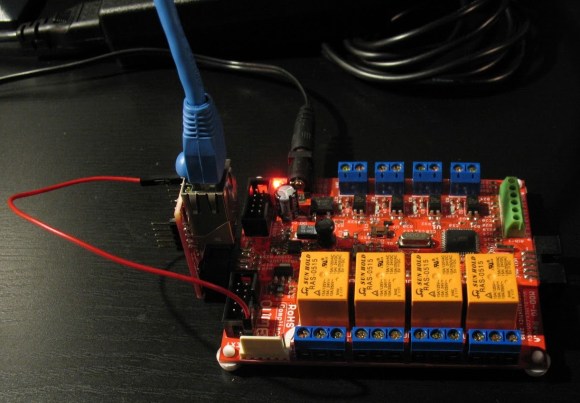
The project was spawned as part of a class in Internet Embedded Systems which [Andrew] is taking. The board has an ATmega16 microcontroller and he’s using the ever popular ENC28J60 on that Ethernet adapter board. The TuxGraphics TCP/IP Stack takes care of communications with the network.

One constraint which [Andrew] imposed upon himself was to use just a single response which the available RAM limits to about  700 bytes. Any decent webpage needs to have at least some graphics but that’s tough with the size limit. He managed to display an AVR logo by optimizing an SVG in Inkscape then stripped the rest of the cruft using VIM (explained in the demo after the break). With that piece of Linux-fu in his pocket he set to work streamlining the CSS file. The webpage isn’t just static either. He displays the server up-time and even allows the relays and LEDs on the Olimex board to be controlled.

Despite the limitations of the ATmega family they still seem to do some amazing Internet-connected stuff. Here’s one used as a Minecraft server.

Continue reading “Embedded Web Server Is All About Clever Formatting”

SenseLamp Automates Rooms By Replacing Light Fixtures

senselamp

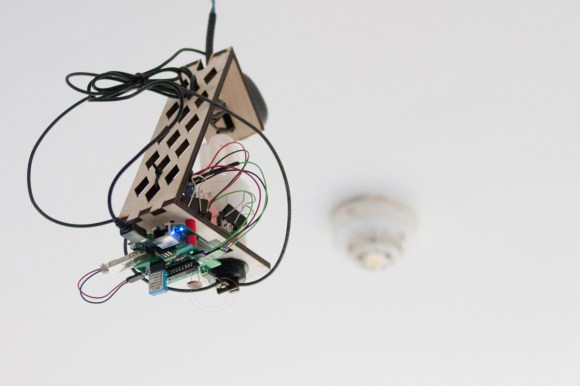
Would you believe that this beautiful light fixture is actually a hacked together home automation project? Okay, so this wire mess is the second of three versions that [Christian] built. It replaces a light fixture in the room, but if you look closely you’ll see that there is a compact fluorescent bulb included in the build. The laser-cut frame acts as a bit of a lamp shade, while providing a place to mount the rest of the hardware.

The final version cleans things up a bit, and adds a footprint for the PIR motion sensor that he forgot to design into this version. The idea is that each lamp monitors motion in the room, switching the light on and off again as necessary. A light-dependent resistor ensures that the bulb is only powered up if the room is dark so as not to waste electricity during the day.

The build includes a sensor package that reports back temperature and humidity data. Communications are provided by a WR703N router rolled into each of the four units installed in his house. With this kind of hardware at his disposal it should be a snap to control every IR remote control device in his house via the network by adding an IR LED and some code to the lamps.

April Fools’ Project Teaches Coworkers Not To Touch Your Stuff

april-fools-siren-box

Take one look at the sticker on top of this project box and it’s pretty clear you’re not supposed to flip the switch protected by the piece of red plastic. But if your coworkers are anything like [The Timmy’s] there’s at least a few who will stop by and just can’t keep their hands off. He built this to teach those sorts a lesson. Flip the switch and a very loud siren starts blaring. The thing is, the 107db alarm can’t be turned off by the switch, you must have the key for the switch on the side.

The siren is a self-contained unit that just needs a power source between 6V and 15V. This makes the project quite simple, the only part that [The Timmy] really needed to think about was how to build a mechanical SR Latch (set-reset). The solution is to use a mechanical relay. The toggle switch connects the normally open connector to the common terminal to enable the relay. The key switch breaks the relay’s connection to ground, allowing the magnetic switch to open again.

If you need some help understanding how the relay connections work we’ve embedded an unrelated video after the break.

Continue reading “April Fools’ Project Teaches Coworkers Not To Touch Your Stuff”

Building A Vehicle Parking Camera

rpi-backup-camera

We’re never really sure what to call these things. When we say “back up camera” it sounds distinctly like a redundancy system for when the primary camera fails to work. But it is used for when you move in reverse in an automobile. [Jeremy Blythe] built the distance sensing video system using a Raspberry Pi board as the brain.

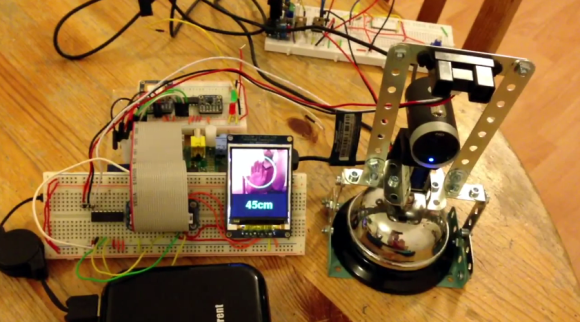
The flexibility of Linux and the power of the RPi board ended up making it pretty easy to get everything working together. He’s using a Microsoft Lifecam Cinema HD camera, which connects to one of the USB ports on the board. Just above that you can see the infrared distance sensor which is connected to the RPi’s GPIO header using one of Adafruit’s Pi Cobbler breakout boards. This also facilitates the connection to the 176×220 color LCD screen.

In the video after the break you can see [Jeremy] testing out the system by moving his hand in front of the sensor. Python is used to grab the image from the camera, draw a circle on it, and overlay the distance in centimeters at the bottom. Once his hand is within 30cm the overlay turns red and the work STOP is displayed. Pretty neat!

Continue reading “Building A Vehicle Parking Camera”