Ask Hackaday: Who Likes Retrocomputing?

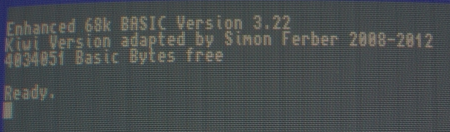
Last week we posted a link to Project Kiwi, a homebrew Motorola 68008-based microcomputer built by [Simon] that includes Ethernet, a very good display adapter, an interface for IDE hard disks, two Commodore SID chips (for stereo chiptunes), a floppy disk controller, and an already existent software library that will make it very easy to develop your own software for this wonderful computer.

After thinking about [Simon]’s Project Kiwi for a while, I’ve been thinking there really hasn’t been a homebrew computer made that is so perfect for a proper Open Hardware release. There are more than enough peripherals in the computer to make development very fun. I’ve suggested doing a group buy to get Kiwi PCBs out into the wild and into the hands of other retrocomputer fanatics, but [Simon] would like a little more feedback.

Of course, this means turning to you, the wonderful Hackaday reader. Would any of you be interested in your own Kiwi microcomputer?

[Simon] tells me there are a lot of problems for turning the Kiwi microcomputer into a Open Hardware project. His prototype PCB cost €300, greatly reducing the number of people who would be interested in making their own Kiwi. Also, there are a few problems on the current PCB design (easily fixed for the next revision), and [Simon] would like to add a few features like DMA and a proper framebuffer.

Despite all those problems, I can’t see a better way to learn about computer architecture the hard way (i.e. 80’s microcomputers as opposed to futzing around with a Raspberry Pi). You’ll also get a really wonderful computer system that will show the power of 80s-era electronics, with the very hopeful goal of spreading the gospel of retrocomputing with the venerable Saint MC68000.

If you’d like to add your two cents – if having an Open Hardware 80s microcomputer is a good idea, or some technical requests such as adding a proper 68000 CPU to future designs, leave a note in the comments or on the forum [Simon] set up on his Kiwi page.

I think it’s a cool idea, but then again I’m probably blinded by how cool an 80s computer of this caliber is. The fate of this project is now in your hands.
Robotic Odometry From An Optical Mouse

One of the problems future engineers spend a lot of class time solving is the issue of odometry for robots. It’s actually kind of hard to tell how far a robot has traveled after applying power to its wheels, but [John] has a pretty nifty solution to this problem. He converted an optical mouse into an odometry sensor, making for a very easy way to tell how far a robot has traveled  regardless of wheels slipping or motors stalling.

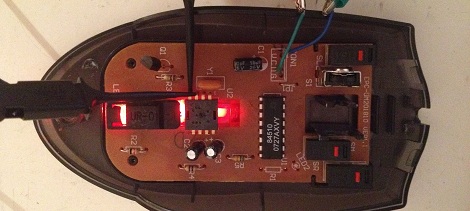
The build began with a very old PS/2 optical mouse he had lying around. Inside this mouse was a MCS-12085 optical sensor connected to a small, useless microcontroller via a serial interface.

After dremeling the PCB and discarding the microcontroller, [John] was left with an optical sensor that recorded distance at a resolution of 1000dpi. It does this by passing a value from -128 to 127, rolling over every time the sensor moves more than 3.2 mm.

As far as detecting how far a robot has moved, [John] now has the basis for a very simple way to measure odometry without having to deal with wheels slipping or motors stalling. We can’t wait to see this operate inside a proper robot.

Hackaday Links: Sept 15, 2012

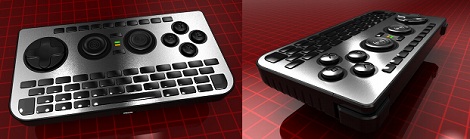
Very tiny keyboard

The idea behind the iControlPad2 is pretty simple – just take the slide-out keyboard from a phone, discard the phone part, add two analog sticks and a D-pad, and put Bluetooth in it. It makes for a very small keyboard perfect for controlling a Raspi, a home media server, or even a phone or tablet. I think it’s cool, anyway.

I mustache you a question. Where’s the Hawaiian Shirt?

At her local hackerspace, [Akki] heard someone pronouncing Raspberry Pi as, “Raspberry pee eye.” Of course this joke needed to be taken to its fullest absurdity, so [Akki] gave her Raspi a [Tom Selleck] mustache. Slightly better than the Googly Eyes Arduino shield.

Not giving a Flip about proprietary batteries

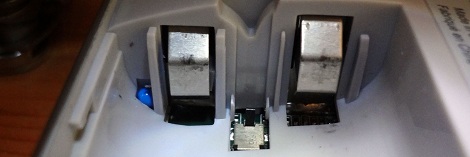
When powering a Flip video camera, [Dan] had two choices: regular AA batteries, or a proprietary battery rechargeable through the USB port. When the rechargeable battery is inserted, it closes a small switch telling the Flip it can recharge these batteries. Wanting to put his own rechargeable batteries in his camera, [Dan] closed the switch with a little bit of cardboard, thus allowing him to use his own NiMH rechargeable batteries.

Building operating systems from scratch

A while ago we posting something about a Cambridge professor putting up a tutorial for developing an operating system from scratch on the Raspberry Pi. [Joey] decided to follow these tutorials and has a blog dedicated to his adventures in OS development. It’s not a custom UNIX-inspired OS yet….

Put a quarter in, get a goldfish

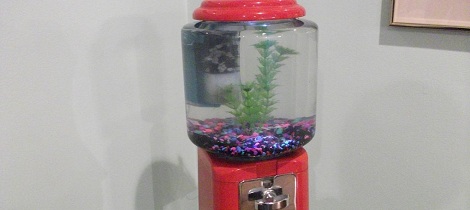
[Yooder] over on Reddit spent a week turning a gumball machine into a fish tank. A very nice build that is now home to a few neon tetras. Check out the imgur album for a full build walkthrough.

Helmet Of Many LEDs Built For Burning Man

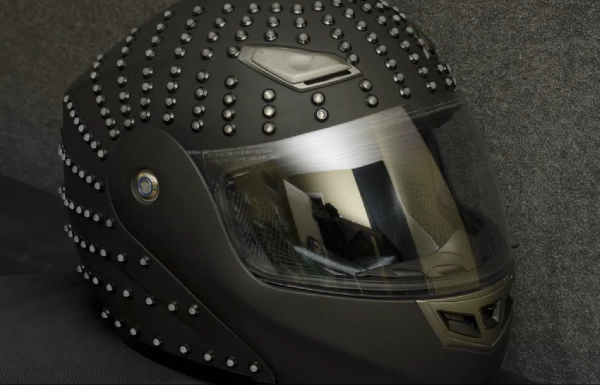
This motorcycle helmet was heavily altered to accept all of the hardware that goes into driving that huge array of LEDs. [Brian Cardellini] built it to wear at burning man. He claims to have been in over his head with the project, but we certainly don’t get that feeling when we see the thing in action. It’s light on build details, but there are plenty of demo shots in the video after the break. The animation and fading action really gets started about a minute and a half into it.

One of the early frames of the video is a shot of the parts order webpage. Since it’s an HD clip we were able to glean a few bits and pieces from that. It includes a MAX7219 LED Display Driver and fifteen 25-packs of Blue LEDs. Now that chip is a great choice, and one of the later shots shows two of them on breakout board driven by an Arduino. The look is very clean since he carved out most of the helmet’s padding to make room for the electronics.

Continue reading “Helmet Of Many LEDs Built For Burning Man”

16×8 Pixel Laser Projector

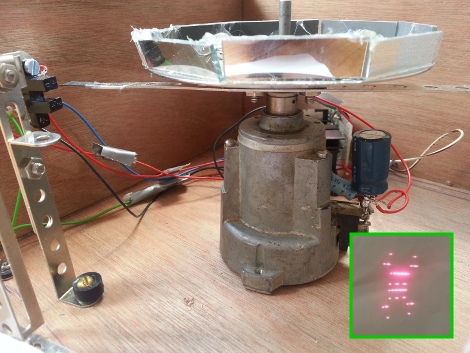
[Michiel] gave us a little shout-out by drawing the Hackaday logo with his recently completed 16×8 pixel laser projector. It uses a spinning set of mirrors mounted at slightly different angles to redirect the path of the red laser diode.

The projector is driven by an Arduino. To give it more than just a hard-coded existence [Michiel] included an Xbee module. This lets him connect to it with a computer in order to stream messages. One of the demo videos linked in his project log shows the web interface he coded which will push a message typed in the submission form out to the projector where it is scrolled like a marquee.

This type of spinning display is one of a few common methods for making laser projectors. In the image above you can see the optical sensor which is used to sync the diode with the spinning mirrors, each of which is responsible for a different row of pixels. He lists off several things that he learned when working on the project. We think the most important is the timing issues which go into something like this.

Dinosaur Hoodie To Remind You Halloween Approaches!!

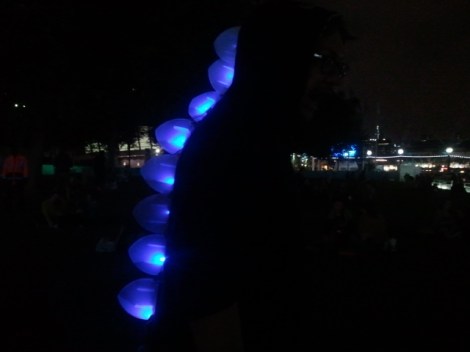
[Tom’s] dinosaur hoodie would make a bang up Halloween costume. It’s a glowing version of the bony plates you’d find on a Stegosaurus. Not only does it look great at night, you should be able to put one together or yourself in an afternoon.

He used a laser cutter to make the translucent fins, but it would not be hard to cut them all out by hand. Each piece is two sides of the plate connected by a narrow rectangle which leaves room inside for an RGB module. These are chained together and controlled by an Arduino (most likely using SPI or I2C, we’re not sure which), then sewn on the back of a hoodie.

Update: [Matt] made a derivative of this design. The plates are pointy like a stegosaurus.

Send in those Halloween projects

Which reminds us… Halloween quickly approaches and we haven’t seen the usual onslaught of awesome. We love this time of year because of the ingenuity that comes out to play in the costumes, yard decor, and scare tactics being prepared for the big night. Please send a link to your project and we’ll start pumping out the holiday features.

To get you thinking, here’s a set of folding wings used in a costume, and a possessed powerwheels to chase down the little ones. Don’t sit on your hands, we want to hear about every project!

Sculpting With LCD Pixels

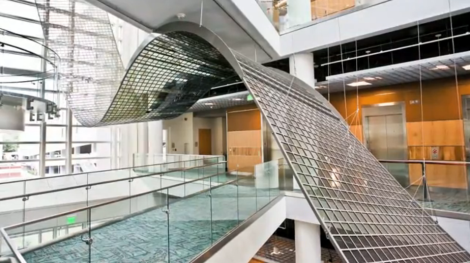
Each one of the small squares in this sculpture is actually an LCD cell, and this is just the tip of the iceberg. What you see here is just a small portion of the sculpture that spans multiple floors of the atrium at the North Carolina Museum of Natural Sciences. It’s made up of multiple panels hosting a total of 3600 LCD cells. We first saw it way back in April, but now there is a ‘making of’ video which you can see embedded after the break.

The project took about 18 months to complete, starting with a 256 pixel prototype. That served as proof that the non-lit hardware would achieve the look they were going for. From there they designed the code which would generate patterns on the sculpture and used it to drive a digital model (we’d bet that was to get the go-ahead and funding). The fast-motion footage of the three-man assembly line formed when soldering up the circuits is fun to watch, the real nail-biting stuff comes when they start mounting the fragile panels in the space.

Continue reading “Sculpting With LCD Pixels”