[ch00ftech] Visits A Shenzhen Market

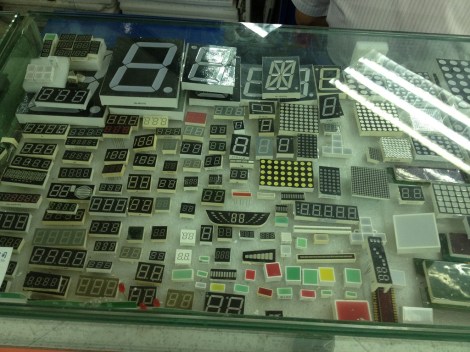
On a business trip, [ch00ftech] visited a Shenzhen electronics market and documented the trip. Some of the attractions included multiple Apple stores of questionable authenticity, stores selling PC components with no manuals, drivers, or packaging, and a variety of LEDs and lasers.

[ch00ftech] showed off the loot from the trip, including breadboards, perf boards, LED matrices, and an RFID reader all for very low prices. There’s also the Class 4 laser pointer that cost about $120 and has a power output of “between 500 mW and 8000 mW.” Given the 500 mW power restriction on lasers sold in the US, it’s fair to say that this thing should be handled with care. Hopefully the included safety classes actually block the specific wavelength of the laser.

The staff in these stores were very knowledgeable and knew part numbers and inventories by memory. One of the biggest surprises was just how low the prices were.  While Radio Shack has started to carry some more parts for hackers, it seems that nothing stateside can compare these Chinese electronics markets.
GameGun Makes Call Of Duty More Immersive

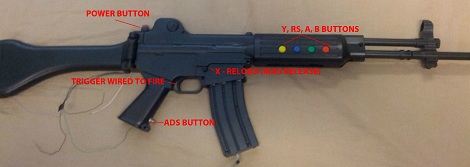
In an effort to improve his Call of Duty gaming experience, Reddit user [Harbingerx81] built a custom controller out of an Airsoft gun. Not only does this gun feature all the buttons and joysticks normally found on a stock xbox controller, it’s also loaded up with accelerometers and gyros so his on-screen character points his gun wherever [Harbingerx] points his gun.

From the imgur album, we can see that [Harbingerx] modded an Airsoft gun with a few buttons, d-pads, and switches optimized for Call of Duty. What really gets us is the clever use of accelerometers and a gun-mounted HDMI display (with a wireless HDMI adapter) to provide a home-made virtual reality setup for one of the most popular games.

Building this controller/display wasn’t cheap – it cost [Harbingerx] upwards of $600. A good price, we’re thinking, since the Oculus Rift will be north of $300 along with the added cost of a gun-shaped xbox controller.

A Portable, WiFi-enabled Kinect

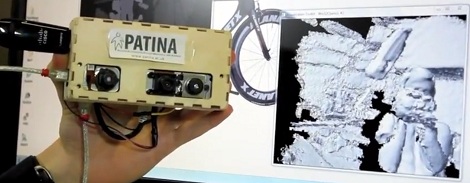
The builds using a Kinect as a 3D scanner just keep getting better and better. A team of researchers from the University of Bristol have portablized the Kinect by adding a battery, single board Linux computer, and a WiFi adapter. With their Mobile Kinect project, it’s now a snap to automatically map an environment without lugging a laptop around, or just giving your next mobile robot an awesome vision system.

By making the Kinect portable, [Mike] et al made the Microsoft’s 3D imaging device much more capable than its present task of computing the volumetric space of the inside of a cabinet. The Reconstructme project allows the Kinect to be used as a hand-held 3D scanner and Kintinuous can be used to create a 3D model of entire houses, buildings, or caves.

There’s a lot that can be done with a portabalized, WiFi’d Kinect, and hopefully a few builds replicating the team’s work (except for replacing the Gumstix board with a Raspi) will be showing up on HaD shortly.

Video after the break.

Continue reading “A Portable, WiFi-enabled Kinect”

Etching Brass And Copper With The Etchinator

If you’re in to making your own PCBs at home, you know the trials of etching copper clad boards. It’s slow, even if you’re gently rocking your etch tank or even using an aquarium pump to agitate your etching solution. [cunning_fellow] over on Instructables has the solution to your etching problems, and can even produce printmaking plates, jewelry, photochemically machine small parts, and make small brass logos of your second favorite website.

The Etchinator is a spray etcher, so instead of submerging a copper clad board into a vat of ferric or cupric chloride, etching solution is sprayed onto the board. We’ve seen this technique before, but previous builds use pumps to spray the etching solution and cost a bundle. [cunning_fellow]’s Etchinator doesn’t used pumps; it’s driven by two cordless drill motors sucking up etching solution through a hollow tube.

The basic idea behind the build is sticking a vertical PVC pipe in a box with etching solution. Mount an impeller in the bottom of the tube, drill many small holes in the side of the tube, and spin it with a motor up top. The solution is sucked up the tube, sprayed out the sides, and falls back down into the reservoir. Put a masked off copper board in the tank and Bob’s your uncle.

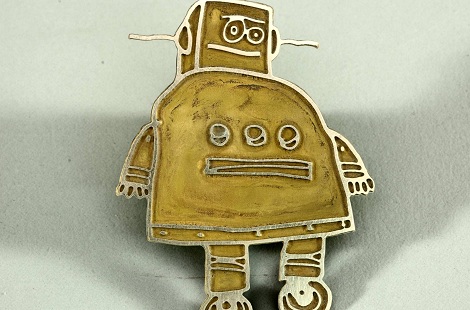
Not only did [cunning_fellow] come up with an awesome PCB etching solution, but the same machine can be used for etching brass plate for printmaking, and even photoetching brass sheets for model planes, trains, and automobiles. The quality is really amazing; the Instructables robot above was etched out of 0.7 mm thick brass, with an etch depth of 0.35 mm with only 0.05 mm of undercut. A very awesome build that is already on our ‘to build’ project list.

700+ Hp Electric Honda S2000 Built By High School Senior

[Juan] dropped us a note to let us know about a little project he’s working on. A few years ago, he bought a Honda S2000. It served him well, but now he’s converting it to electric power, and it’s going to be a beast.

[Juan] is using 104 battery packs each containing 4 cells in parallel. The total output of his battery assemblage is 686 kilowatts, or 920 horsepower. [Juan] is assuming his drive train will be 85% efficient, meaning his wheels will be getting 782 horsepower and 1500 ft/lbs of torque at 0 rpm. Yes, this thing is going to scream.

A project of this caliber is usually undertaken by gear heads with decades of experience, but that’s not the case for [Juan]; he’s still a senior in High School. A build this awesome can only portend a very bright future as an engineer and certainly a few drag race wins. This car is going to be a monster, and we can’t wait to see it on the track.


Video Preview: New IOIO Prototype

We got our hands on this prototype of the new IOIO design. It’s a breakout board that makes adding hardware to an Android device pretty easy.  [Ytai Ben-Tsvi] sent it our way, and took a bit of time to explain some of the differences between this board and the original version. You can see our video preview embedded after the break.

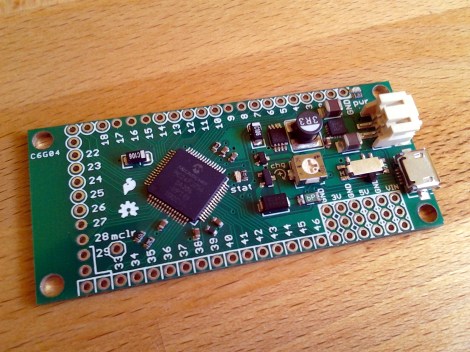
The size and form factor of the board remain the same, but the choice and layout of parts has changed. Most obviously, the USB-A connector is gone, replaced by a USB mini-B micro-B connector. This makes it possible to use the board as a USB-on-the-go device, or as a USB host device with the help of an adapter that will ship with the board. The JST connector is for external power. The previous revision included a footprint for it but it was never populated. There has also been an upgrade to the voltage regulation circuit, using a newer part as the switch-mode regulator.

There was a last-minute bug discovered in the layout. [Ytai] wants iron-clad 5V to ground short protection and is re-spinning the board to ensure he achieves that goal. He can’t say for sure, but as we mentioned in our previous post about the prototype, a price cut is planned. It could cut the current price of $50 down to just $30, but that won’t be decided until all of the choices have been made for the first production run.

Continue reading “Video Preview: New IOIO Prototype”

How To Make Your Own Piezoelectric Speaker

Piezoelectric speakers are found all around you, from musical greeting cards to the tweeters in your car stereo setup. Making your own piezo speakers is actually very easy, as [Steven] shows us after replacing the speaker in a clock radio.

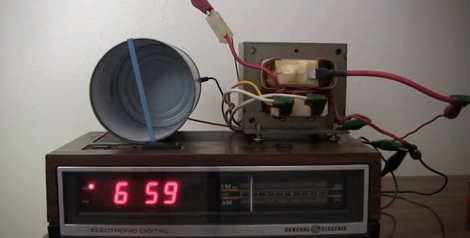
Piezo speakers require a small crystal with piezoelectric properties, so this build is the perfect followup to [Steven]’s tutorial for making Rochelle salt crystals. After attaching two strips of aluminum foil to his Rochelle salt crystal, [Steven] took the wires that previously went to the clock radio speaker, connected them to the crystal, and turned on the radio. When attached to a tin can, the newly created piezo speaker created a little bit of sound, but the results weren’t very impressive.

To boost the sound output of his homemade speaker, [Steven] needed to increase the voltage across his piezo speaker. At first he tried a doorbell transformer with somewhat better results, but much more sound was produced when he used a transformer taken from a microwave oven.

After experimenting with his microwave transformer and Rochelle salt, [Steven] moved on to piezo elements found in BBQ and cigarette lighters. These homemade speakers were much clearer than the chunk of Rochelle salt he was using previously, and surprisingly produced about the same audio quality as a commercially made piezo speaker [Steven] picked up at Radio Shack.

You can check out the build video for [Steven]’s crystal speaker after the break.

Continue reading “How To Make Your Own Piezoelectric Speaker”