Use Your TV Remote As An HID Mouse

[Vinod’s] latest project lets him use a TV remote control as a mouse. It may not sound like much, but he did it with a minimum of hardware and packed in the maximum when it comes to features.

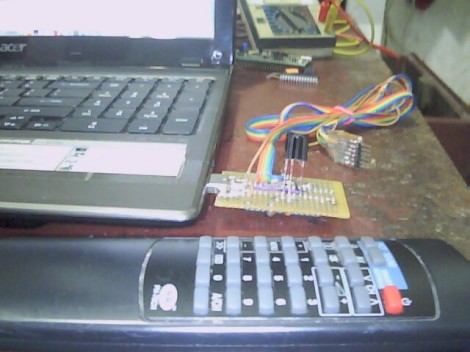
He’s using an ATmega8 to read the remote control signals and provide USB connectivity. With the V-USB stack he enumerates the device as an HID mouse. One note of warning, he used the PID/VID pair from the USBasp programmer project. If you use that programmer you’ll need to uninstall the drivers to get this to work (we think this is only necessary on a Windows box).

The cursor can be moved in eight directions using the number pad on the remote. The numeral five falls in the center of the directional buttons so [Vinod] mapped that to the left click, with the zero key serving as right click. He even included the scroll wheel by using the volume buttons. The firmware supports cursor acceleration. If you hold one direction the cursor will move slowly at first,then pick up speed. Fine adjustments can be made by single clicking the button. Check out his demonstration embedded after the break.

Continue reading “Use Your TV Remote As An HID Mouse”

Father/son Team Goes Big With Backyard Observatory

Oh that? It’s just the backyard observatory we built last summer. You know, for fun. This is a conversation we image [Kakon24] and his dad are having quite often these days. They’re astronomy interests just got a big equipment upgrade when they built a huge observatory on their homestead. Now we don’t proclaim to know a lot about observatory quality, but this is head and shoulders above what most people manage to acquire.

It isn’t a simple build either. It’s a full-fledged building of its own, starting with a poured foundation, then stick framing which was covered in stone work. The images tell the story of the build, but for information on the hardware you’ll want to read through the comments over on the Reddit Astronomy thread. Sounds like the scope itself cost over 100 grand so having a proper building to protect it is a must.

Drag And Drop Images For 3D Printing

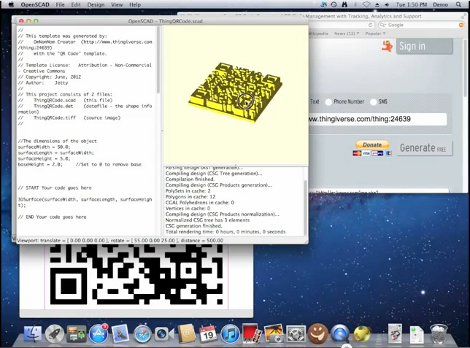
This piece of software called OmNomNom works with OpenSCAD to turn 2D images into 3D models. It’s literally a drag-and-drop process that renders almost instantly.

Here the example is a QR code, which is perfect for the software since it’s a well-defined black and white outline in the source image. But the video after the break shows several other examples that don’t rely on this simplicity. For instance, the Superman logo, which uses four different colors, is converted quite easily. There’s also a depth map of [Beethoven’s] bust that is converted into a 3D object. The same technique can be used to create terrain from topographic source images.

Once the file has been converted to a model it can still be tweaked like normal. This allows you to customize size and depth to suit your needs. This is where OpenSCD comes into play, but if you don’t use that program you can still export an STL file directly from OmNomNom for use on your 3D printer.

Continue reading “Drag And Drop Images For 3D Printing”

Small RC Car, Full Size Controller

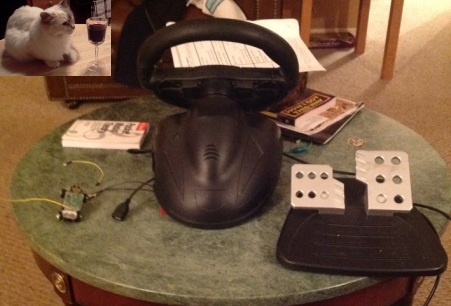
[Noah Farrington] sent in his latest hack over at his intensely interesting blog; converting a racing wheel arcade controller to a remote control for his RC car. He picked up the arcade controller for free, and decided it would be much cooler to control an RC car he had handy with it. He elected not to use an Arduino for this project *gasp* ,and do it all with hard logic. He did, however, use the Arduino in the design process *phew* in order to figure out the working of the RC control board. The final board is pretty simple compared to the Arduino solution, a few op-amps, a voltage regulator, and some passive components. Not bad at all for what [Noah] claims is one of his first big projects. Maybe he’ll post a video of it in action some time soon.

MIDI Swiss Army Knife Built From An MSP430

[youtube=http://www.youtube.com/watch?v=0hvQUXcXlEg&w=470]

Hot off the heels of his web server for the TI MSP430, [Rob] shared a MIDI booster pack for the MSP430 LaunchPad, an exceedingly inexpensive and ever more capable microcontroller that is getting somewhat of a cult following.

[Rob]’s MIDI booster pack contains a MIDI in and out port as well as just about whatever MIDI manipulation apps his mind can dream up. So far, [Rob] has a MIDI arpeggiator, a harmonizer, an echo, filter, s MIDI monitor that displays incoming messages on a Nokia LCD, and a controller that interfaces with a light sensor or joystick to manipulate MIDI variables.

Back in the 80s (and 90s, and even into the aughts), a dedicated MIDI arp or harmonizer was a crazy expensive piece of kit, especially considering how simple the device is. Those dedicated rackmount boxes can now be replaced with a TI LaunchPad and [Rob]’s booster pack.

You can check out the arp and harmonizer in action after the break.

Continue reading “MIDI Swiss Army Knife Built From An MSP430”

The Many Iterations Of [Joe’s] PCB Business Card

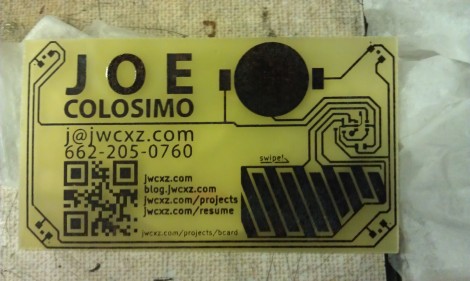
[Joe Colosimo] is putting on a show with his PCB business card project. The idea isn’t new, but his goal is to keep it simple and undercut the cost of all other PCB cards he’s seen. This is the third generation of the board design, and he’s just waiting on some solder mask solution before he tries running it through the reflow oven.

The first two prototypes used some through-hole parts. Notably, the battery was to be positioned in a circular cut-out and held in place by a metal strap and some bare wires. But he couldn’t quite get it to work right so this design will transition to a surface-mount strap for one side, and the large circular pad for the other. At each corner of the board there is a footprint for an LED. He tried milling holes in the board to edge-light the substrate. Now he just mounts the LED upside down to give the board a blue glow. The LEDs are driven by an ATtiny10 microcontroller which takes input from the touch sensor array at the bottom right.

He etched a QR code on the board which seems to work better than the milled QR experiments we saw back in April. The link at the top point’s to [Joe’s] main page on the card. Don’t forget to follow the links at the bottom which cover each part of the development more in-depth.

[Thanks Skitchin]

Monitoring Your Home Energy Use

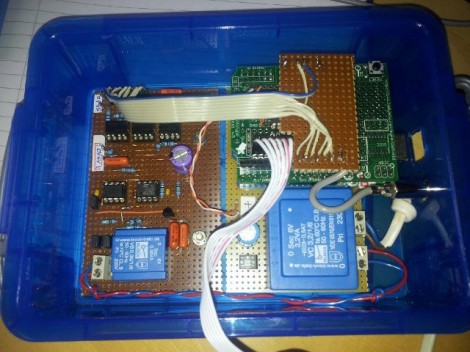
[Dave’s] been elbow-deep in mains voltage while building this home energy monitoring rig. He started with an approach that is different from most we’ve seen before. He wanted a system that could make a linear measurement to keep the accuracy as high as possible. His first thought was to use a opto-isolated linear amplifier to measure voltage, but ended up altering that plan since he’s looking for digital values when all is said and done.

He’s using an ADC on the mains side of the interface board, then sending the digital values to an Arduino with opto-isolators to keep the high voltage separate from the low. This does complicate things a little bit, as he has low voltage rails on either side; 0V and 5V to run the ADC on the mains side, and separate 0V and 5V to run the Arduino. To solve the problem of accurate current measurement over the full range a house uses he opted for a Programmable Gain Amplifier. It’s addressed via SPI and allows him to adjust resolution to facilitate accurate measurement of very small currents. We think anyone who has tried to measure small appliances (like an alarm clock) with a Kill-A-Watt and gets a zero reading will appreciate this.

The Arduino sends data via a serial connection, which [Dave] is currently graphing using his laptop. It would be nice to see a simple web-server using the Ethernet shield (or a different board like the RPi) so you could log in from the couch and see what’s been going on with your home grid.