Scavenging From Consumer Electronics To Make A Flame-powered Phone Charger

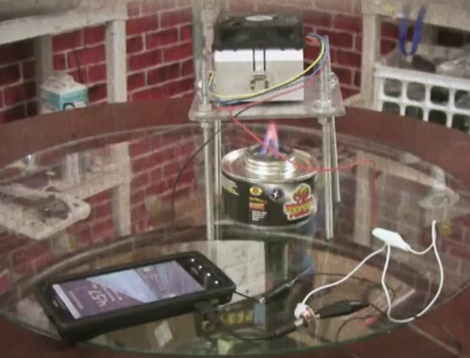
[Gigafide] just finished building this flame-powered phone charger. The concept is not new. He grabbed a Peltier cooler and used the temperature differential between a flame and a heat sink to produce electricity used by the charger. If you search around here enough you’ll find plenty of candle-powered devices, and a few hacks that use a Peltier device in a bit more interesting way. But we really like his high-production value video, straightforward explanation of the concepts, and ability to source the components in consumer devices. We don’t think you’ll be disappointed by his video found after the break.

The Peltier device comes out of a USB drink chiller. It is supported by a metal stand made from electrical box covers and threaded rod. Underneath he’s using a gel fuel can used by the food industry, and above he’s got  CPU heat sink and fan. This setup puts out around 1.5V but he’ll need a boost converter to charge a phone with that. A single AA battery charger meant to power your phone in a pinch is perfect for this application.

Continue reading “Scavenging From Consumer Electronics To Make A Flame-powered Phone Charger”
Adding Kilometers To A Radio Meant Only For Meters

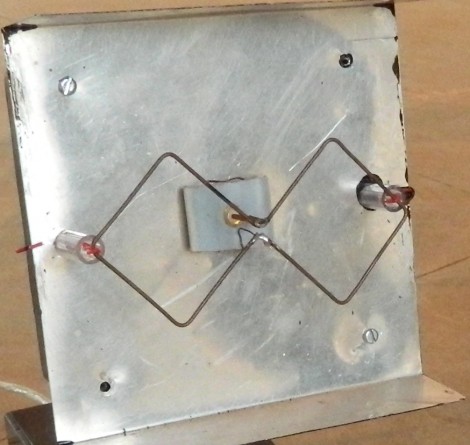
The NRF 24L01+ radio transceiver can be found in a lot of wireless project builds. But it’s only meant to work at a range of a few meters. [Achu Wilson] found that he could greatly extend the range by as much as 2 kilometers. All he needed to do was build this high-gain antenna.

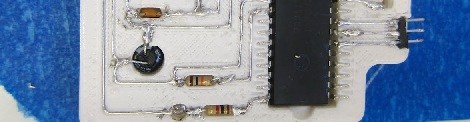
He already had an idea of what he wanted to use the RF link for, so a directional antenna is no a problem. He chose a biquad setup with a back reflector, then used NEC2 to model the design and tweak it for the best performance possible. It only took him about two hours to complete the build, and manages a 10 dB gain. Not bad for some wire and a scrap of sheet meta.

This is the same transceiver chip used in the SNES wireless mod. If only we had a really powerful set of binoculars we could play the extremely long-distance game of Mario Kart we’ve always dreamed about.

Printing Circuitry On A RepRap

Over on the RepRap blog, [Rhys] has been experimenting with molten metal to build circuits with the RepRap.

Last June, [Rhys] found a neat alloy made of Tin, Bismuth, and a little bit of Indium that melts at around 130° C, and has just the right properties to be extruded with a standard RepRap setup. The results were encouraging, but the molten metal quickly dissolved the brass and aluminum nozzles [Rhys] was pushing liquid metal through.

The solution to this problem was solved by anodizing the heck out of a RepRap nozzle to make a hard, protective oxide layer. Already [Rhys] has logged hundreds of hours squirting molten metal out of his RepRap with no signs of any damage to the nozzle.

Since [Rhys] figured out how to print in metal, he whipped up an extremely minimal Sanguino board. You can see this RepRapped PCB running a LED blink program after the break. Now to work on the RepRap pick and place…

Continue reading “Printing Circuitry On A RepRap”

Teaching BeagleBone To Play With LIDD Displays

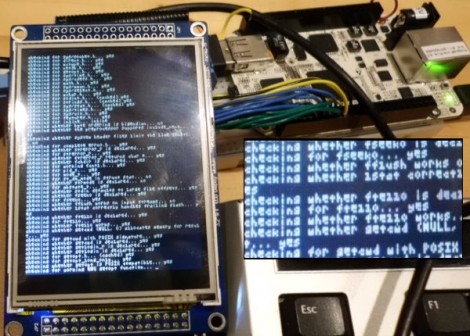
[Chris] hasn’t managed to get his hands on a Raspberry Pi yet, so he ordered a BeagleBone and got down to business. He was surprised to find that there isn’t much info out there about using LIDD type displays with the hardware. This protocol is used in many of the 320×240 smart LCD modules on the market, so he hammered out his own drivers and is sharing the details.

The system is designed to run a Linux kernel and [Chris] has chosen to go with Angstrom. His journey started by working out how to compile and patch the kernel himself. From there it was just a matter of getting the pin mapping right, and compiling a driver (it sounds way too simple when put like that).

Apparently he’s pretty close to getting the X desktop environment up and running. No idea what he plans for the hardware, but we’re all for people sharing their work to make it easier for others. Thanks!

How To Build A Competitive Battle Robot

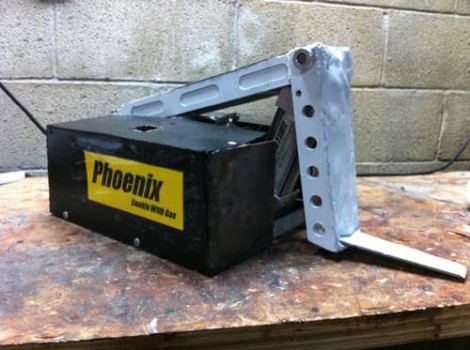
Ever wonder what’s under the hood with a competitive battle robot like this one? It’s usually a big secret as teams don’t care to give their competition any help. But [AlexHrn] decided not only to give us a peek, but also shows us his step-by-step build process for Phoenix, the 30 pound flipping battle robot.

[Alex] has already seen quite a bit of success with a different robot, but he couldn’t quite beat another competitor whose bot included a flipping arm which threw its competition across the ring. So [Alex] decided to join in on the technique with this build. The arm itself uses air pressure to exert a large force very quickly. Inside, a paintball gun tank powers the pneumatic ram. It looks like this tank is charged up before the competition and only gets about 12 shots before it’s depleted. You can see the power in the quick clip after the break.

For locomotion the unit uses a couple of cordless drill motors. These have a fairly high RPM and work well when powered by batteries.

Continue reading “How To Build A Competitive Battle Robot”

Accelerometer May Help Make You A Sharpshooter

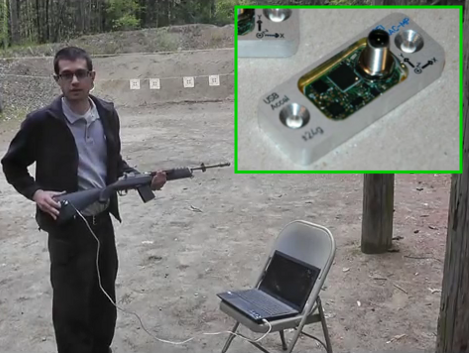
[Chris Suprock] is interested in using technology to improve your accuracy with a firearm. To that end, he’s using an Accelerometer mounted to a gun to gather feedback about each shot.

The hardware setup is pretty simple. We don’t have specific details, but it looks like he’s using a QFN accelerometer chip like you would find in a cellphone. The milled aluminum mounting bracket that holds the board has ‘USB’ printed on it, although the connector is something we don’t really recognize.

In the video after the break [Chris] demonstrates the feedback he can get when the device is mounted on the stock of a Ruger Mini-14. The graph of the data makes it obvious when the trigger was pulled. The most useful part may be the period leading up to that event, as it shows any unnecessary movement prior to the shot. If you’re into sport shooting, this may be one more tool that will help give you the edge on your competitors.

Continue reading “Accelerometer May Help Make You A Sharpshooter”

A New Method For Adding Audio Input To A Sansa Clip+

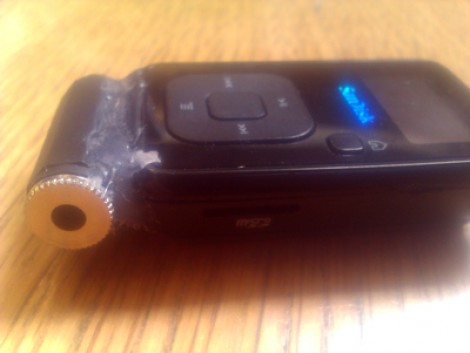
The Sansa Clip+ is a nice little MP3 player and recorder. But it doesn’t offer an input connector, instead relying on the built-in microphone. [Simon Frank] wanted to extend its functionality so he figured out how to add a standard audio jack for analog input.

This is not the first time this has been done, but [Simon] has found a different method of accomplishing the task at hand. The other external input hack we saw cannibalized the internal microphone, rerouting its connections as an external input. But the method seen here keeps that microphone intact. The device includes an FM radio chip which is attached to an ADC on one of the devices other integrated circuits. [Simon] just patched into those signals. Now all he has to do is set up the device to record from the radio and connect his source to the jack which he epoxied to the base of the enclosure.