Illogical Voltage Double Uses Logic

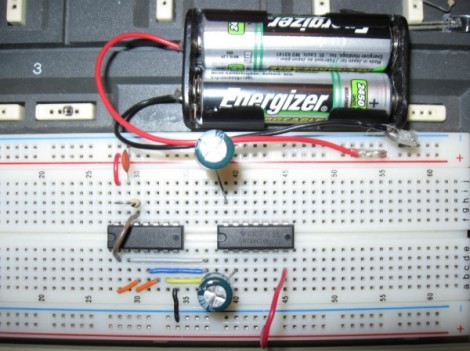
[Jonathan Thomson] just finished writing up his entry for the 7400 logic contest. It’s a voltage doubler that uses a 74HC14 logic chip. Because this is not at all what the chip was meant for–and he’s a sucker for puns–he’s calling it the Illogical Dickson Doubler.

What he’s got here is basically a charge pump built from a set of diodes and capacitors. On the breadboard you see two chips, one is used as a clock signal generator for the other which is acting as part of the charge pump. We’ve seen a string of hacks that misuse the protection diodes on the inputs of logic chips. In fact, [Jonathan’s] setup uses the same back power concept that barebones PIC RFID tag did. You may remember in that project the chip was being powered from one of the I/O pins, with the VCC pin not connected to anything.

We’ve embedded a video after the break with shows some voltage measurements, as well as an LED being powered from the doubling circuit.

Continue reading “Illogical Voltage Double Uses Logic”

Light Painting Nyan Cat With An Arduino

You too can paint your favorite meme in light with just a few tools. [Skywodd] brought together a couple of different projects to make this happen. He had already built a large POV display and now uses a DSLR with long exposure to create light paintings (translated).

The Arduino-powered display is built from a strip of 35 RGB LEDs. Now, that’s four pins per LED but one of is ground, leaving just 105 pins that need to be addressable. A couple of things make this manageable. First, he etched his own circuit boards for the LED strips. This breaks out the contacts to the edge of the boards and simplifies the soldering a bit by taking care of the ground bus. Secondly, he’s using M5450 LED display drivers for addressing. After the break you can see the video of the prototype hardware (in French but blinky action starts at about 2:30).

If you’re looking for an easier way to do this, check out the light painting that uses manufactured LED strips.

Continue reading “Light Painting Nyan Cat With An Arduino”

Cheap Acoustic Panel DIY

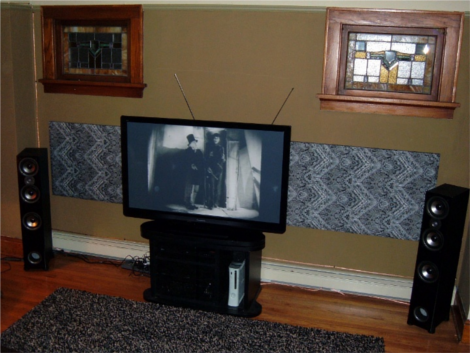
[Eric Wolfram] wrote in to let us know about a simple and cheap acoustic panel DIY he put together.  When installing a home theater acoustics are often neglected (especially if you spend so much on the TV you cannot afford any furniture for the room) resulting in reduced listening quality and poor spacial sound imaging from your surround system (also responsible for the furniture problem). The addition of sound absorbing panels helps control the acoustics of the room and may even class up the place a bit.  These are also come in handy for home studio usage where a low level of reverberation is preferred.

The panels are relatively simple to produce on a budget, just a sheet of 2″ thick dense fiberglass board glued into a wooden frame and covered in a sound-transparent fabric. [Eric] goes into a lot of the material selection process to help you along your way. The best part about the project (aside from its obvious utility) is that all of the materials can be found cheaply at your average home improvement store, with the exception of the fabric.  [Eric] mentions that you can substitute colored burlap if need be.  Once the panel is assembled and glued it just has to be hung on the wall of your choice like a large heavy picture frame. This could certainly help the acoustics and reduce some slap-back echo in your warehouse/shop. We might have to try this one over the weekend.

Thanks [Eric]!

A Very Simple Android Recon Vehicle

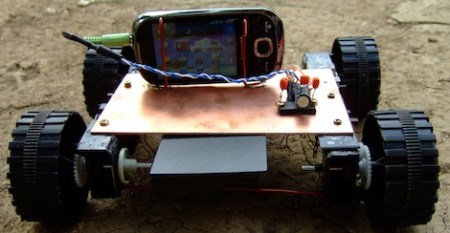
Desperately in need of a graduation paper, [Andrei] decided to build a few computer controlled recon vehicles (PDF warning), and we’re really impressed with the minimalist approach [Andrei] took.

The Computer Operated Recon Entity (C.O.R.E.) mk. I is based around a laptop. Instead of an Arduino, [Andrei] used a car stereo amp to control the motors. The two channel amp [Andrei] picked out has four outputs. Tying a motor to each output gives a four-wheel drive robot that’s really clever in its simplicity. With an onboard webcam, [Andrei] can do live video streaming from his remote vehicle. Outputting a specific tone with the sound card allows for full control of the robot.

The C.O.R.E. mk. II uses a Samsung Galaxy I5500 phone – the cheapest Android phone [Andrei] could find. The setup is similar to the mk. I C.O.R.E. with a WiFi connection sending video back to a base station. Control of the two motors is still handled by playing sound files and sending that to a stereo amp connected to the motors.

Check out the C.O.R.E. mk. II going Bach and forth after the break.

Continue reading “A Very Simple Android Recon Vehicle”

Extending Battery Life While Taking Time Lapse Photos

msp430_camera_control

[Peter] loved using his GoPro HD camera, but he found the time lapse functionality a bit lacking. It wasn’t that there were not enough settings to satiate his needs, but that the camera would run through its batteries in just a few short hours.

He found that the camera did not turn off or enter any sort of sleep mode between shots, wasting precious battery life. He could have simply added a bigger external battery pack to the camera, but for the sake of portability, he had a far better idea in mind.

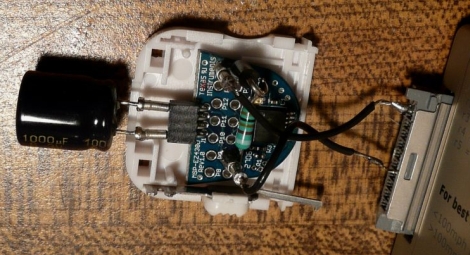
The GoPro has a pretty well documented interface called the “Hero Bus”, so all it took was a little bit of online research before [Peter] had all the information he needed. The camera has a neat feature that immediately snaps a picture when it is powered on, so he decided that he would use a microcontroller to turn the camera on and off at specific intervals, rather than using its built-in time lapse function. He chose a Texas Instruments MSP430 for the job, since it is very well known for being a power miser.

Once he had his code up and running, he connected it to his camera and found that it worked perfectly right off the bat. Now, he can take anywhere between 1,500 and 2,000 shots before the batteries run out, instead of the measly 200 he was getting without the modifications – quite an improvement!

Grab Your Own Images From NOAA Weather Satellites

Can you believe that [hpux735] pulled this satellite weather image down from one of the National Oceanic and Atmospheric Administration’s weather satellites using home equipment? It turns out that they’ve got three weather satellites in low earth orbit that pass overhead a few times a day. If you’ve got some homebrew hardware and post processing chops you can grab your own images from these weather satellites.

The first step is data acquisition. [hpux735] used a software defined radio receiver that he built from a kit. This makes us think back to the software-radio project that [Jeri Ellsworth] built using an FPGA–could that be adapted for this purpose? But we digress. To record the incoming data a Mac program called DSP Radio was used. Once you do capture an audio sample, you’ll need something to turn it into an image. It just so happens there’s a program specifically for weather image decoding called WXtoImg, and another which runs under Linux called WXAPT. Throw in a little post processing, Robert’s your mother’s brother, and you’ve got the image seen above.

[Hpux735] mentioned that he’s working on a post about the antenna he built for the project and has future plans for an automated system where he’ll have a webpage that always shows the most current image. We’re looking forward hearing about that.

Taser Gloves Are A Bad Idea

In a project that you’re sure to read about in police blotter someday, [Jair2k4] built a pair of Taser gloves that will shock your victim with they laying-on of hands.

Not surprisingly, this project was spawned from a conversation at work about what tech would best suit a vigilante crime fighter. [Jair2k4] suggested taser gloves, which drew a laugh, but also stuck in his mind. His prototype takes advantage of the flash circuitry from a disposable camera to step up battery voltage all the way up to 300 volts.

The gloves he’s using are rubberized fishing gloves which help ensure that he doesn’t shock himself. Wire travels from the capacitor to conductors sewn into the fingers and thumb of the gloves He’s got video embedded on his post that shows the bright spark and loud zap of a discharge when the conductors get close to one another. Altoids tins lined with electrical tape house the hardware, with a momentary push button used to charge the devices.

Hopefully criminals will not mind waiting for you to charge your weapons before they attack. But then again, [Jack Buffington’s] own version of a taser glove had the same issue. That one used conductors on the knuckle side of the glove, and involved long wires tethering the glove to a belt pack. Locating that back as a bracelet is a nice improvement on the idea.