Video: Performing I/O With The ATmega328p

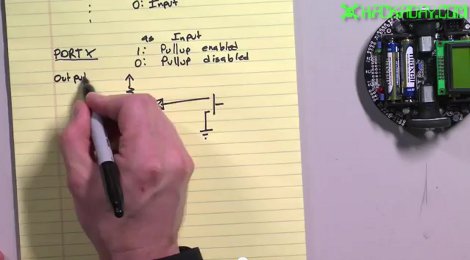
Today we continue on with part 2 of our series where [Jack] shows how to program for the ATmega328p processor using the Pololu 3pi robot. In this video, he starts to dig deeper than last week’s video by showing you how to program in C so that you are directly reading inputs and directly sending data to outputs. Specifically, this video shows how to set up your I/O pins and then how to interface with LEDs, buttons, and a beeper.

There were a few comments on last week’s video about not wanting to buy a 3pi robot to learn on. That’s fine. For this series there really is no reason that you need to use the 3pi robot. We picked it because it is a great device to learn about the ATmega processors since it has so many things that you can play around with to get your feet wet but there really is no reason that you couldn’t wire up a DIP version on a perfboard and still follow along with these videos. In fact, if you have a good writeup about the cheapest possible way to get started with the ATmega series of processors, we’d love to hear about it.

Looking for part 1 of this series? [Click Here]

Video is after the break.
Continue reading “Video: Performing I/O With The ATmega328p”

Creepy Delta Bot Follows Your Every Move

tim_tracking_interactive_mechanism

The creation you see above is the work of art student [Daniel Bertner] who is wrapping up his Bachelor of Fine Arts degree at the School of the Art Institute of Chicago. He calls the incredibly intriguing, yet somewhat disturbing device “TIM”, which is short for Tracking Interactive Mechanism.

A culmination of different projects he has tinkered with over the last year or so, TIM is an interactive delta bot with an attitude. Mounted on the wall of the Art Institute’s Sullivan Galleries, TIM is as interested in you as you are in it. While passers by investigate the curious device, it watches them back, following their every movement.

The robot’s motors are controlled using an Arduino, and its ability to track people standing nearby is provided via a video stream processed with Open CV.

It really is a cool project, and we think it would make for an awesome prop in some sci-fi horror flick. Check out the video below to see TIM’s personality in action – he doesn’t like it when people stand too close!

Continue reading “Creepy Delta Bot Follows Your Every Move”

A Wooden Computer Case, Monitor Stand, And Keyboard

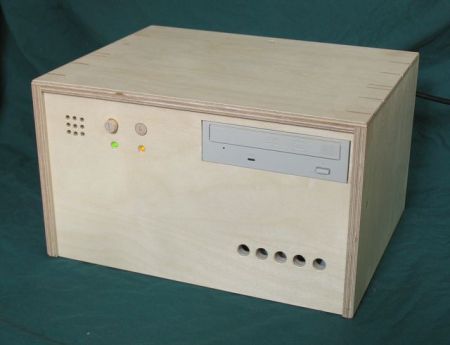
Wood and electronics don’t generally mix nowadays, but if you yearn back to a time when radios and the like had a nice wooden finish, this wooden computer case may be for you. Combine that with a Wooden keyboard enclosure, and maybe even a LCD monitor stand and you’ll have a setup that should fit in with any wood-themed decor!

The wooden computer case is actually more of a cover in that it uses most of the stock case to house all of the components.  It would definitely be a pain, and possibly a fire-hazard, to make a back mounting plate for all the components out of wood. To go along with this, the LCD monitor stand was engineered for a 21″ monitor when the owner of it wasn’t satisfied with the stability of the stock stand.  In the end, he ended up building something quite sturdy and nice looking to replace it.

The highlight for many for the keyboard would be that it was made, in part at least, out of a desire for a Commodore-64 keyboard.  It appears to function well andlooks great, so be sure to check out the other pictures after the break! Continue reading “A Wooden Computer Case, Monitor Stand, And Keyboard”

Cellphone Microscope For About $20

Medical-grade microscope photography for $20 might be a game changer in areas where medical services are unavailable. This particular hack uses an iPhone’s 2 megapixel camera, as well as a tiny glass marble, to magnify a sample to about 350 times its actual size. The two images seen on the left are red blood cells photographed with the improvised microscope. The main issue with this magnification method is a very thin plane of focus that is overcome with processing in software.

This makes us think of the microscope hack that shined a laser through a droplet of water, to project the image on a wall. The concept was later refined to work with samples on glass slides. There are a couple of distinct advantages to using this cellphone-based method. First, the sample can be seen with its true colors. Second, you not only magnify the sample, but you have a digitized image already on a device that connects to the Internet. If you’re trying to make a medical diagnosis this can easily be sent to a qualified professional for analysis.

The team that came up with this technique also figured out how to build a cellphone-based spectrometer for just a few bucks. The image in the upper right is the result of that hack. Both have a step-by-step build guide on the page linked at the top. The microscope is just a glass bead in a piece of rubber, as seen here. The spectrometer is a bit more involved.

[Thanks Fabien]

Multicolor 3D Prints The Hard Way

After drooling over the Makerbot dual-head extruder, [Brett] decided to get off his duff and make a proper multi-color print.

[Brett] has been making a few bottle openers for friends and has been successfully experimenting with switching filaments in the middle of a print. For his “Saturday Killer” bottle opener, he decided to push multicolored prints to the limit. For the “Saturday Killer,” [Brett] decided to print an abridged version of the classic Simpsons quote, “Beer, the cause of, and solution to, all of life’s problems” on the side of a bottle opener in 4 different colors.

The files necessary to print the Saturday Killer were generated in OpenSCAD. The general principle behind the design is to generate separate .STL files for the bottle opener and the sides, split those files into 2-layer chunks, and print those files while constantly adjusting the z-height. It’s not called the Saturday Killer for nothing, so [Brett] had to change the color of his filament 25 times.

A much simpler version of a complex multi-color print is [Brett]’s Shepard Fairey inspired self-portrait. Still, we’re thinking a dual head extruder is somewhere in [Brett]’s future. At least he’s got the technique down.

Unbricking And Upgrading An ASUS Wl520 Router

unbricking_upgrading_asus_wl520

[Andrew] has an ASUS wl520-gU router that he is pretty fond of, despite its numerous problems. CPU clock bug aside, the router only has 16MB or memory like many others on the market. While tooling around with the bootloader he bricked the device, so he decided it was time for an overhaul.

After some searching online, he found that the router could be unbricked by shorting out one of the pins on its flash chip. With an emergency unbrick button installed on the board, he can now reset it in seconds by power cycling the device.

Now that he had a working router again, he proceeded to remedy his initial gripe – the lackluster amount of memory. He soldered in a 512Mbit (64MB) module in the original chip’s place, crossed his fingers and booted the router. It started up just fine, so he ran a few commands to instruct the router to recognize the new memory capacity. After rebooting, he found that it only recognized 32MB of RAM, which was remedied by soldering a 22 Ohm resistor to one of the module’s pins.

It did take a bit of careful soldering to get things upgraded and working, but we think it was well worth the effort.

Halloween Hacks: Scaring Small Children With Huffman Coding

The team over at NerdKits decided they needed to do something for Halloween. Only on Halloween is scaring small children is an admirable goal, so they demoed a way to play creepy sounds after a door has been opened.

To trigger the sound, a magnetic reed switch from an alarm system is attached to a front door. This triggers the microcontroller and with a bit of delay, some creepy audio can be played on a pair of speakers. The team decided to store all the audio data on the flash memory of their ATmega328p, but that wouldn’t allow for a very long scream. To extend the length of the wails of the damned, the NerdKits team decided to use Huffman coded audio.

Because Huffman coding relies on the most common value being assigned the shortest code, the team used a bit of Python and C magic to figure out the optimal encoding for their audio file. After the evil laugh was sufficiently compressed, the microcontroller was programmed to decode the audio and send it to a pair of speakers. The team made all the software for their project available here for your perusal.

Although this project could be thrown together in an hour with an Arduino and an MP3 shield, the NerdKits team wants to get kids to learn how things work, also an admirable goal. [Humberto] from NerdKits put a video up explaining the theory of the project. Check it out after the break.

Continue reading “Halloween Hacks: Scaring Small Children With Huffman Coding”