JTAG Programming Over A Network

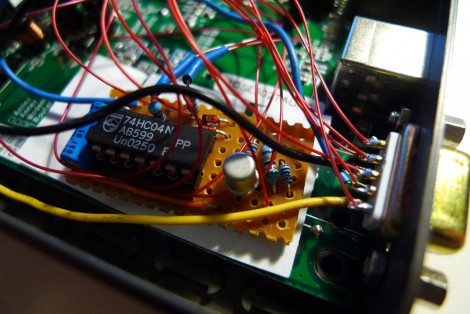
[Matt Evans] was running up against the common programming gotcha caused by disappearing parallel ports. For years he had used a JTAG parallel cable when working with FPGAs but recently realized he no longer owned any machines with that interface available. Instead of shelling out $50 for a USB programmer he a programming interface from an old router.What he’s doing is bit-banging using Linux. In this case it’s a router running a version of Linux which makes his setup Internet friendly but this could be done in the same basic manner on any Linux device with enough available I/O to connect to the device you are programming.
IRobot Gets Awesome Exploding Rope Thingy

[youtube=http://www.youtube.com/watch?v=A3jab7rnIL0]

The iRobot Warrior 710 is shown here touting a new toy called an APOBS or Anti-Personnel Obstacle  Breaching System.  The system is comprised of an explosive rope pulled by a rocket. We know that sounds pretty awesome, and you can see in the video that it is, in fact, pretty awesome. We don’t condone violence, or war. We do, however, love blowin’ stuff up. This footage was just so pretty, we thought we had to share it. What’s even more amazing is that these guys aren’t battling Apple over the name iRobot.

[via botjunkie]

Switchmode LED Flashlight Upgrade

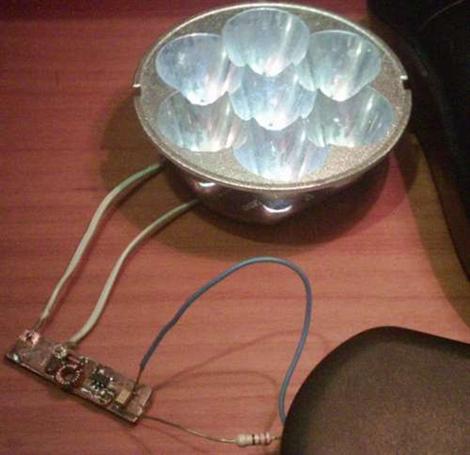
When [Neelandan]’s cheap flashlight’s internal rechargeable battery died, he scrounged for a replacement. Ultimately, the brightness of the light suffered with his new battery, taken from an old cell phone since he had dropped the voltage a bit. Upon inspection he saw that he would have to swap the individual resistors for each lamp to get the desired brightness again. This wasn’t really acceptable as he would have to repeat the process if he used another re-purposed battery with different specs. Instead, he added a new circuit to supply constant brightness until the voltage drops below 2.7 volts. We love to see hardware resurrected, even if it is just a cheap LED flashlight.

May The Phorse Be With You

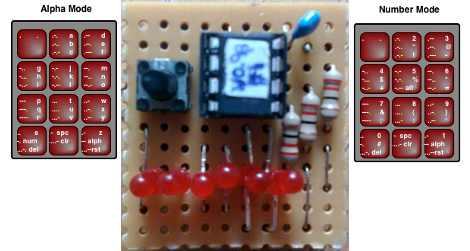
The PhorsePOV by [Julian Skidmore] almost slipped by, but we thought it was a nice easy hack for your Memorial Monday. The gadget uses an ATTINY25 to drive 6 LEDs aren’t standard characters 7 units high? Which when waved in the air produces a readable message. What we were really interested in is the use of a single button for text entry, called Phorse code, or an “easier to learn and remember” version of Morse code. While it seemed silly at first, most of us here could enter messages within a few minutes of trying.

Beginner Concepts: Cascading Shift Registers

There’s a million tutorials out there describing how to use shift registers. If you’re just getting into embedded systems you should know how to use them as they allow you to take three microcontroller pins and expand them virtually without limits. This is due to the serial-in parallel-out nature of these integrated circuits. A key feature of these chips is the ability to overflow, or cascade to the next chip which is what provides the expansibility.

Protostack just published a tutorial that uses this hardware to interface sixteen LEDs using two shift registers. The explanation is short and to-the-point with easy to understand code examples. There’s also something to be said for their crisp and clean breadboarding work.

Take a look at how they do it and then use the concept to make a fancy clock or reduce the pins needed to drive a display.

Bluetooth Boombox

[Nathan] took this boombox and outfitted it for Bluetooth streaming. He took a Motorola DC800, which is meant to make headphones wireless, and connected it to the stereo inputs. The controls for the Bluetooth module were routed to the stock tape deck controls and a little bit of frosted spray paint adds a blue glow to the cassette window. Now he can stream music from his phone, including internet radio, which he’s done in the video after the break.

Did he find the most annoying demo video music ever? You be the judge. Continue reading “Bluetooth Boombox”

LEGO Pick And Place

[youtube=http://www.youtube.com/watch?v=YoXCn4Gh_HA&w=470]

Turn your volume down and take a look at the brick sorting robot in the video above. It’s built using LEGO and powered by four different NXT modules. It sorts differently colored bricks on the intake conveyor and places them on three output conveyors. The build is solid and was [Chris Shepherd’s] impetus for starting a blog. We appreciate the pneumatic tricks that he detailed in some of his earlier posts such as a compressor, pressure switch, and air tank system. His advice is “build, build, build” and that’s what you’d have to do to perfect a monster of this size and scope.