Wheels are all well and good for getting around, but they only tend to rotate about a single axis. Omni-wheels exist, but they’re still a little too pedestrian for [James Bruton]. His latest project involved 3D printing custom omni-balls which roll in all directions. (Video, embedded below.)
The omniball concept comes from earlier work by Osaka University, which also produced a treaded tank-like vehicle by the name OmniCrawler as well. The spherical design, fitted with an axle and casters as well, allows rotation in multiple directions, allowing for a platform fitted with such omni-balls to easily rotate and translate in all directions.
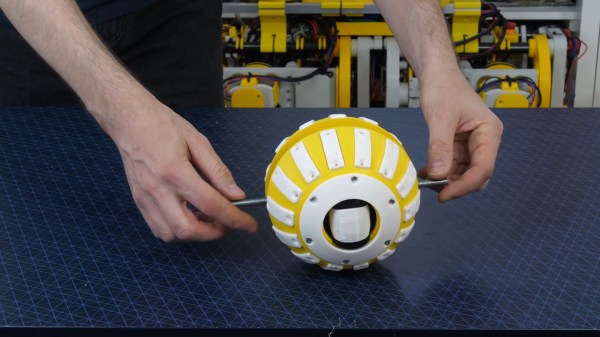
[James] set about creating his own version of the design, which relies on grippy TPU filament for grip pads to give the 3D printed hemispheres some much needed grip. There’s also bearings inside to allow for the relative rotation between the hemispheres and the internal castor, necessary to allow the wheels to move smoothly when sitting on either pole of the hemispheres. Skate bearings were then used to assemble three of the omni-balls onto a single platform, which demonstrated the ability of the balls to roll smoothly in all directions.
While it’s just a demonstration of the basic idea for now, we can imagine these balls being used to great effect for a robot platform that needs to navigate in tight spaces on smooth surfaces with ease. The mechanical complexity of the omni-balls probably negates their effective use in dirtier offroad contexts, however.
We’ve seen [James]’s work before too – such as his compliant leg design for walking robots, and his active gyroscope balancer last week. When does [James] sleep?
Continue reading “3D Printing Omni-Balls For Robot Locomotion”