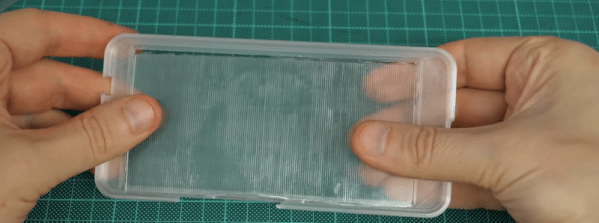
[Bitluni] has been experimenting with resin printing lenses — in particular, lenticular lenses. You’ve probably seen lenticular lenses before in 3D greeting cards or children’s books. By presenting a slightly different image at different angles, your eyes perceive stereo vision giving the illusion of depth. You can see his results in the video below.
Honestly, even if you don’t want to make a display like this yourself, the demonstration of how a lenticular lens works using a laser is worth watching. Sure, you know in theory what’s going on, but seeing it visually exposed is great.
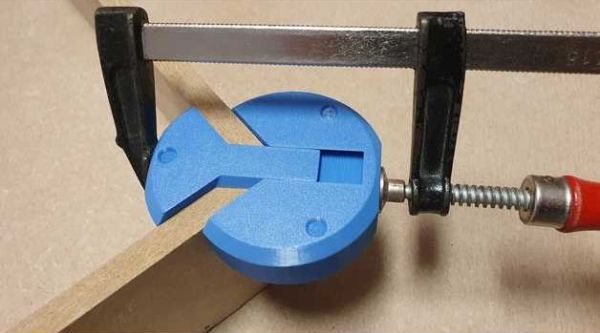
We love this design’s simplicity, but its mundane appearance is deceptive because a lot is going on here. [Bas van Hassel]’s clamp looks like a bench cookie or maybe a compressed hockey puck, but one pie piece-shaped quadrant extends on dovetails to form a right-angle channel, perfect for holding your ninety-degree joint while your glue dries. Opposing disc edges are flat, so your clamp won’t slip. Divots on the top and bumps on the bottom keep your stacks nice and neat when you put them away. All around, we have no trouble believing this designer has spent a lot of hours in the woodshop.
As long as your wood pieces are the same thickness, it seems like a practical use of printer filament, but if you have different sizes, you can always pull the dovetail out of its groove. Thanks to the scaling feature built into slicing programs, we expect some precision makers to utilize this in projects like dollhouses and model airplanes. If you have a high-resolution printer, you could make some miniature tools to construct a flea circus set. At that point, you may need to make some smaller clamps.
Print orientation for the puck is straightforward as it is a print-in-place design, but sometimes it isn’t always clear, so listen to those who know better and don’t be afraid of gears in your vises.
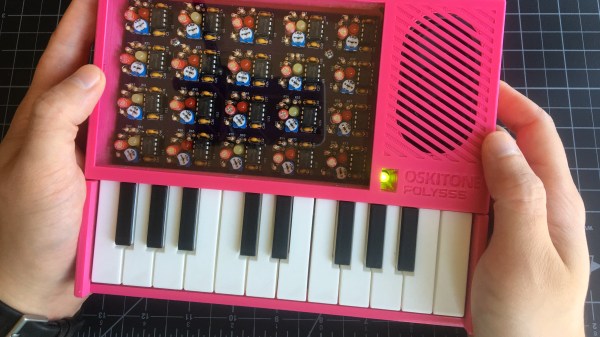
[Tommy]’s POLY555 is an analog, 20-note polyphonic synthesizer that makes heavy use of 3D printing and shows off some clever design. The POLY555, as well as [Tommy]’s earlier synth designs, are based around the 555 timer. But one 555 is one oscillator, which means only one note can be played at a time. To make the POLY555 polyphonic, [Tommy] took things to their logical extreme and simply added multiple 555s, expanding the capabilities while keeping the classic 555 synth heritage.
The real gem here is [Tommy]’s writeup. In it, he explains the various design choices and improvements that went into the POLY555, not just as an instrument, but as a kit intended to be produced and easy to assemble. Good DFM (Design For Manufacturability) takes time and effort, but pays off big time even for things made in relatively small quantities. Anything that reduces complexity, eliminates steps, or improves reliability is a change worth investigating.
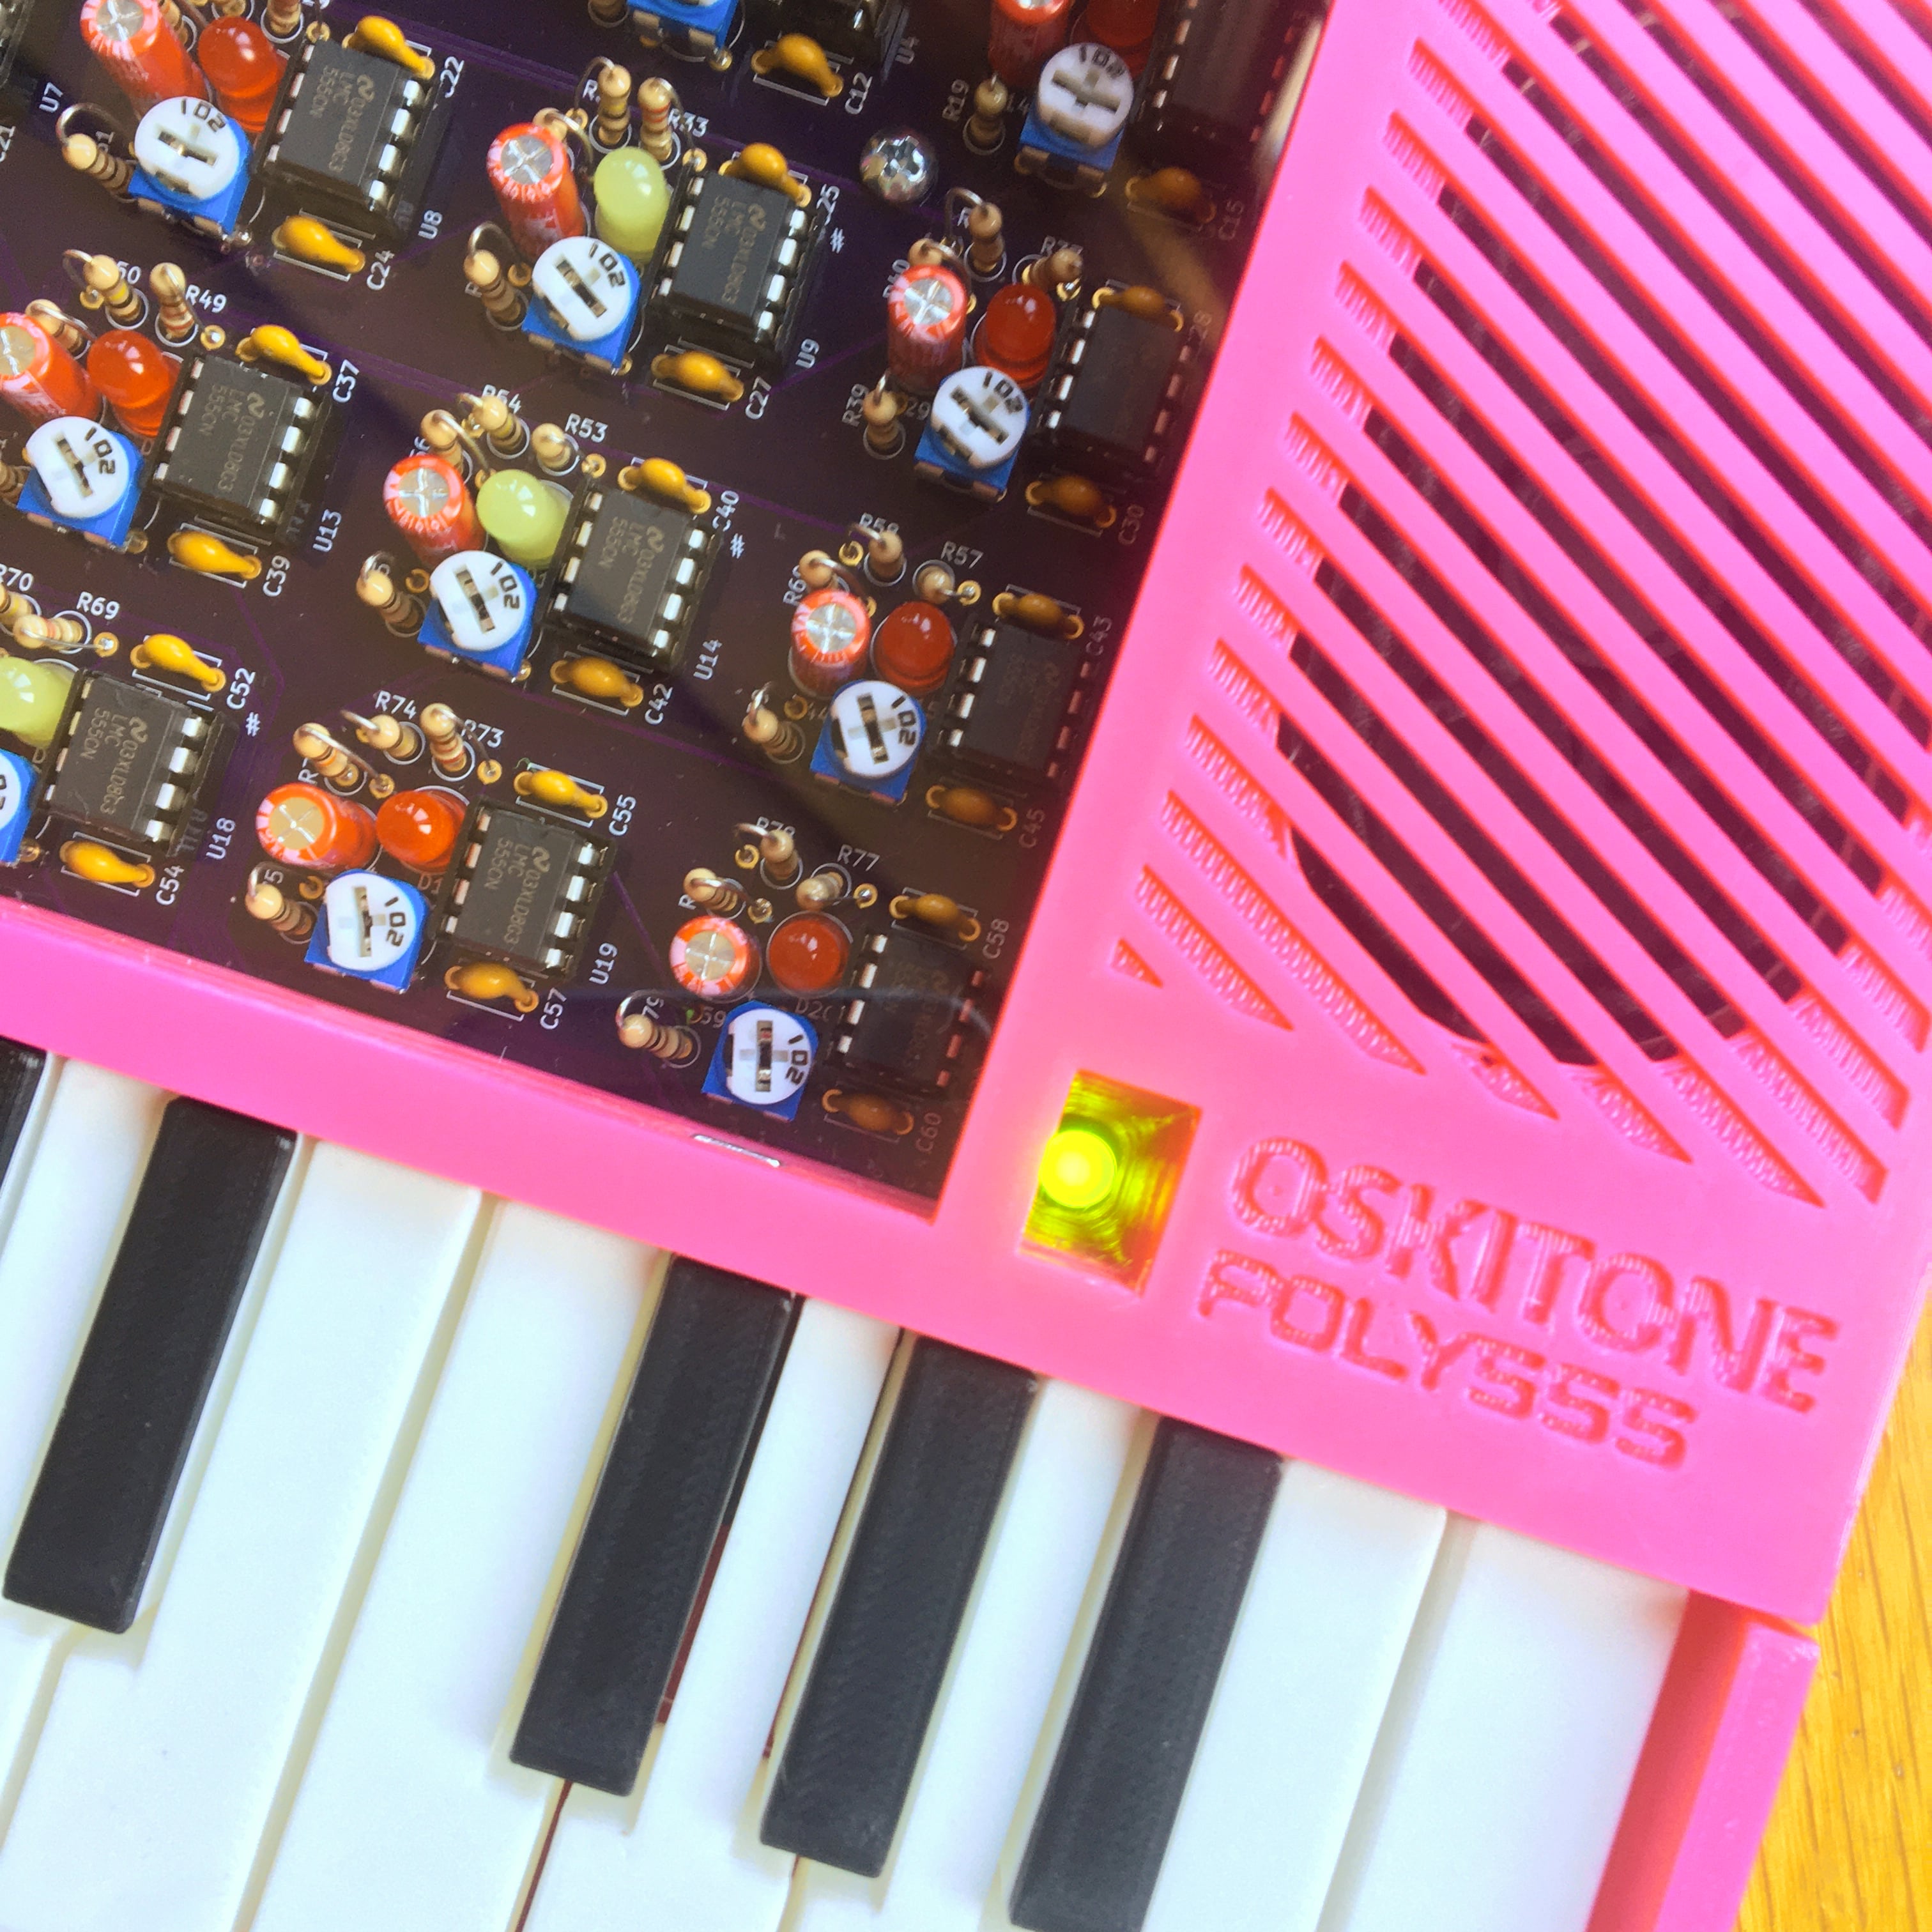
For example, the volume wheel is not a thumbwheel pot. It is actually a 3D-printed piece attached to the same potentiometer that the 555s use for tuning; meaning one less part to keep track of in the bill of materials. It’s all a gold mine of tips for anyone looking at making more than just a handful of something, and a peek into the hard work that goes into designing something to be produced. [Tommy] even has a short section dedicated to abandoned or rejected ideas that didn’t make the cut, which is educational in itself. Want more? Good news! This isn’t the first time we’ve been delighted with [Tommy]’s prototyping and design discussions.
POLY555’s design files (OpenSCAD for enclosure and parts, and KiCad for schematic and PCB) as well as assembly guide are all available on GitHub, and STL files can be found on Thingiverse. [Tommy] sells partial and complete kits as well, so there’s something for everyone’s comfort level. Watch the POLY555 in action in the video, embedded below.
When slicing a model for 3D printing, the part is divided into a stack of flat, 2D layers. But there’s an alternative in the form of non-planar slicing, where the layers can follow 3D curves. [Rene K. Mueller] took this a step further and successfully used non-planar slicing to print 90° overhangs on a normal Cartesian FDM printer.
Non-planar layers have been around for a while, but were generally limited to creating smooth curves without layer lines. The idea of using the technique for overhangs had been floating around in [Rene]’s head for a while, and he was spurred to action after seeing the rotating tilted nozzle printer featured here on Hackaday. The idea is only to have the outer edge of each layer overhang, by making each layer slope downward toward the overhang. [Rene] programmed a conic slicer algorithm for this purpose, which splits the model into dome-shaped layers, like an onion.
He did a lot of testing and documented the results in detail. Conical slices were compared with tilted slices, which are also used for belt 3D printers. Both have some geometric limitations. Tilted slices can only print the overhang in one direction, but conical slices can do this in all directions, allowing it to create a mushroom-like shape without any support. The limitation is that it can only print inward or outward from a central point. More complex geometry must be segmented, and each sub-volume sliced separately. The slicing angle is also limited by the shape of the print head, to avoid it crashing into the print.
We think this technique has a lot of potential for widespread use, especially since it is compatible with most existing FDM printers. It is still a work in progress, but support has already been added for Slic3r and Prusa Slicer. We look forward to seeing how it develops and gets adopted.
Dual extrusion systems for 3D printers have been around for quite a few years, but the additional cost, complexity, and hassle of printing with them have kept them off the workbenches of most hackers. [Jón Schone] from Proper Printing has now thrown his own hat in the ring, with a custom dual extrusion rocker system that can swap extruders without any additional actuators.
The two extruders are mounted on a spring-loaded rocker mechanism, which holds the inactive extruder up and away from the printing surface. Extruders are swapped by moving the carriage to either end of the x-axis, where the v-wheel rolls a ramp and pops the rocker over, putting the new extruder in the center line of the carriage. There are 3 wheels at the top of the carriage, but only two are in contact with the rail at any time. While this system is more complex than simply mounting two extruders side-by-side, it reduces the chances of the inactive nozzle oozing onto the parts or scraping across the surface. The height of each extruder can be adjusted with a screw, and any horizontal offset between the nozzles is checked with a calibration procedure and corrected in the firmware. See the full video after the break.
[Jón] is offering the design files and modified firmware to perform this mod on your own Ender 3 Pro (though he notes other Creality printers should be compatible), but you’ll still need to source a control board with the additional stepper driver and heater output for the second extruder. This is yet another in a long list of hacks he’s performed on this popular entry-level printer, such as a modification that allows you to fold the machine up and take it on the go.
Chess is undoubtedly a game of the mind. Sadly, some of the nuances are lost when you play on a computer screen. When a game is tactile, it carries a different gravity. Look at a poker player shuffling chips, and you’ll see that when a physical object is on the line, you play for keeps. [Matou], who is no stranger to 3D printing, wanted that tactility, but he didn’t stop at 3D printed pieces. He made parts to transform his Creality Ender 3 Pro into a chess-playing robot.
To convert his printer, [Matou] designed a kit that fits over the print head to turn a hotend into a cool gripper. The extruder motor now pulls a string to close the claw, which is a darn clever way to repurpose the mechanism. A webcam watches the action, while machine vision determines what the player is doing, then queries a chess AI, and sends the next move to OctoPrint on a connected RasPi. If two people had similar setups, it should be no trouble to play tactile chess from opposite ends of the globe.
Physical chess pieces and computers have mixed for a while and probably claimed equal time for design and gameplay. There are a couple of approaches to automating movement from lifting like [Matou], or you can keep them in contact with the board and move them from below.
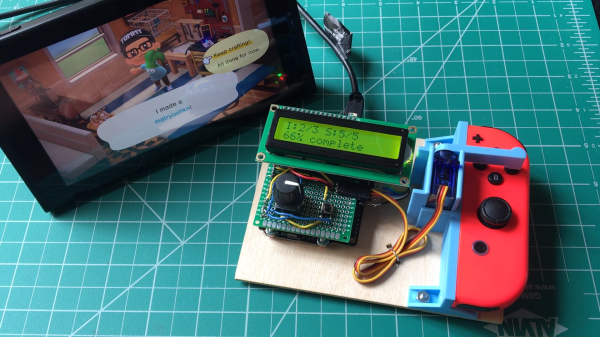
Press button, wait, press button again, repeat. There must be a better way! If that kind of interaction drives you nuts, you’ll probably appreciate [Tommy]’s buttonpusher, which has only one job: automate away some of the more boring parts of Nintendo’s Animal Crossing. On one hand the job the device does is very simple: press a button on the Nintendo joy-con in a preprogrammed pattern. There’s no feedback loop, it just dumbly presses and waits. But there are still quite a few interesting bits to this build.
Rigid mounting combined with interfacing the actuator to the servo horn (instead of to the servo shaft) were the keys to reliable button pushing.
For one thing, [Tommy] discovered that the little 9g RC servo can reliably exert enough force to press the button on the joy-con with the right adapter. He had assumed the servo would be too weak to do the job without a greater mechanical advantage, but a simple hammer-style actuator that attaches to the servo horn easily does the job. Well, it does as long as the servo and joy-con are held rigidly; his first version allowed a little too much wiggle in how well the parts were held, and button presses didn’t quite register. With a 3D-printed fixture to rigidly mount both the servo and the joy-con, things were fine.
In the process of making buttonpusher, which uses CircuitPython, [Tommy] created a tool to automate away another pesky task he was running into: circuitpython_tools was created to automatically watch for code changes, convert the .py files into (smaller) MicroPython bytecode .mpy files, then automatically deploy to the board. This saved [Tommy] a lot of time and hassle during development, but it was only necessary because he quickly ran out of memory on his M0 Metro Express board, and couldn’t fit his code in any other way.
Still, it’s a good example of how one project can sometimes spawn others, and lead to all kinds of lessons learned. You can see buttonpusher automate the crafting process in Animal Crossing in the video, embedded below.