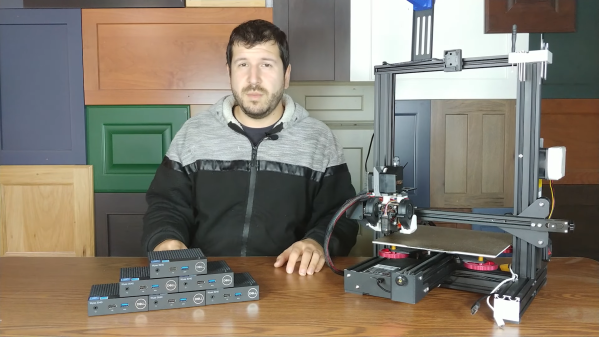
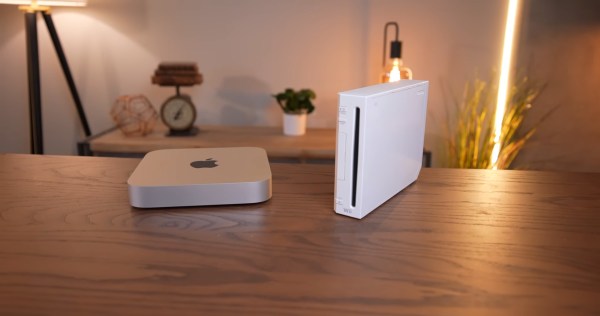
3D printed fish leaping through waves

A Crazy Wave Automaton

[Henk Rijckhaert] recently participated in a “secret Santa” gift exchange. In a secret Santa, everyone’s name goes in a hat, and each person must pick a name without looking. Each gives a gift to the person whose name they drew.

Henk needed a gift for Amy, a friend who loves the water and water sports as well as maker-y things.  So he built her a wave automaton — a sea wave and fishies, and documented the build in this video.

The build is mostly plywood and 3D printed parts. We have to  think reprising it in a nice wood and brass would make a lovely project for a hobby wood and metalworker.

The bulk of the project is 30 plywood boards stacked up with spacers. Each board is mounted with a 3D printed stepped bushing on one end that rides in a horizontal slot. On the other end is a 3D printed eccentric riding in an oversized (about 5cm) hole. So the board moves in a circle at one end and back and forth at the other for a very nice simulation of an ocean wave. Continue reading “A Crazy Wave Automaton”

Super Tough Resin Is Literally As Tough As Nails

Resin printing still seems to polarize opinions amongst hacker types, with some considering such machines a good tool for the right tasks, and some just plain rejecting them outright. There are many arguments for and against, but like fused deposition modeling (FDM) machines, resin printers are improving in leaps and bounds — and so is the liquid resin itself. Nowadays low-odor resins are common, colors and finishes are varied, and now thanks to some dedicated development work, the brittleness that often characterizes such prints it being addressed. [Mayer Makes] has designed a super tough “engineering resin” that he demonstrates is so tough, you can print a nail and hammer it into a block of wood! (Video, embedded below, if you don’t believe it.)

This particular resin is destined for mixing, given its natural cured shade is a kind of greenish-grey, but it does have a neat trick of presenting a definite yellowish hue when not fully cured, which is very helpful. This is particularly useful when removing support structures as you can use the color change during the curing process to judge the right moment to snap off the thicker sections, minimizing the risk of damaging the print. The resulting printed part is also tough enough to withstand subsequent traditional post-processing, such as milling, giving greater final finishing tolerances. Try doing that with an FDM print.

One of the neat things about resin chemistry is that you can simply mix them in their liquid form to tune the resin properties yourself and they can also be colored with specially formulated dyes without affecting the other properties too much, so this new super-tough resin gives prototypers yet another tool in their resin armory.

Thinking of taking the plunge and giving resin printing a try? Checkout our handy guide which may give you a leg up! If that doesn’t swing it for you, you could always use resin to help smooth out your FDM prints. It’ll probably still smell funny, mind.

Continue reading “Super Tough Resin Is Literally As Tough As Nails”

bolt with maze threads

Maze Bolt Toy By Lost PLA Casting

Maze bolts, a bolt which has a maze along its shaft traversed by a pin on its nut, are great fun. Here’s a really beautiful metal version by [Robinson Foundry], made by a process more makers should know about – lost PLA casting.

His basic method is to 3D print in PLA, and then use more or less the same process as lost wax casting.

He 3D printed the part, along with the sprues and risers that go along with casting, in PLA, then dipped the parts in slurry ten (10) times.  He heated in a kiln to 500°F (260°C), the PLA melted and ran out or burned away. With the PLA gone, after repairing a few cracks, he raised the temperature to 1500°F (815°C) and vitrified the slurry into a ceramic. He now had molds.

The nut is bronze. The bolt is aluminum.  He poured the metal with the molds hot, held in heated sand, so the metal can flow into all the small details. The rest of the project is just cleanup, but we learned that you can vary the finish produced by glass bead blasting just by varying the air pressure.

A great demo of a useful technique and a fun toy at the end.

We covered a great technique for doing lost PLA casting using a microwave.

Continue reading “Maze Bolt Toy By Lost PLA Casting”

partially finished print, with the embedded animation

Flip Book Animations On The Inside Of 3D Prints

We’ve all seen 3D printed zoetropes, and drawn flip book animations in the corner of notebooks. The shifting, fluid shape of the layers forming on a 3D printer is satisfying. And we all know the joy of hidden, nested objects.

Hackaday alumnus [Caleb Kraft] has a few art pieces that all reflect all these. He’s been making animations by recording a 3D printer. The interesting bit is that his print is made of two objects. An outer one with normal infill that gives a solid form, and a layer cake like inner one with solid infill. It’s documented in this video on YouTube.

CAD model of the stack of frames

There are lots of things to get right.  The outer object needs to print without supports. The thickness of the “layer cake” layers determines the frame rate. I had to wonder how he triggered the shutter  when the head wasn’t in the way.

His first, experimental, piece is the classic ‘bouncing ball’ animation, inside a ball, and his mature piece is Eadward Muybridge’s “The Horse, In Motion” inside a movie camera.

We’ve covered [Caleb Kraft] before, of course. His Moon On A Budget piece is wonderful.  And we’ve covered a number of 3D printer animations. and 3D zoetropes.  We particularly were drawn to this one.

Thanks [jmc] for the tip!

Continue reading “Flip Book Animations On The Inside Of 3D Prints”

Wearable Electronics Takes The 3D Printing Route

There was a time when a cheap 3D printer was almost certain to mean an awful kit of parts, usually a so-called “Prusa i3”, which was of course as far away in quality from the machines supplied by [Josef Průša] himself as it’s possible to get. But as Chinese manufacturers such as Creality have brought machines with some quality and relaibility into the budget space these abominations have largely been crowded out. There are still cheap 3D printers to be found though, and it’s one of these that [3D Printing Professor] has mounted on his wrist (Nitter) for the ultimate in portable manufacturing.

The Easythreed K7 is a novel take on a 3D printer that positions the device more as a child’s toy than a desktop manufacturing solution. It’s somewhat limited in its capabilities by its tiny size but by all accounts it’s a usable machine, and at around $100 USD it’s about the cheapest 3D printer for sale on the likes of AliExpress. The wearable mount is probably best described as a forearm mount rather than a wrist mount, but has provision for a battery pack and a small roll of filament. And this contraption is claimed to work, but we maybe would think before committing to a day-long print with it.

This may be the smallest wearable 3D printer we’ve shown you so far, but it’s not the first. That achievement goes to Shenzhen maker [Naomi Wu], who strapped one on her back way back in 2017.

Thanks [J. Peterson] for the tip!

The eurorack rail piece, just printed in white plastic, not yet folded, with a folded example in the upper right corner

Bend Your Prints To Eliminate Supports

When designing even a reasonably simple 3D-printable part, you need to account for all the supports it will require to print well. Strategic offsetting, chamfering, and filleting are firmly in our toolkits. Over time we’ve learned to dial our settings in so that, hopefully, we don’t have to fumble around with a xacto knife after the bed has cooled down. On Twitter, Chris shows off his foldable 3D print experiments (nitter) that work around the support problem by printing the part as a single piece able to fold into a block as soon as you pop it off the bed.

The main components of this trick seem to be the shape of the place where the print will fold, and the alignment of bottom layer lines perpendicular to the direction of the fold lines. [Chris] shows a cross-section of his FreeCad design, sharing the dimensions he has found to work best.

Of course, this is Twitter, so other hackers are making suggestions to improve the design — like this sketch of a captive wedge likely to improve alignment. As for layer line direction alignment, [Chris] admits to winging it by rotating the part in the slicer until the layer lines are oriented just right. People have been experimenting with this for some time now, and tricks like these are always a welcome addition to our toolkits. You might be wondering – what kinds of projects are such hinges useful for?

The example Chris provides is a Eurorack rail segment — due to the kind of overhangs required, you’d be inclined to print it vertically, taking a hit to the print time and introducing structural weaknesses. With this trick, you absolutely don’t have to! You can also go way further and 3D print a single-piece foldable Raspberry Pi Zero case, available on Printables, with only two extra endcaps somewhat required to hold it together.

Foldable 3D prints aren’t new, though we typically see them done with print-in-place hinges that are technically separate pieces. This trick is a radical solution to avoiding supports and any piece separation altogether. In laser cutting, we’ve known about similar techniques for a while, called a “living hinge”, but we generally haven’t extended this technique into 3D printing, save for a few manufacturing-grade techniques. Hinges like these aren’t generally meant to bend many times before they break. It’s possible to work around that, too — last time we talked about this, it was an extensive journey that combined plastic and fabric to produce incredibly small 3D printed robots!

We thank [Chaos] for sharing this with us!

Recycling Plastic Into Filament

Plastic is a remarkable material in many ways. Cheap, durable, and versatile, it is responsible for a large percentage of the modern world we live in. As we all know, though, it’s not without its downsides. Its persistence in the environment is quite troubling, so any opportunity we can take to reduce its use is welcome. This 3D printed machine, although made out of plastic, is made out of repurposed water bottles that have been turned into the filament for the 3D printer.

While there’s not too much information available on the site, what we gather is that the machine cuts a specific type of plastic water bottle made out of PET plastic into strips, and then feeds the strips into a heated forming tool. The tool transforms the strips into the filament shape and spools them so they are ready to feed back into a 3D printer. As a proof of concept, it seems as though this machine was made from repurposed plastic, but it could also be made using whatever filament you happen to have on hand.

As far as recycling goes, this is a great effort to keep at least some of it out of landfills and oceans. Unfortunately, plastic can’t be recycled endlessly like metal, as it will eventually break down. But something like this could additionally save on some filament costs for those with access to these types of bottles. Other options for creating your own filament also include old VHS tapes, but you will likely need a separate machine for that.