If you want to remap some mouse or keyboard keys, and you use Linux, it is easy. If you use Windows or another operating system, you can probably do that without too much trouble. But what if you use all of them? Or what if you don’t have access to the computer in question? Thanks to [jfedor2], you can reach for a Raspberry Pi Pico and make this handy key-and-mouse remapping hardware dongle.
Sim racing is a lot more complex than playing Need For Speed 3: Hot Pursuit. You need buttons for all kinds of stuff, from headlights to brake balance to traction control. If you want to control all that in an intuitive and realistic manner, you’ll want to build yourself a decent button pad like [Chris Haye] has done. It’s surprisingly easy, too!
Very cool.
[Chris] is quite a serious racer, and needed four button boxes. He wanted to do this on the cheap, so he decided to build his first three boxes around the Zero Delay Arcade USB Encoder, a cheap controller board available on eBay for around £7. Arcade buttons were sourced off Amazon to populate the black project boxes which acted as the housings.
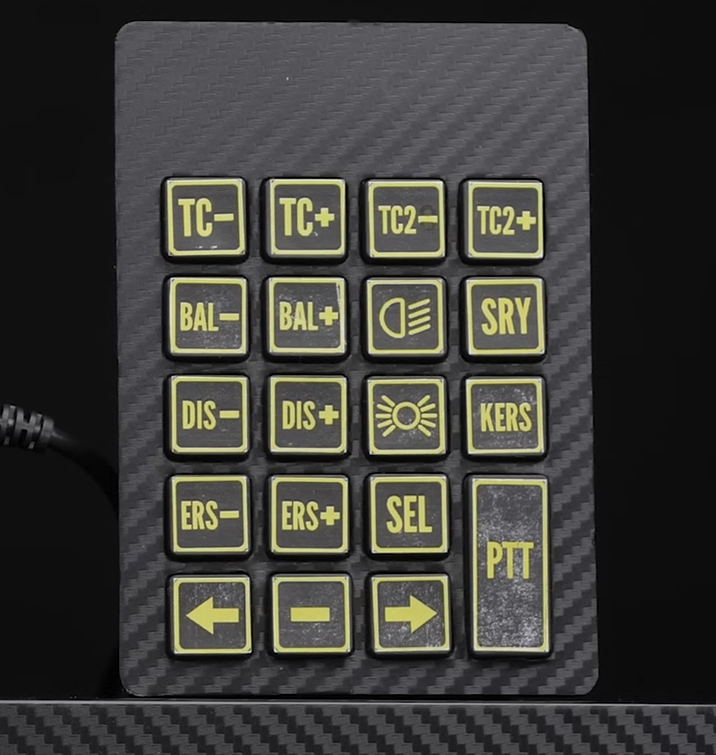
His final button pad looks straight out of a GT3 race car, but it’s the simplest of the bunch. It’s literally just a USB numpad with a carbon vinyl wrap applied and some home-printed labels. One suspects the feel isn’t particularly high-quality but the look is top tier. If you’re a streamer that wants to build a hardcore-looking setup, this is a great way to go.
[Chris] estimates that each box took maybe an hour to build, tops. It’s a great example of solution-focused design. He could have gotten out his own microcontroller and done a custom PCB and all that, and the results surely would have been good. But it would have taken far longer! It’s hard to beat the speed of wiring together Amazon arcade buttons with the Arcade USB Encoder’s pre-terminated wire harness. If you’re more interested in sim racing than building button boxes, it’s a great way to do a custom pad fast.
Best of all? [Chris] says he managed to put these all together for £60—quite a feat of bargain engineering. We’ve featured some other builds along these lines before, too—even using vintage aircraft controls! Video after the break.
A StreamDeck is effectively a really cool box full of colorful buttons that activate various things on your PC. They’re fun and cool but they’re also something you can build yourself if you’re so inclined. [Jason] did just that for his sim racing setup, and he included some nifty old-school tech as well.
An ESP32 is at the core of the build, listening to button presses and communicating with the PC. However, the build doesn’t actually use regular buttons. Instead, it uses infrared sensors wired up in a matrix. This was an intentional choice, because [Jason] wanted the device to be reconfigurable with different paper card overlays. There are ways to do this with regular buttons too, but it works particularly well with the infrared technique. Plus, each button also gets a Neopixel allowing its color to be changed to suit different button maps.
What’s really neat is that the button maps change instantly when a different overlay card is inserted. [Jason] achieved this with an extra row of infrared sensors to detect punched holes in the bottom of the overlay cards.
Once upon a time, even building your own keyboard was an uphill battle. Today, it’s easier than ever to whip up fun and unique interface devices that suit your own exact needs. That’s a good thing! Video after the break.
There are many forms of human interface device beyond the ubiquitous keyboard and mouse, but when it comes to fine-tuning a linear setting such as a volume control there’s nothing quite like a knob. When it comes to peripherals it’s not the size that matters, as proven by [Stefan Wagner] with the Tiny Knob. It’s a very small PCB with a rotary encoder and knob, an ATtiny85, a USB port, and not much else.
It uses the V-USB software implementation of USB HID, and should you have a need for a Tiny Knob of your own you can find all the files for it in a GitHub repository. There’s even a very professional-looking 3D-printed enclosure for the finishing touch. We like this project for its simplicity, and we think you might too.
Over the years we’ve brought you more than one knob, they appear to be a popular subject for experimentation. If you’re up for more, have a look at this one.
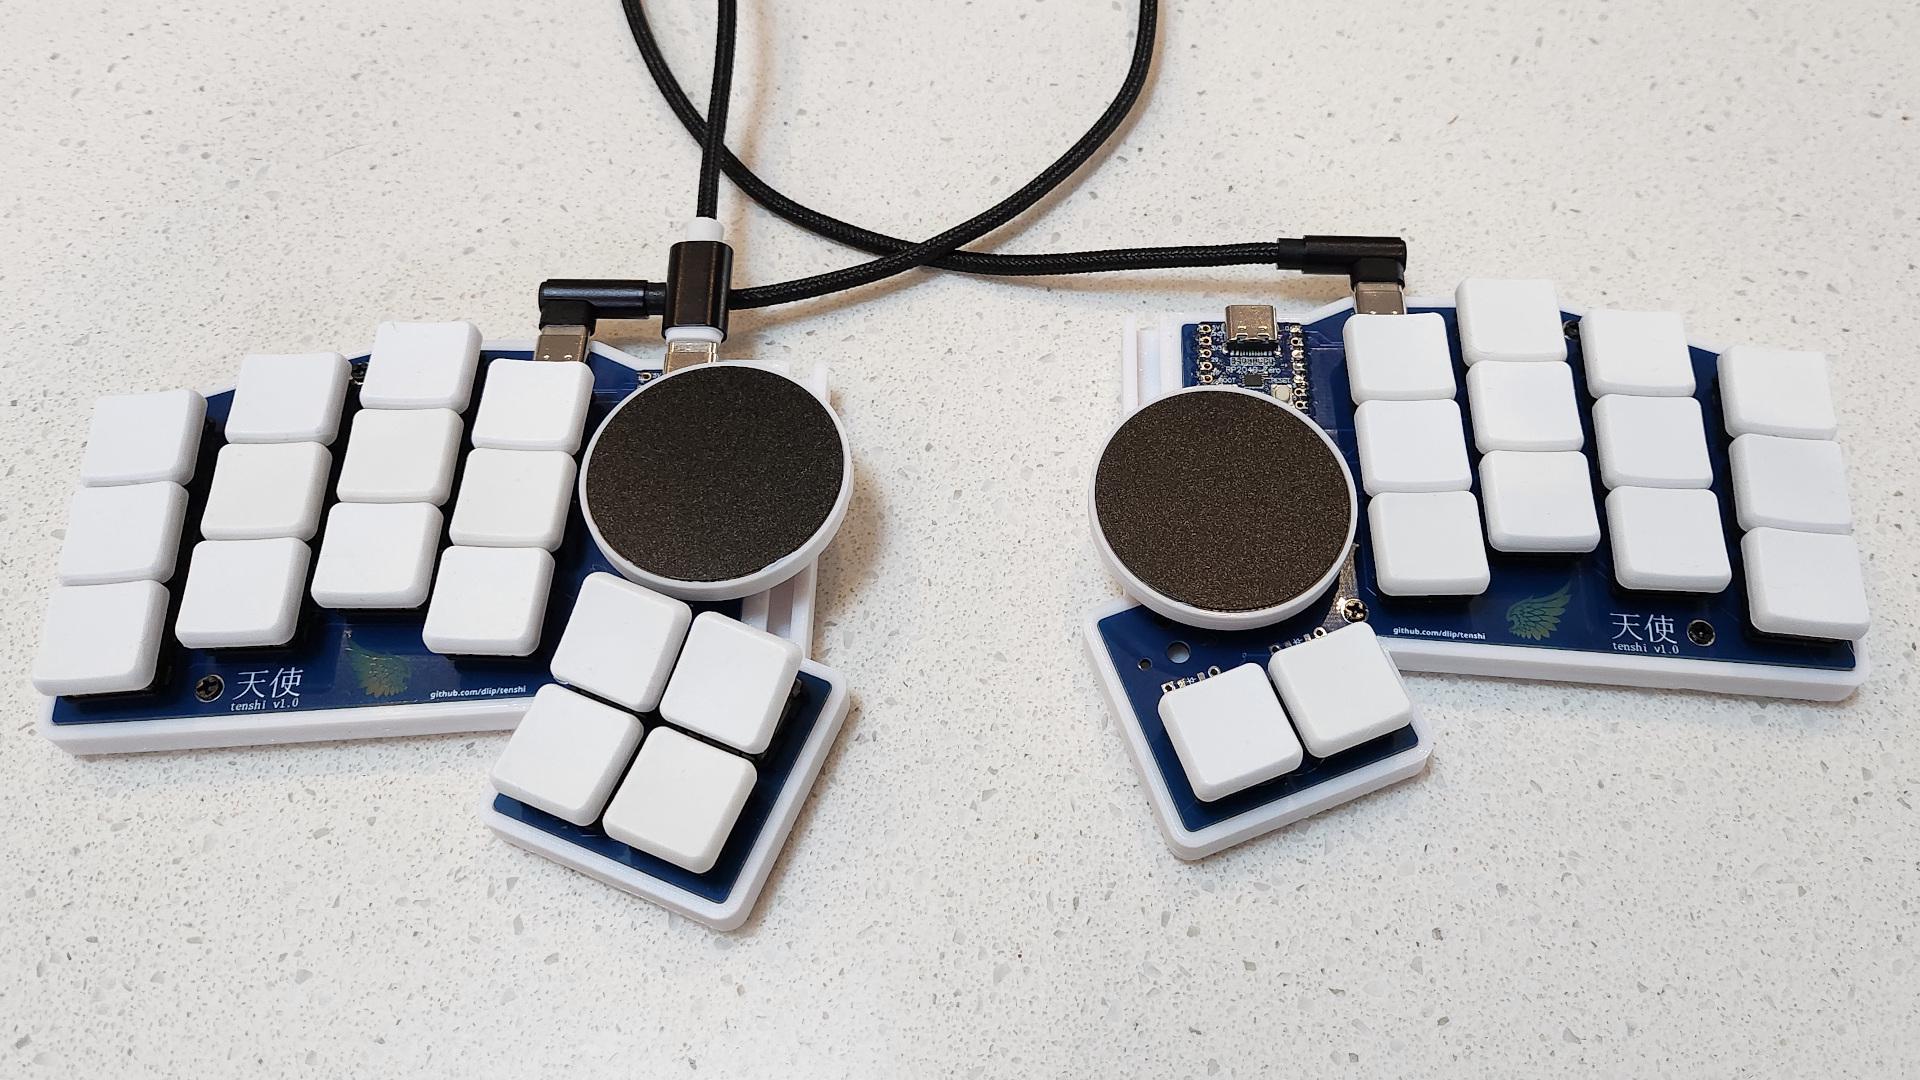
Image by [fata1err0r81] via redditThe most striking feature of the Tenshi keyboard has to be those dual track pads. But then you notice that [fata1err0r81] managed to sneak in two extra thumb keys on the left, and that those are tilted for comfort and ease of actuation.
The name Tenshi means ‘angel’ in Japanese, and creator [fata1err0r81] says that the track pads are the halos. Each one slides on a cool 3D-printed track that’s shaped like a half dovetail joint, which you can see it closer in this picture.
Tenshi uses a pair of RP2040 Zeros as controllers and runs QMK firmware. The track pads are 40 mm each and come from Cirque. While the Cirques have been integrated into QMK, the pull request for ZMK has yet to be merged in. And about those angled keys — [fata1err0r81] says they tried risers, but the tilting feels like less effort. Makes total sense to me, but then again I’m used to a whole keyboard full of tilted keys.
Cats are notorious for interrupting workflow. Whether it’s in the kitchen, the garden, or the computer, any feline companion around has a way of getting into mischief in an oftentimes disruptive way. [Robin] has two cats, and while they like to sit on his desk, they have a tendency to interrupt his mouse movements while he’s using his Apple trackpad. Rather than solve the impossible problem of preventing cats from accessing areas they shouldn’t, he set about building a customized tiny trackpad that integrates with his keyboard and minimizes the chance of cat interaction.
The keyboard [Robin] uses is a split ergonomic keyboard. While some keyboards like this might use a standard USB connection to join the two halves, the ZSA Voyager uses I2C instead and even breaks the I2C bus out with a pogo pin-compatible connector. [Robin] originally designed a 3D-printed integrated prototype based on a Cirque trackpad that would clip onto the right side of the keyboard and connect at this point using pogo pins, but after realizing that the pogo pin design would be too difficult for other DIYers to recreate eventually settled on tapping into the I2C bus on the keyboard’s connecting cable. This particular keyboard uses a TRRS connector to join the two halves, so getting access to I2C at this point was as simple as adding a splitter and plugging in the trackpad.
With this prototype finished, [Robin] has a small trackpad that seamlessly attaches to his ergonomic keyboard, communicates over a standard protocol, and avoids any unwanted cat-mouse action. There’s also a build guide if you have the same keyboard and want to try out this build. He does note that using a trackpad this small involves a bit of a learning curve and a larger-than-average amount of configuration, but after he got over those two speed bumps he hasn’t had any problems. If trackpads aren’t your style, though, with some effort you can put a TrackPoint style mouse in your custom mechanical keyboard instead.
Using Bluetooth on a desktop computer is now such a seamless process; it’s something built-in and just works. Behind that ubiquity is a protocol layer called HCI, or Host Controller Interface, a set of commands allowing a host computer to talk to a Bluetooth interface. That interface doesn’t have to be special, and [Dakhnod] is here to show us that it can be done with an ESP32 microcontroller through its USB interface.
The linked repository doesn’t tell us which of the ESP32 variants it works with, but since not all of them have a USB peripheral we’re guessing one of the newer variety. It works with Linux computers, and we’re told it should work with Windows too if a HCI driver is present. We might ask ourselves why such a project is necessary given the ubiquity of Bluetooth interfaces, but for us it’s provided the impetus to read up on how it all works.