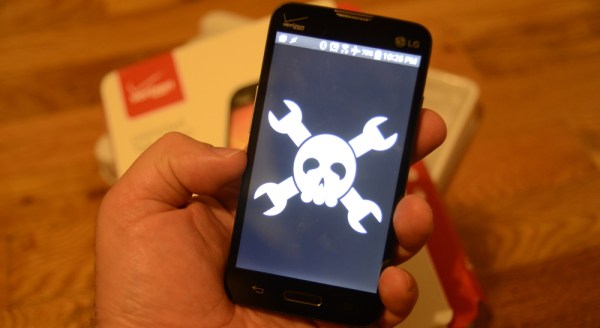
roomba

IRobot Releases Hackable Roomba — Without The Vacuum

We love forward thinking companies that take a risk and do something different. iRobot, the company behind the iconic Roomba, just released the newest version of their Roomba Create — a programmable Roomba (minus the vacuum) that can be hacked and programmed to do all sorts of things.

The company developed the Create with STEM students in mind — a robotics learning platform. It came out originally back in 2007, and we’ve covered many hacks that have made use of it. Many. Like, a lot. One of our favorites has got to be this data center monitoring robot that makes use of the platform!

Anyway, the newest version of the Create features the typical hardware upgrades you’d expect, and with some special emphasis on 3D printing. In fact, the CEO of iRobot [Colin Angle] thinks that 3D printing is going to make a big difference in a few years:

“Your Roomba could be a software file that you print at home,” he says. He says the Create’s new features are a way for the company to get ready for that day, while also providing a platform that educators and hobbyists can use to tinker.

Kudos to you guys, iRobot! We just wish people would stop giving Roomba’s knives…

[Thanks PSUbj21!]

Nothing’s As Vain As A Phone Taking A Selfie Of Itself… With Itself

The selfie: pop culture’s most frivolous form of self-expression is also probably one of the most human acts you could find yourself doing in a day. Everyone is guilty of snapping a quick pic from time to time with the expectation that it will leave an impression on those who see it. All of the implications surrounding why we do this support our deep-seated need to sculpt an identity for ourselves using others as the hammer and chisel. So, consider how upside-down the world would feel if you caught a robot posing for a shot in the mirror? What about one whose sole function was to take selfies and post them? If this breaks your mind a little, that was the intention. This #selfie robot by artists [Radamés Ajna] and [Thiago Hersan] is the first development in a larger body of work called “memememe”, which is meant to comment on our culture’s obsession with the trending, selfing nature of social media. This specific project explores the relationship between conversation and identity in a situation where there is no second party.

selfieBOT2Hardware-wise, the #selfie bot is a Stewart platform made from six servo motors and a few pieces of carefully measured pushrod connected with swivel-ball-links. An android phone is mounted on the end effector which acts functionally as the robot’s face and eyes. To make it self-aware in a sense, [Ajna] and [Hersan] created their own recognition software with Open CV using a collection of sample images of various phones as reference points. As soon as the robot recognizes itself in the mirror as indicated by specific words flashing on its screen, it takes a picture, immediately uploading it to its own tumblr account. [Ajna] and [Hersan] have a nice description of their process on the project’s Instructable’s page which you can check out to see how they used Haar Cascades to create their custom object recognition. Additionally, if you’d fancy building your own robot to covertly place in your living room to snap pictures of other phones, you could check out their code on github.

Watch it selfie :

Continue reading “Nothing’s As Vain As A Phone Taking A Selfie Of Itself… With Itself”

Ceci N’est Pas Une Clock

[Justin] tipped us about his slick custom OBD-II gauge that could easily pass for an OEM module. He was able to use the clock area of his Subaru BRZ to display a bunch of information including the oil and coolant temperatures and the battery voltage.

The forum post linked above has a good FAQ-based explanation of what he did, but so many people have told him to shut up and take their money that he created an Instructable for it. Basically, he’s got a Sparkfun OBD-II UART board communicating with a pro Trinket. The display is an Adafruit OLED, which he found to be an ideal choice for all the various and sundry light conditions inside the average car.

[Justin] was able to reuse the (H)our and (M)inute buttons and reassigned them to (H)igh to show the peak reading and (M)ode to, well, switch between modes. The (:00) now resets the peak readings. He offers suggestions for acquiring the specific CAN codes for your car to make the data more meaningful. [Justin]’s code is safe in the many tentacles of Octocat, and you can check out his demo video below.

Continue reading “Ceci N’est Pas Une Clock”

Android Flip Dot Display

Controlling A Flip-Disc Display Using Android

There’s just something about electro-mechanical displays that enthralls most people when they see them; and while you’ll be hard pressed to find a split-flap display for cheap, you can still easily buy flip-disc displays! That’s what [Scott] did, and he’s been having a blast messing around with his and building a system to control it via his Android phone.

He picked up the display from a company called Alfa-Zeta in Poland, a company that’s been making electromagnetic displays since 1988. No mention of price, but it looks like some pretty awesome hardware. The beauty with electromagnetic displays is they don’t consume any electricity in idle state, making them far more efficient than almost any other display technology – not to mention perfect contrast in any lighting conditions!

They work by using permanent magnets, electromagnets, and a material that can retain magnetization. A short pulse to the electromagnet causes the disc to flip into the second position, which will then hold in place due to the permanent magnet — no more electromagnet needed.

The display comes with all the necessary hardware to drive the electromagnets and interface with a microcontroller. But, it uses the RS-485 standard, which isn’t natively supported by most other microcontrollers. [Scott’s] using an Arduino which does have an RS-485 shield, but he decided he wanted to challenge himself and build a circuit to drive them himself!

All the info is on his blog if you’re looking to try something similar. Once he had it interfaced with the Arduino it was just a simple matter of writing an Android app to transmit controls over Bluetooth for the display. Take a look:

Continue reading “Controlling A Flip-Disc Display Using Android”

camera dolly

Timelapse Photography On An Android-Powered Dolly

If you’re heading off on a trip to Alaska, you need to make sure you have plenty of supplies on hand for the wilderness that awaits. If you’re [Bryce], that supply list includes some interesting photography equipment, including a camera dolly that he made to take time-lapse video of the fantastic scenery.

On the hardware side, the dolly carries the camera on a rail that is set up on a slant. The camera starts on one side and moves up and towards the otherside which creates a unique effect in the time-lapse. The rig is driven by a stepper motor, and rides on some pretty fancy bearings. The two cameras [Bryce] plans to use are a Canon T2i and a EOS-M which sit on the top from a tripod.

The software and electronics side is interesting as well. Instead of the usual Arduino, [Bryce] opted for controlling the rig through Android and a IOIO board. This gives the project a lot of options for communications, including Bluetooth. The whole thing is powered by a 19V battery pack. If you’re looking for something a little simpler, you might want to check out the egg timer for time lapse! Check out the video of [Bryce]’s rig in action after the break.

Continue reading “Timelapse Photography On An Android-Powered Dolly”

Chromecast Is Root

Image from [psouza4] on the xda-developers forum

Chromecast is as close as you’re going to get to a perfect device – plug it in the back of your TV, and instantly you have Netflix, Hulu, Pandora, and a web browser on the largest display in your house. It’s a much simpler device than a Raspi running XBMC, and we’ve already seen a few Chromecast hacks that stream videos from a phone and rickroll everyone around you.

Now the Chromecast has been rooted, allowing anyone to change the DNS settings (Netflix and Hulu users that want to watch content not available in their country rejoice), and loading custom apps for the Chromecast.

The process of rooting the Chromecast should be fairly simple for the regular readers of Hackaday. It requires a Teensy 2 or 2++ dev board, a USB OTG cable, and a USB flash drive. Plug the Teensy into the Chromecast and wait a minute. Remove the Teensy, plug in the USB flash drive, and wait several more minutes. Success is you, and your Chromecast is now rooted.

Member of Team-Eureka [riptidewave93] has put up a demo video of rooting a new in box Chromecast in just a few minutes. You can check that out below.

Continue reading “Chromecast Is Root”

The BlueOkiris Gameduino Console

3011851406903369314

[Dylan] created an easy to make gaming console with an Arduino Uno, a makeshift button, an analog stick, and a TFT LCD touchscreen shield. Plus, he fashioned together a simple button with some duct tape.

So far, he has made 2 games. One is the infamous Pong. The other is a ‘Guess the Number’ type experience. The whole project is run within the code, and does not access the bootloader directly like you would with 2boots or a regular Gameduino adapter.

Build instructions can be found on [Dylan]’s hackaday.io project page (linked above). Essentially, all that is needed is to gather up the supplies, then take the button and analog stick and complete a circuit, fitting the open wires into the slots at digital pin 9. Solder the wires in place and connect ground to ground, 5v to 5v, x to A4, and y to A5. Add the TFT shield, insert a micro SD card, and upload a game.

To see it in action, check out the video after the break:

Continue reading “The BlueOkiris Gameduino Console”