Automatic Sunglasses For The Lazy Hacker

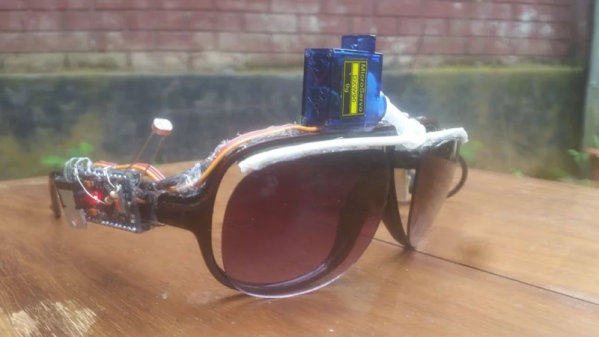
[Andreas] may have created the ultimate lazy hacker accessory: automatic sunglasses, or “Selfblending sunglasses” as he creatively titled his video. If you can’t tell from the name, these are glasses that you never have to take off. If the light is dim, they move away from your eyes. Going back outside to bright light? The glasses move to protect your eyes.

The glasses consist of a couple of micro servos which move tinted lenses toward or away from the user’s eyes. A side-mounted Arduino Uno reads a CdS cell light sensor and drives the servos.  Why an Uno rather than a much more wearable Arduino Nano? It’s what [Andreas] had lying around.

Yes, a good portion of the fun of this build is [Andreas’] comedy. But the best part comes when he tests the glasses out — in an actual car on the highway. The glasses work better than expected — moving the lenses into and out of [Andreas] field of view as he drives through tunnels. You can actually see how surprised [Andreas] is that it works so well.

These aren’t the first automatic sunglasses we’ve seen, nor are they the most peril-sensitive. Still, it’s a fun project and the video gave us a few chuckles.

Continue reading “Automatic Sunglasses For The Lazy Hacker”

Simplifying Basic LED Effects

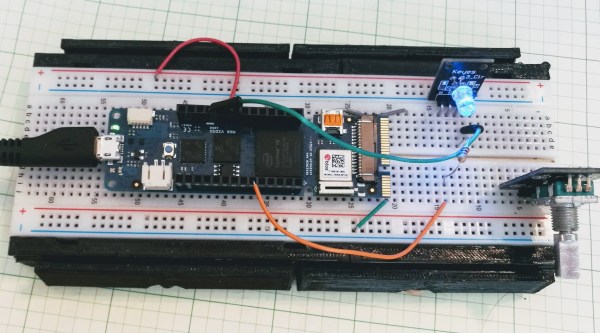
There was a time when having a blinking blue LED on a project was all you needed to be one of the cool kids. But now you need something more complex. LEDs should not just snap on, they should fade in and out. And blinking? Today’s hotness is breathing LEDs. If that’s the kind of project you want, you should check out [jandelgado’s] jled library.

At first glance, an Arduino library for LED control might seem superfluous, but if you are interested in nice effects, the coding for them can be a bit onerous. If you don’t mind stopping everything while you fade an LED on (or off) then sure, you just write a loop and it is a few lines of code. But if you want to have it happen while other things continue to execute, it is a little different. The library makes it very simple and it is also nicely documented.

Continue reading “Simplifying Basic LED Effects”

ESP8266 Uses LiFi To Get On WiFi

Connecting your shiny new ESP8266 to WiFi can be as simple or as complicated as you please. Most people decide to manually add it. Some people find clever ways to make the bloody thing connect itself. [Eduardo Zola] transfers his WiFi password using the flashing light of a smartphone screen.

A simple photo-resistor and a bit of tinkering allows him to easily send credentials — or any data really — to his ESP8266, through the power of LiFi. Short for Light Fidelity, LiFi transmits data using light with on and off states representing digital values. It can use visible light, or reach into either the ultraviolet or infra-red radiation if need be. For the nitty-gritty details on the subject, check out our primer on LiFi.

 A flashing LCD screen and a photo-resistor barely make the cut for a one-way LiFi system, but [Eduardo Zola] makes it work. The approach is to build a resitor divider and watch an input pin on the ESP for changes.

The trick is to keep ambient light out of the mix. The test sensor shown here places the LDR in a black cap, but [Eduardo] 3D-Printed a slick little enclosure for his reverse flashlight so it fits flush with the phone screen. One click and about half a minute of a flashing screen later, and the Wi-Fi credentials are transferred. This circuit could really be added onto any project, for short data transfers. With a bit more work on the sensor circuit, speed could be improved with the limiting factor being the timing on the phone screen itself.

Since the ESP8266 has its own WiFi connection, it’s likely you’ll use that for data transfer once the LiFi gets it onto the network. But any situation where you don’t have a full user input or a network connection could benefit from this. Pull out that old scrolling LED matrix project and add this as a way to push new messages to the device!
Continue reading “ESP8266 Uses LiFi To Get On WiFi”

FPGA Persistently Rick Rolls You

When [Im-pro] wants a display, he wants it to spin.  So he built a persistence of vision (POV) display capable of showing a 12-bit color image of 131 x 131 pixels at 16 frames per second. You can see a video about the project below, but don’t worry, you can view it on your normal monitor.

The project starts with a Java-based screen capture on a PC. Data goes to the display wirelessly to an ESP8266. However, the actual display drive is done by an FPGA that drives the motor, reads a hall effect index sensor, and lights the LEDs.

Continue reading “FPGA Persistently Rick Rolls You”

Arduino Analog I/O Multiplexer

[SeanHodgins] has a project in mind where he needs to sample over 500 analog sensors. To get ready, he made a breakout board for 32-channel analog multiplexer device he wants to use. He put the project out on Hackaday.io and also has a video tutorial you can see below.

There are five input pins to the chip which lets you connect one analog pin to any one of 32 analog pins. Of course, in addition to the five control lines, you need some handshaking lines, too so you could use as many as eight digital pins to control the device.

Continue reading “Arduino Analog I/O Multiplexer”

WiFi Pool Controller Only Cost $20

Pools have come a long way. It used to be you had a pump and if you were lucky it had a mechanical timer switch on it. That was it. Now you have digital controllers and spa jets and heaters. You can even get them that connect to your home automation system. If your pool isn’t new enough to do that already, you can get a range of add-on accessories. For a price. [Rob] paid $500 to get a remote for his pool. It wasn’t even WiFi, just a simple RF remote. In 3 years, the transmitter had burned out ($300 to replace) and he decided he had enough. For $20, [Rob] added MQTT control and monitoring to his pool using an ESP8266. You can see the video description of the project below.

Naturally, the instructions are a bit specific to the Pentair system he has. However, it isn’t as specialized as you might think. The project relies on the connection for a wired “spa-side remote” that most modern pool systems support. The electrical connections for these aren’t quite standard, but they are all very similar, so you have a good chance of reproducing this for your setup assuming you have a connection for one of these wired remotes.

Continue reading “WiFi Pool Controller Only Cost $20”

Roll A Black Box For Your Wheels

Telemetric devices for vehicles, better known as black boxes, cracked the consumer scene 25 years ago with the premiere of OnStar. These days, you can get one for free from your insurance company if you want to try your luck at the discounts for safe driving game. But what if you wanted a black box just to mess around with that doesn’t share your driving data with the world? Just make one.

[TheForeignMan]’s DIY telematics box was designed to pull reports of the car’s RPM, speed, and throttle depression angle through the ODBII port. An ODBII-to-Bluetooth module sends the data to an Arduino Mega and logs it on an SD card along with latitude and longitude from a NEO-6M GPS module. Everything is powered by the car’s battery through a cigarette lighter-USB adapter.

He’s got everything tightly wrapped up inside a 3D printed box, which makes it pretty hard to retrieve the SD card. In the future, he’d like to send the data to a server instead to avoid accidentally dislodging a jumper wire.

If this one isn’t DIY enough for you to emulate, start by building your own CAN bus reader.