Fixing Arduino’s Serial Latency Issues

arduino_latency

[Paul] wrote in to tell us about some interesting Arduino latency issues he helped nail down and fix on the Arduino.

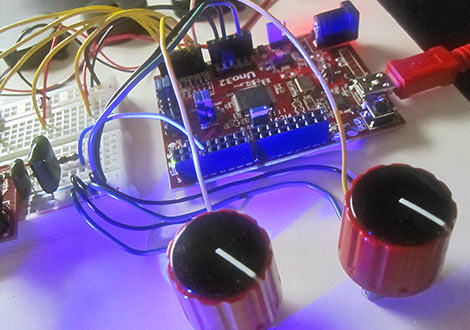
It seems that [Michu] was having some problems with controlling his Rainbowduino project we featured earlier this year, and he couldn’t quite figure out why he was experiencing such huge delays when sending and receiving data.

Searching online for answers turned up very little, and since [Michu] was using Processing, the pair designed a set of tests to see what kind of latency was being introduced by Java. Pitting an Arduino Uno and an Arduino from 2009 against a Teensy 2.0, the tests gauged the latency of native data transfers versus transfers facilitated by Java via the rxtx library it uses for serial communications.

The results were pretty stunning. While both of the Arduinos lagged behind the Teensy by a long shot, their latency values under Java were always 20ms at a minimum – something didn’t add up. [Michu] poked around in the rxtx code and found a mystery 20ms delay programmed into the serial library. It made no sense to him, so he changed the delay to 2ms and saw a drastic increase in performance when transferring less than 128 bytes of data.

The pair’s fix doesn’t seem to affect latency when larger amounts of data (>1kB) are being transferred, but it makes a world of difference when manipulating smaller chunks of data.

For the sake of disclosure, it should be noted that [Paul’s] company produces the Teensy mcu.

Bluetooth Super Nintendo Controller For Android Gaming

bluetooth_snes_controller

[Rich] needed to come up with a senior design project and decided to combine two things he loved: his Android phone and Super Nintendo.

While touchscreen phones are great, he felt that nothing beats the tactile feedback of a physical controller when it comes to gaming. He figured out how the controller’s signaling works, then wired it up to an Arduino Pro Mini 328. The Arduino interprets the SNES controller’s signals, sending them to his Android phone via a BlueSMiRF Bluetooth module.

He originally had all of the components crammed in a cardboard box, but much like we pointed out yesterday, he realized that a project really comes together when housed in a proper enclosure. He managed to squeeze all of his components into the SNES controller’s shell aside from the battery pack he used to power the remote. After a little bit of Bondo and a few coats of paint were applied, the controller is looking quite sharp.

Stick around to see a quick demo video of his controller in action, and check out this tutorial he put together explaining some of the principles he used to construct it.

Continue reading “Bluetooth Super Nintendo Controller For Android Gaming”

Google ADK Project Shows Just How Easy It Is To Use

first_adk_project

[yergacheffe] was able to get his hands on a shiny new Google ADK board about a week before it was announced at I/O, and got busy putting together a neat project to show off some of the ADK’s features. His idea was to meld together the ADK and Google’s new music service, two items he says complement each other very well.

He had a handful of LED matrices left over from last year’s Maker Faire, which he decided to use as a Google music metadata display. The base of the display is made from laser-cut acrylic, with a few spare ShiftBrites lighting up the Google music beta logo.

He says it took literally just a couple lines of code to get his Android handset to talk with the display – a testament to just how easy it is to use the ADK.

Pretty much anyone can walk up, attach their phone, and see their current music track on the display with zero fuss, which you can see in the video demo below.

Continue reading “Google ADK Project Shows Just How Easy It Is To Use”

Destroying An Arduino’s EEPROM

We’ve seen projects test the lifespan of an EEPROM before, but these projects have only tested discrete EEPROM chips. [John] at tronixstuff had a different idea and set out to test the internal EEPROM of an ATmega328.

[John]’s build is just an Arduino and LCD shield that writes the number 170 to memory on one pass, and the number 85 on the next pass. Because these numbers are 10101010 and 01010101 in binary, each bit is flipped flipped once each run. We think this might be better than writing 0xFF for every run – hackaday readers are welcomed to comment on this implementation. The Arduino was plugged into a wall wart and sat, “behind a couch for a couple of months.” The EEPROM saw it’s first write error after 47 days and 1,230,163 cycles. This is an order of magnitude better than the spec on the atmel datasheet, but similar to the results of similar experiments.

We covered a similar project, the Flash Destroyer, last year, but that tested an external EEPROM, and not the internal memory of a microcontroller.

Check out the hugely abridged video of the EEPROM Killer after the break.

Continue reading “Destroying An Arduino’s EEPROM”

Emulating A Marching Band With Wearable Instruments

[Scott] is a design and technology master’s student who just came up with The Imaginary Marching Band – virtual band instruments you can wear on your hand.

Taking inspiration from Minority Report and the NES Power Glove, the system is able to emulate 6 instruments at this point – A trumpet, trombone, tuba, snare drum, bass drum, and cymbals. The glove itself reads data from a variety of sensors and passes that onto an Arduino Uno which sends serial data back to a computer. This data is then parsed by a Serial – MIDI converter, and can then be played back through a sampler, synthesizer or piped into your sequencer of choice. Happily, [Scott] will be designing custom PCBs for his gloves to cut down on space and weight, and he’ll also be making his project open-source eventually.

[Scott] has a kickstarter page for his project, and so far he’s been on track towards getting this project funded. Check out a demo after the break.

Continue reading “Emulating A Marching Band With Wearable Instruments”

ChipKIT Max32, An Arduino Mega Upgrade With A PIC32 Under The Hood

For those of you who are looking to put some power behind your Arduino shields,  Digilent just released their chipKIT Max32 prototyping platform. The board  features a Pic 32 microcontroller, USB programmer and all the things you would typically expect from a development board.

The PIC32MX795F512 is a  32-bit MIPS processor core running at 80Mhz, 512KB flash memory and packs 128KB of SRAM data memory. Digilent also mentions utilizing the Pic’s built in USB 2 controller, 10/100 Ethernet and dual CAN controllers, but these will require shields specific to the chipKIT Max32. The board is also fully compatible with Arduino IDE and libraries as well as MPLAB  and the PICKit3 in-system programmer/debugger.

With a price point just below the Arduino Mega 2560 this looks like a great resource for anyone looking to upgrade their Arduino webserver, or just embarrass their Arduino Arduino shield. Maybe it’ll just spawn some interesting gameduino upgrades. It can certainly cut down on extraneous Arduino usage. Either way we’ll be on the lookout to see what this performance bump can bring to table!

Adding A Tachometer To The SX2 Mini Mill

sx2_mill_tach

[Jeff] recently bought an SX2 mini milling machine with plans to eventually automate it for use as a CNC mill. After paying nearly $700 for the mill, he decided there was no way he was willing to pay for the $125 tachometer add on as well. Instead, he reverse-engineered the mill and constructed a tachometer of his own.

He opened the control box and started looking around. After identifying most of the components, he got sidetracked by a 3-pin header that didn’t seem to have any particular function. That is, until he realized that a lathe by the same manufacturer uses the same components, and figured that the header might be used for reversing the motor. Sure enough he was right, and after adding a reverse switch, he got back to business.

He probed the 7-pin socket with his logic analyzer and quickly picked out the mill’s data line. He hooked the line up to an Arduino and in no time had the RPM displayed on an LCD screen.

[Jeff] says that this little experiment is the first of many, since the mill is so hacker friendly. We definitely look forward to seeing a CNC conversion tutorial in the near future.