Resistors Sorter Measures Values

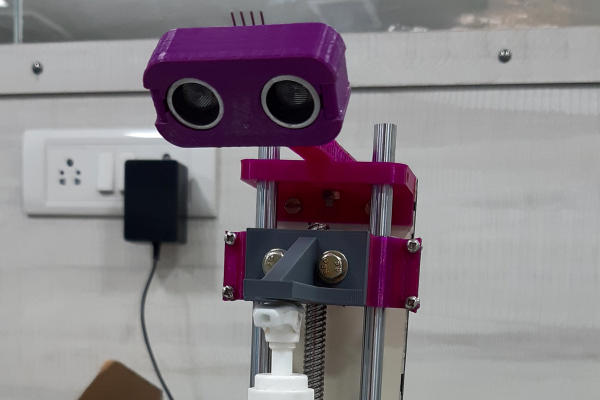
We’ve all been there. A big bag of resistors all mixed up. Maybe you bought them cheap. Maybe your neatly organized drawers spilled. Of course, you can excruciatingly read the color codes one by one. Or use a meter. But either way, it is a tedious job. [Ishann’s] solution was to build an automatic sorter that directly measures the value using a voltage divider, rather than rely on machine vision as is often the case in these projects. That means it could be modified to do matching for precise circuits (e.g., sort out resistors all marked 1K that are more than a half-percent away from one nominal value).

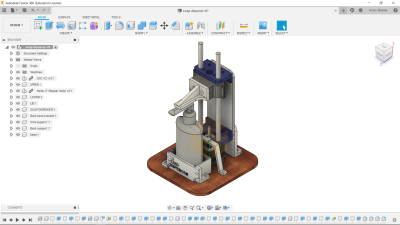
There is a funnel that admits one resistor at a time into a test area where it is measured. A plate at the bottom rotates depending on the measured value. In the current implementation, the resistor either falls to the left or the right. It wouldn’t be hard to make a rotating tray with compartments for different values of resistance. It looks like you have to feed the machine one resistor at a time, and automating that sounds like a trick considering how jumbled loose axial components can be. Still, its a fun project that you probably have all the parts to make.

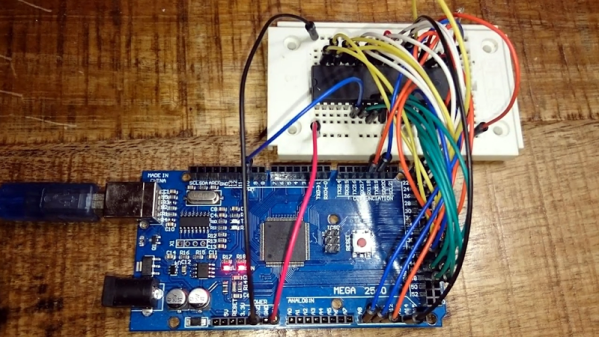
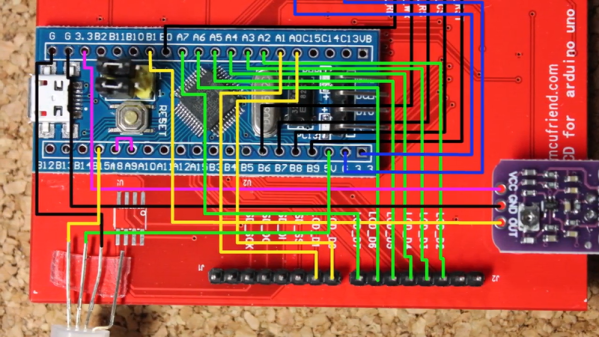
An Arduino powers the thing. An LCD screen and display control the action. If you want some practice handling material robotically, this is a great use of servos and gravity and it does serve a practical purpose.

We have seen many variations on this, including ones that read the color code. If you ever wanted to know where the color code for resistors came from, we took a trip to the past to find out earlier this year.

Continue reading “Resistors Sorter Measures Values”

An Arduino As A PLL

At the heart of many amateur radio and other projects lies the VFO, or Variable Frequency Oscillator. Decades ago this would have been a free-running LC tuned circuit, then as technology advanced it was replaced by a digital phase-locked-loop frequency synthesiser and most recently a DDS, or Direct Digital Synthesis chip in which the waveform is produced directly by a DAC. The phase-locked loop (PLL) remains a popular choice due to ICs such as the Si5351 but is rarely constructed from individual chips as it once might have been. [fvfilippetti] has revisited this classic circuit by replacing some of its complexity with an Arduino (Spanish language, Google Translate link).

The internals of a PLL frequency synthesiser
The internals of a PLL frequency synthesiser. Image by Chetvorno – CC0

A PLL is a simple circuit in which one oscillator is locked to another by controlling it with a voltage derived from comparing the phase of the two. Combining a PLL with a set of frequency dividers creates a frequency synthesiser, in which a variable frequency oscillator can be locked to a single frequency crystal with the output frequency set by the division ratios. The classic PLL chip is the CMOS 4046 which would have been combined with a pile of logic chips to make a frequency synthesiser. The Arduino version uses the Arduino’s internal peripherals to take the place of crystal oscillator, dividers, and phase comparator, resulting in an extremely simple physical circuit of little more than an Arduino and a VCO for the 40 metre amateur band. The code can be found on GitLab, should you wish to try for yourself.

It would be interesting to see how good this synthesiser is at maintaining both a steady frequency and minimal phase noise. It’s tempting to think of such things as frequency synthesisers as a done deal, so it’s always welcome to see somebody bringing something new to them. Meanwhile if PLLs are new to you, we have just the introduction for you.

Come On Baby Light My Fire Button

While the Nintendo GameCube stood deep in the shadows of the PS2 in its day, its controller remains a popular target for all sorts of modifications today — many of them involving LEDs, thanks to a translucent bottom and button option. As an avid player of the Super Smash Bros. series, [goomysmash] is of course an owner of the very same controller, which motivated him to write GoomWave, a “versatile and hackable LED library”. In an impressively detailed Instructable, he shows how to modify your own controller in two different ways to make use of the library for yourself.

Initially inspired by the Shinewave mod that lights up RGB LEDs in colors associated to pre-defined moves in Smash Bros, [goomysmash] aimed to improve on it and add more versatility from the very beginning. Its latest iteration comes in a simplified ABXY-buttons-only variety using an ATtiny85, and a full-blown all-button variety using an Arduino Nano. Both of them are powered straight from the controller board, and have different modes where they either react to controller interactions, or are just custom lights. A brief showcasing of all the different modes can be seen in the video after the break, and there a few more details also in an older version’s video, also embedded below.

Mesmerizing LED-blinking aside, we just have to admire the diligence and cleanliness [goomysmash] put into the wiring and fitting everything inside the controller. But in case light mods aren’t your thing or you’re looking for other GameCube controller modifications, how about adding Bluetooth?

Continue reading “Come On Baby Light My Fire Button”

Is That An ESP32 On Your Wrist?

What could you do with a dual-core 240 MHz ESP32 that supports Arduino-style programming, with 16 MB of flash, 8 MB of PSRAM, and 520 k of RAM? Oh, let’s throw in a touchscreen, an accelerometer, Wifi, and Bluetooth. Besides that, it fits on your wrist and can show the time? That’s the proposition behind Lilygo T Watch 2020. If it sounds like a smartwatch, it is. At around $25 –and you can snag the hardware from a few different places — it is not only cheaper than the latest flagship smartwatch, but it is also infinitely more hackable.

OK, so the screen is only 1.54″, but then again, it is a watch. If Arduino isn’t your thing, you can use anything else that supports the ESP32 like Micropython or even Scratch. There are variants that have LoRA and GPS, at slightly higher prices. You can also find ones with heart rate monitors and other features.

Continue reading “Is That An ESP32 On Your Wrist?”

Pinball Machine Needs No Wizard

Ever since he was a young boy, [Tyler] has played the silver ball. And like us, he’s had a lifelong fascination with the intricate electromechanical beasts that surround them. In his recently-completed senior year of college, [Tyler] assembled a mechatronics dream team of [Kevin, Cody, and Omar] to help turn those visions into self-playing pinball reality.

You can indeed play the machine manually, and the Arduino Mega will keep track of your score just like a regular cabinet. If you need to scratch an itch, ignore a phone call, or just plain want to watch a pinball machine play itself, it can switch back and forth on the fly. The USB camera mounted over the playfield tracks the ball as it speeds around. Whenever it enters the flipper vectors, the appropriate flipper will engage automatically to bat the ball away.

Our favorite part of this build (aside from the fact that it can play itself) is the pachinko multi-ball feature that manages to squeeze in a second game and a second level. This project is wide open, and even if you’re not interested in replicating it, [Tyler] sprinkled a ton of good info and links to more throughout the build logs. Take a tour after the break while we have it set on free play.

[Tyler]’s machine uses actual pinball machine parts, which could quickly ramp up the cost. If you roll your own targets and get creative with solenoid sourcing, building a pinball machine doesn’t have to be a drain on your wallet.

Continue reading “Pinball Machine Needs No Wizard”

Jumbo LED Matrix Brings Classic Sprites To Life

Despite all the incredible advancements made in video game technology over the last few decades, the 8-bit classics never seem to go out of style. Even if you weren’t old enough to experience these games when they were new, it’s impossible not to be impressed by what the early video game pioneers were able to do with such meager hardware. They’re a reminder of what can be accomplished with dedication and technical mastery.

The grid has been split up for easier printing.

If you’d like to put a little retro inspiration on your desk, take a look at this fantastic 16 x 16 LED matrix put together by [Josh Gerdes]. While it’s obviously not the only thing you could use it for, the display certainly seems particularly adept at showing old school video game sprites in all their pixelated glory. There’s something about the internal 3D printed grid that gives the sprites a three dimensional look, while the diffused glow reminds us of nights spent hunched over a flickering CRT.

The best part might be how easy it is to put one of these together for yourself. You’ve probably got most of what you need in the parts bin; essentially it’s just a WS2812B strip long enough to liberate 256 LEDs from and a microcontroller to drive them. [Josh] used an Arduino Nano, but anything compatible with the FastLED library would be a drop-in replacement. You’ll also need a 3D printer to run off the grid, and something to put the whole thing into. The 12×12 shadowbox used here looks great, but we imagine clever folks such as yourselves could make do with whatever might be laying around if you can’t nip off to the arts and crafts store right now.

Beyond looking great, this project is a fantastic reminder of how incredibly handy WS2812 LEDs really are. Whether you’re recreating iconic game sprites or fashioning your own light-up sunglasses, it’s hard to imagine how we managed before these little wonders hit the scene.

Continue reading “Jumbo LED Matrix Brings Classic Sprites To Life”

Laundry Monitor Won’t Generate Static With Roommates

Laundry. It’s one of life’s inescapable cycles, but at least we have machines now. The downside of this innovation is that since we no longer monitor every step — the rock-beating, the river-rinsing, the line-hanging and -retrieving — the pain of laundry has evolved into the monotony of monitoring the robots’ work.

[Adam] shares his wash-bots with roommates, and they aren’t close enough to combine their lights and darks and turn it into a group activity. They needed an easy way to tell when the machines are done running, and whose stuff is even in there in the first place, so [Adam] built a laundry machine monitor that uses current sensing to detect when the machines are done running and sends a text to the appropriate person.

Each machine has a little Hall effect-sensing module that’s carefully zip-tied around its power cable. The signal from these three-wire boards goes high when the machine is running and low when it’s not. At the beginning of the load, the launderer simply presses their assigned button on the control box, and the ESP32 inside takes care of the rest.

Getting a text when your drawers are clean is about as private as it gets. Clean underwear, don’t care? Put it on a scrolling marquee.