Mandalas are meditative objects that mean many things to myriad religions. Psychologist Carl Jung equated them with the concept of the Self as a whole, and put forth the notion that an urge to create mandalas signifies a period of intense personal growth.
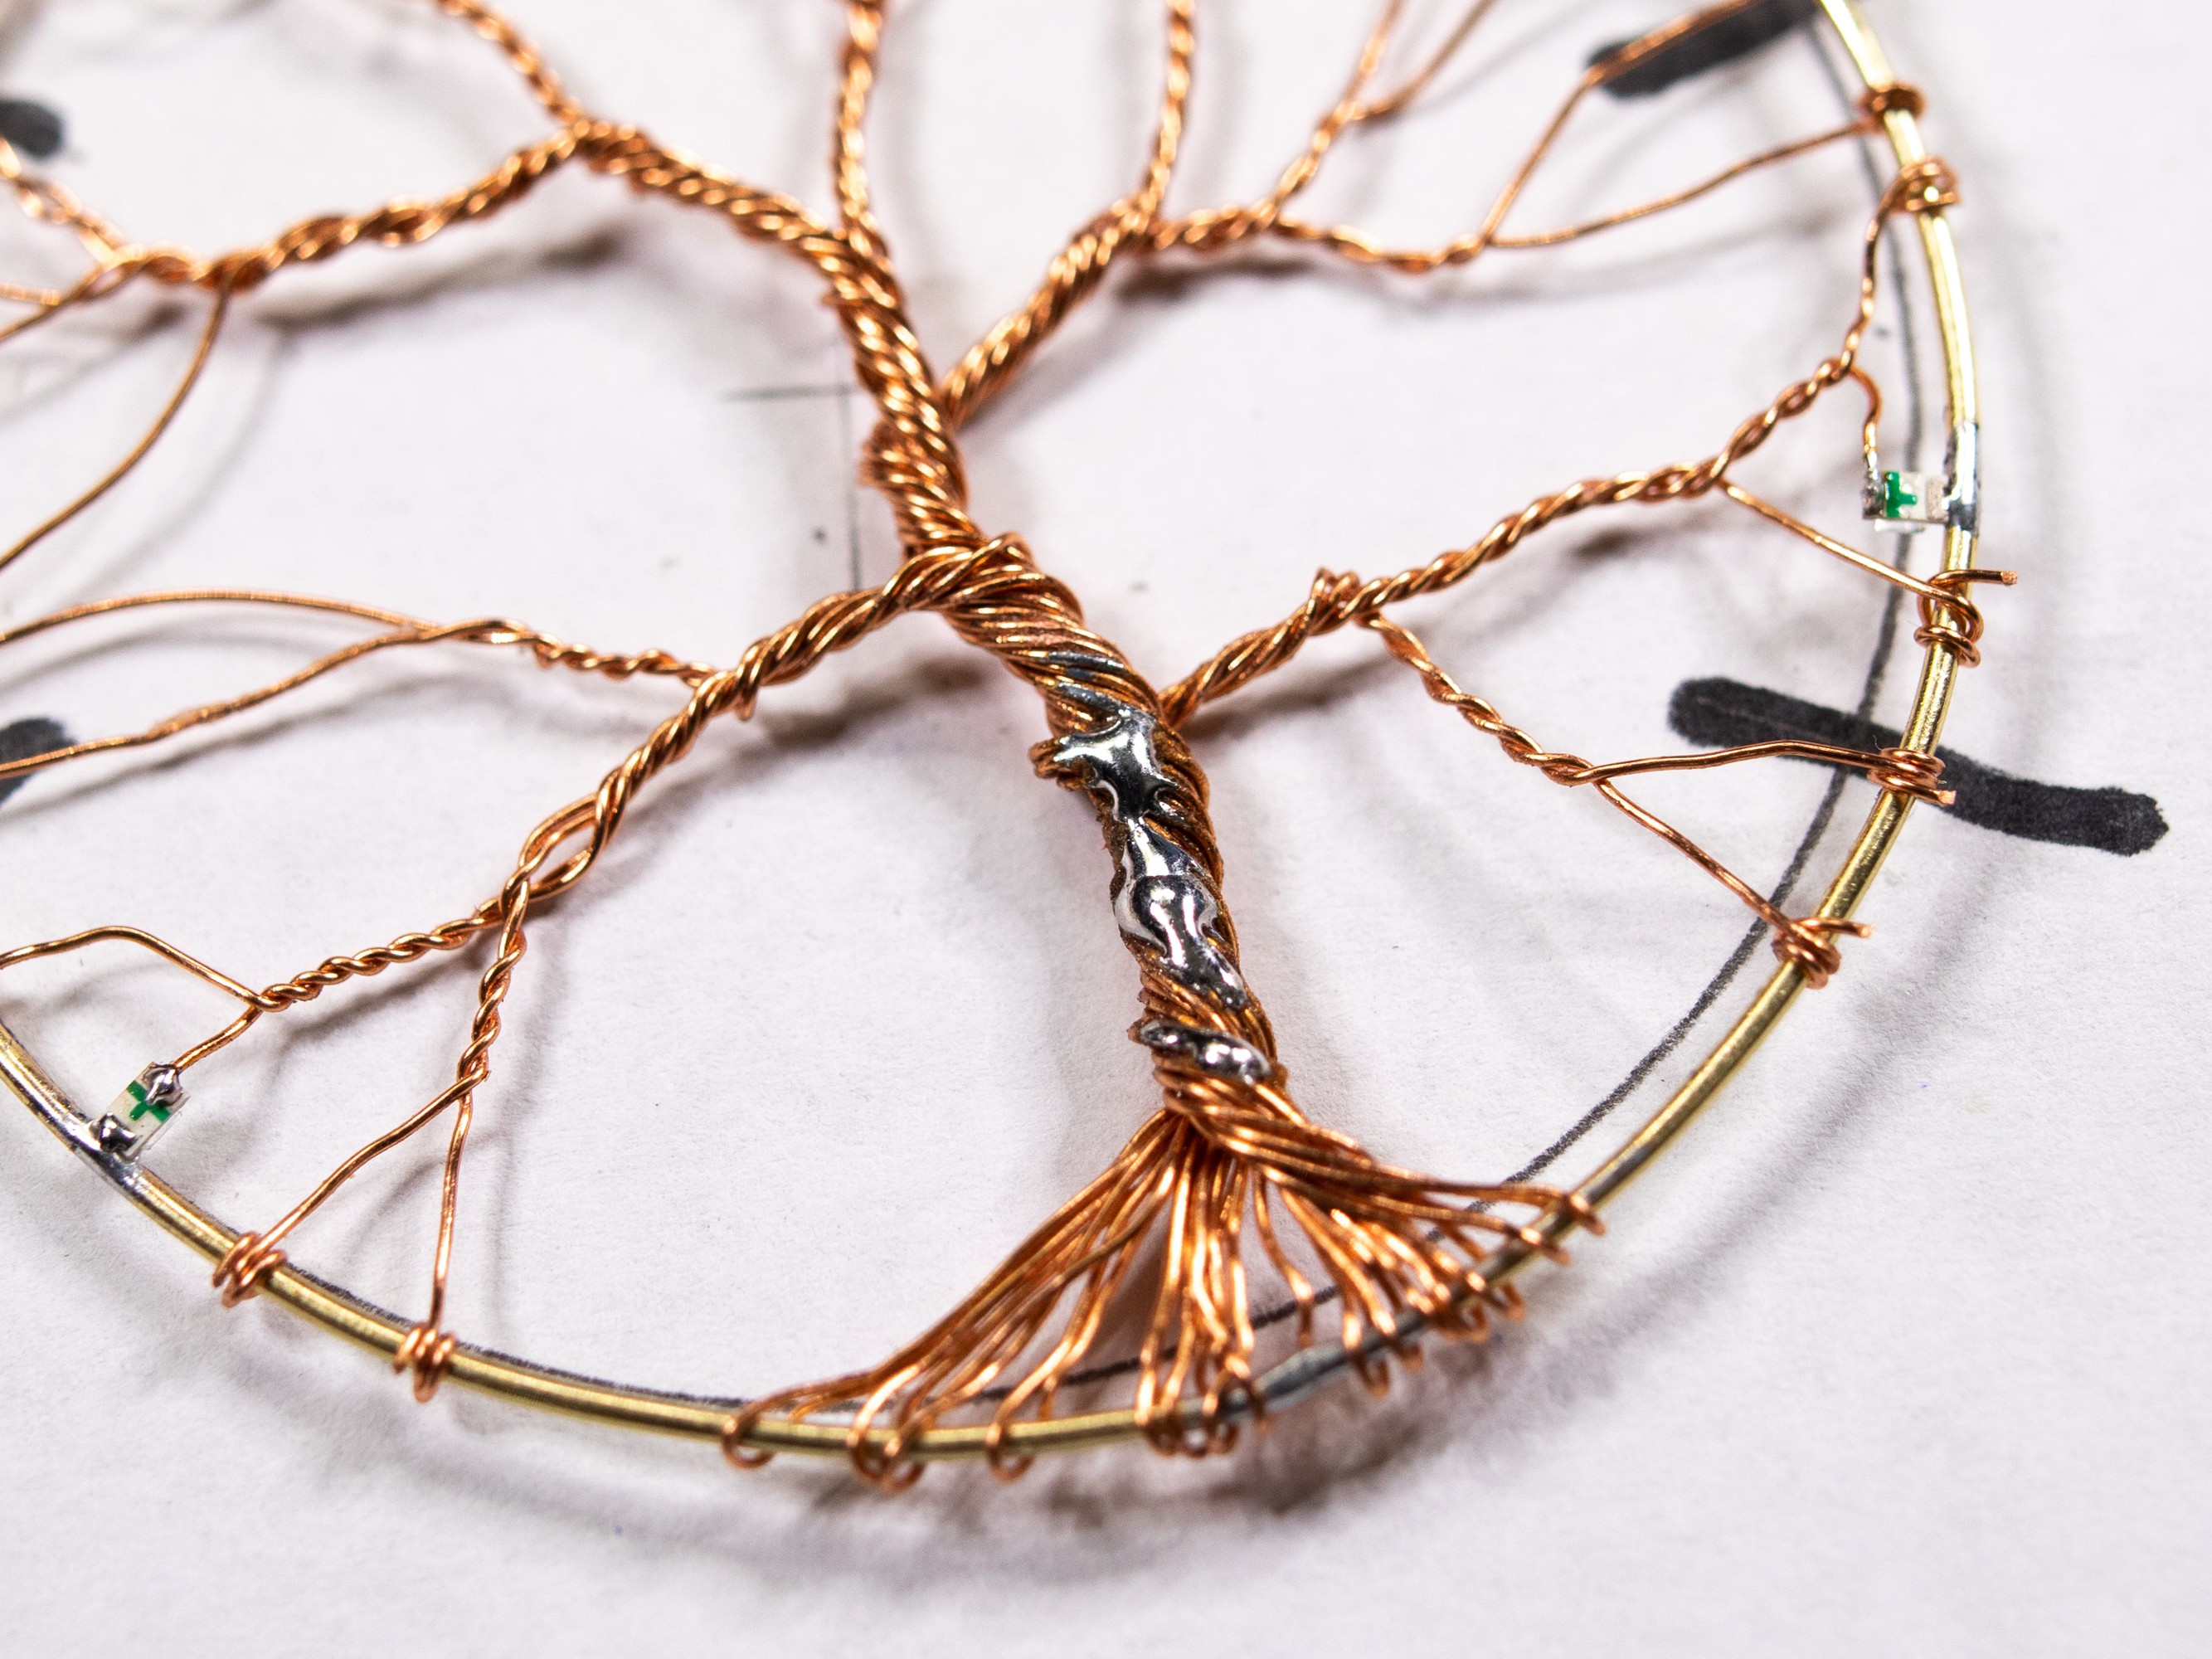 [Sander van de Bor] took up the mandala challenge at the beginning of 2020 and decided to create several of them in free-form electronic style. If you’re looking for a healthy new way to deal, [Sander] has step-by-step instructions for making your own light-up tree of life by wrangling a wad of wires into a trunk and branches. Big bonus if you already find soldering to be soothing.
[Sander] starts by forming a circle from brass rod. This is the base for the rest of the build and will tie all the LED grounds together. The tree is twisted from a cluster of enameled copper wires that are eventually soldered together to distribute power from a coin cell out to the six SMT LEDs.
You could argue that the tree should be ground because it’s rooted to Earth, but you could also argue that the circle should be ground because the circle of life is a grounding force. Something to think about while you design and build your own, eh?
If electronic sculpture becomes your new thing, explore all the angles with the master manipulator, [Mohit Bhoite].