The late 1950s [Bill Haley], [Elvis Presley], and [Little Richard] were building a new kind of music. Meanwhile, electronic hobbyists were building their own gear from Heathkit. A lot of that gear shows you how far we’ve come in less than a century. [Jeff Tranter’s] YouTube channel is a great way to look at a lot of old Heathkit gear, including this really interesting “direct reading capacity meter.” You can see the video, below.
Measuring capacitance these days is easy. Many digital multimeters have that function. However, those didn’t exist in the 1950s–at least, not in the way we know them. The CM-1 weighed 5 pounds, had several tubes, and cost what would equate to $250 in today’s prices. Unlike other instruments of the day, though, the capacitance was read directly off a large analog meter (hence, the name). You didn’t have to interpret readings using a nomograph or move a knob to balance a bridge and read the knob’s position.
If you want to build your own vacuum tubes, whether amplifying, Nixie or cathode-ray, you’re going to need a vacuum. It’s in the name, after all. For a few thousand bucks, you can probably pick up a used turbo-molecular pump. But how did they make high vacuums back in the day? How did Edison evacuate his light bulbs?
Strangely enough, you could do worse than turn to YouTube for the answer: [Cody] demonstrates building a Sprengel vacuum pump (video embedded below). As tipster [BrightBlueJim] wrote us, this project has everything: high vacuum, home-made torch glassware, and large quantities of toxic heavy metals. (Somehow [Jim] missed out on the high-voltage from the static electricity generated by sliding mercury down glass tubes for days on end.)
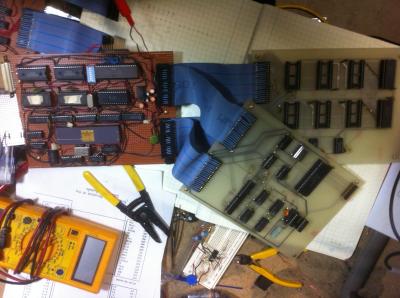
There was a time when building your own computer meant a lot of soldering or wire wrapping. At some point, though, building a PC has come to mean buying a motherboard, a power supply, and just plugging a few wires together. There’s nothing wrong with that, but [Scott Baker] wanted to really build a PC. He put together an Xi 8088, a design from [Sergey] who has many interesting projects on his site. [Scott] did a great build log plus a video, which you can see below.
As the name implies, this isn’t a modern i7 powerhouse. It is a classic 8088 PC with a 16-bit backplane. On the plus side, almost everything is conventional through-hole parts, excepting an optional compact flash socket and part of the VGA card. [Scott] acquired the boards from the Retrobrew forum’s inventory of boards where forum users make PCBs available for projects like this.
If you are a connoisseur of analogue audio, it’s probable you might have a turntable and a stack of records at home somewhere. If you are of a certain age you may even have a cassette deck, though you’re more likely to have abandoned that format some time in the 1990s. If you are old enough to have been around in the 1960s or 1970s though, you may have owned another analogue audio format. One of several that you might have found in a well-equipped home of that period was the 8-track stereo cartridge, a self-contained tape cassette format that fit four stereo tracks onto a single quarter-inch tape loop as eight parallel tracks, four each of left and right. A triumph of marketing, really, it should more accurately have been called 4-track stereo.
8-track cartridges were developed from earlier tape cartridge formats, largely to satisfy the demands of the automotive industry for interchangeable in-car entertainment. Thus if you owned an 8-track player it was most likely to have been found in your car, but it was not uncommon to find them also incorporated into home hi-fi systems. Thus we come to our subject today. Our retrotechtacular series usually highlights a video showing a bygone technology, but today we’re going to get a little more hands-on.
Some time in the early 1990s, I acquired an 8-track player, a BSR McDonald unit manufactured in the UK and dating from the early 1970s. BSR were much more well-known for their turntables, so this is something of an oddity. Where I found it has disappeared into the mists of time, but it was probably at a radio rally or junk sale. I certainly didn’t buy it because I wanted it to play 8-track tapes, instead I wanted a talking point for my hi-fi, something quirky to set it apart from everyone else’s. So every incarnation of listening enjoyment chez List for the last quarter century has had an 8-track player nestling within it, even if it has never played a tape while in my ownership. Thus we have a unique opportunity for this retro teardown.
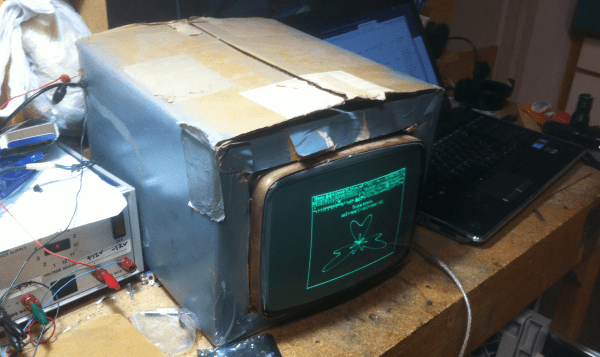
Alongside the Commodores, Ataris, Nintendos, and all the other game systems of the 80s, there was a single unique video game system that stood out from the pack. This was the Vectrex, a console with a built-in CRT meant to display vector graphics and only vector graphics. The video game crash of 1983 wasn’t kind to the Vectrex, but it still lives on with a reasonably popular homebrew scene. Still, these homebrew games are limited by the hardware itself. After thirty years, the Vectrex has an upgrade. The Vectrex32 is a coprocessor, designed for the Vectrex cartridge slot, that gives this ancient console better graphics and 32-bit capabilities.
There’s a whole site dedicated to this Vectrex add-on, and the hardware is pretty much what you would expect. There’s a fast PIC32 microcontroller on this cartridge, a USB port, and a dual-port memory chip that’s connected to the Vectrix’s native processor.
Since this add-on cartridge is effectively a computer itself, the Vectrex32 can operate as a BASIC interpreter for the Vectrex. That’s something the original hardware couldn’t have done, and makes homebrew development much easier.
You can check out a few videos describing the functionality of the Vectrex32 below, along with a few gameplay videos of new homebrew games written specifically for the Vectrex.
Slotting a modern media center into an old stereo usually means adding Bluetooth and a Raspberry Pi to an amp or receiver, and maybe adding a few discrete connectors on the back panel. But this media center for a late-70s Braun hi-fi (translated) goes many steps beyond that — it fabricates a component that never existed.
The article is in German, and the Google translation is a little spotty, but it’s pretty clear what [Sebastian Schwarzmeier] is going for here. The Braun Studio Line of audio components was pretty sleek, and to avoid disturbing the lines of his stack, he decided to create a completely new component and dub it the “M301.”
The gutted chassis of an existing but defunct A301 amplifier became the new home for a Mac Mini, Blu-Ray drive, and external hard drive. An HDMI port added to the back panel blends in with the original connectors seamlessly. But the breathtaking bit is a custom replacement hood that looks like what the Braun designers would have come up with if “media center” had been a term in the 70s.
From the brushed aluminum finish, to the controls, to the logo and lettering, everything about the component that never was shows an attention to detail that really impresses. But if you prefer racks of servers to racks of audio gear, this media center built into a server chassis is sure to please too.
Thanks to [Sascho] and [NoApple4Me] for the nearly simultaneous tips on this one.
Whether you’re selling a product or just showing off your latest project, a photo turntable makes video shots a lot easier. 360° turntables allow the viewer to see every side of the object being photographed, while the camera stays locked down. Motorized turntables are available as commercial products costing anywhere from $30 to $150 or so. Rather than shell out cash, [NotionSunday] decided to create his own turntable using a few parts he had on hand and 3D printing everything else.
The motor for the turntable came from the eject mechanism of an old DVD-ROM drive. An Arduino Pro Mini controls the motor’s speed using an MX1508 H-bridge chip. Power comes from an 18650 Li-Ion battery. The whole assembly spins on the head assembly from a VCR.
Before you jump in on the comments, yes, VCR heads have motors. However, they’re typically brushless motors rated for 1,800 RPM. Running a motor like that at low-speed would mean rewinding the coils. In this case, using a DC motor and gear drive was the easier option.
[NotionSunday] 3D printed the turntable base and mount. The mount uses a magnet arrangement that makes it easy to switch between freewheeling or belt driven operation. The turntable itself is posterboard, with 3D printed edges.