What’s to be gained from reverse engineering a four-decade-old video game? As it turns out, quite a lot, and as you’ll learn from [Norbert]’s recent talk at the ViennaJS meetup, it’s not just about bringing a classic back to life.
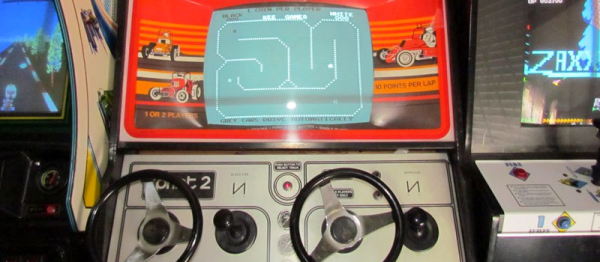
The game in question is Kee Game’s Sprint 2, a monochrome 2D car race that allowed two players to compete head to head. The glorious Harvest Gold and Burnt Orange color scheme just screams 1970s, and it might be hard to see why this game was once a popular quarter-eater. But it was quite engaging for the day, and [Norbert] was interested in reverse engineering it. That he did, using JavaScript to build a faithful browser-based emulation of the game. And he took it further, creating a 3D first-person version of the game.
[Dave] builds custom wooden orreries, which are mechanical models of the solar system. It’s no surprise then that he’s interested in the Antikythera Mechanism—a small geared device discovered off the coast of the Greece in 1900 that is believed to be the first analog computer and one of the oldest known geared systems, built partly to predict the positions of celestial bodies in the solar system as it was understood in ancient Greece.
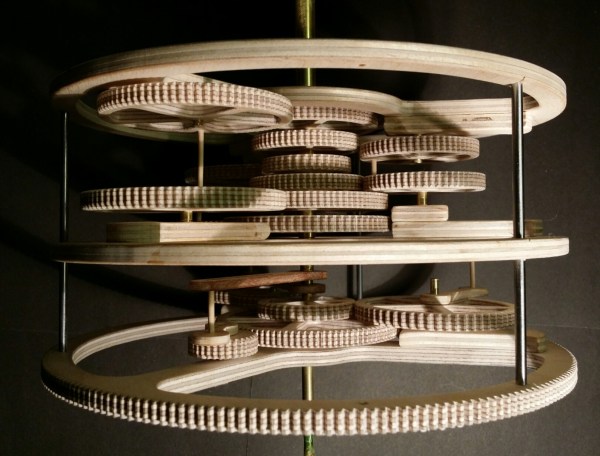
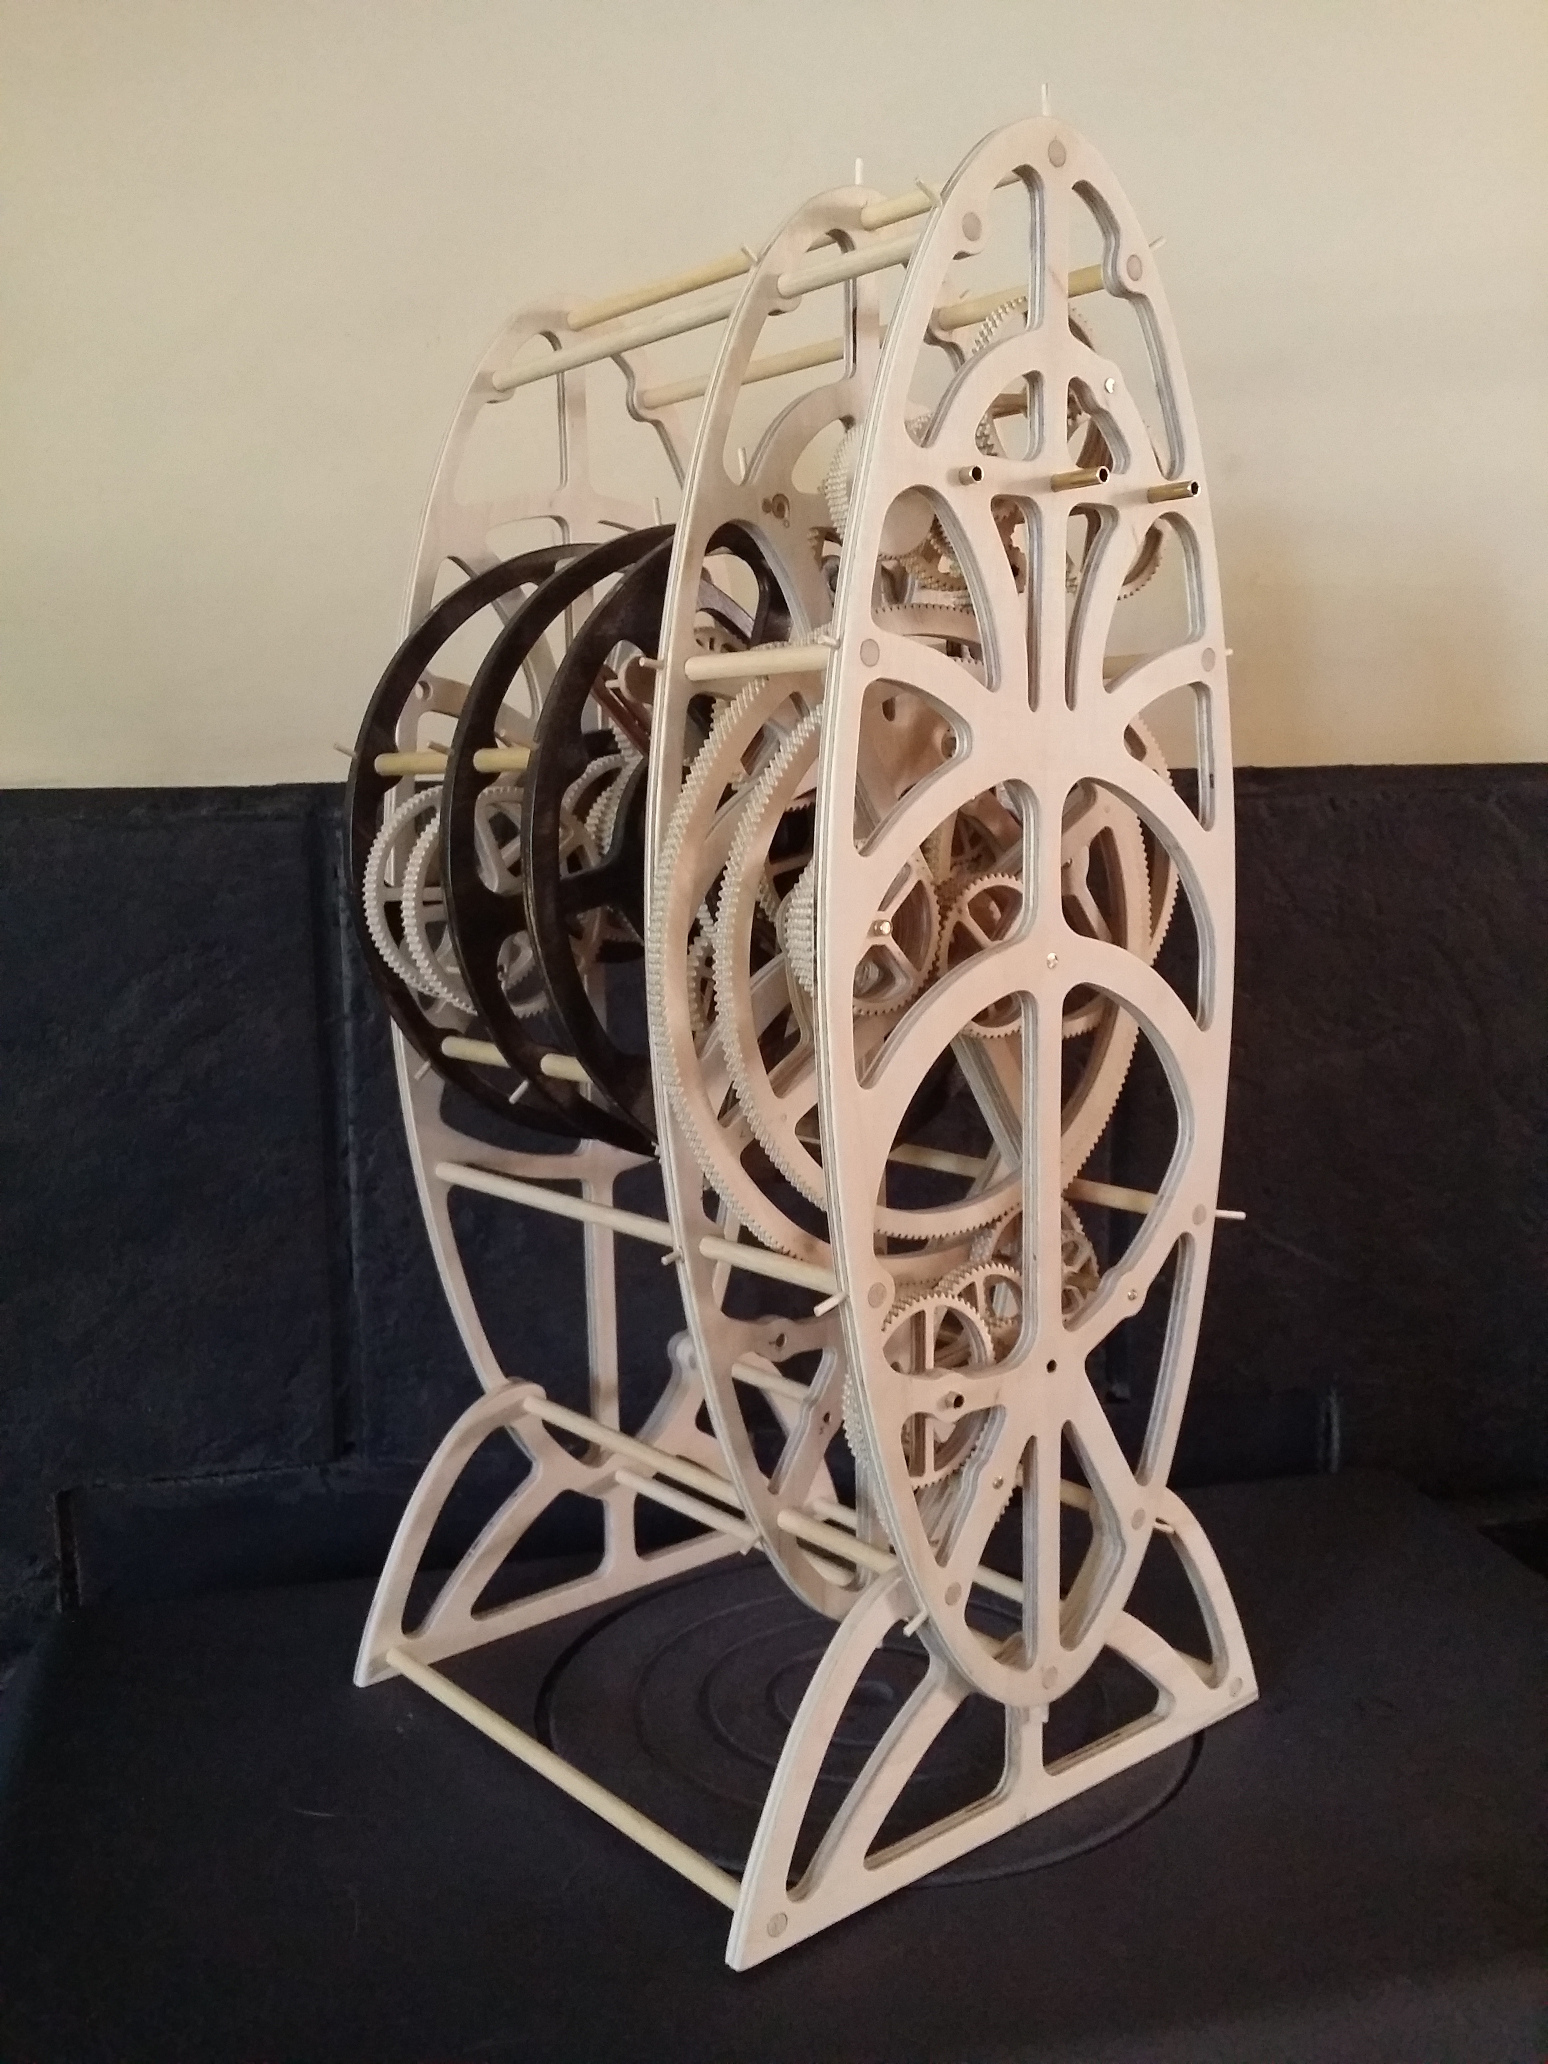
[Dave] decided to build a wooden version of the Antikythera Mechanism as a proof of concept that it can be done in wood rather than the brass of the original. He also sought to incorporate all the modern theories of the device’s gear train. The entire system is made out of 6mm birch plywood that [Dave] cut by hand on a scroll saw. That’s right — no CNC or lasers here. This has as much to do with replicating the craftsmanship of the original as it does with practicality. Besides, the pitch of the gear teeth is too small to be effectively cut with a laser.
There are no motors, either. The gears are centrally connected to nested brass tubing and the mechanism is actuated with a hand crank. The six pages of forum discussion are worth combing through just to see the pictures of [Dave]’s progress and all of those meticulously hand-cut gears.
It took [Dave] the better part of two years to complete this work of art, and you can see it in motion after the break. With the first version complete, he has begun Mk. II which will feature all of the spiral dials and pointers of the original. If you’re interested in exploring the Antikythera Mechanism further, here is Hackaday’s own in-depth look at it.
Want something that you’ll try for fifteen minutes before realizing it’s extremely stupid and has limited utility before throwing it in the back of a closet to eventually sell at a yard sale? No, it’s not the Internet of Things, but good guess. I’m speaking, of course, about unicycles.
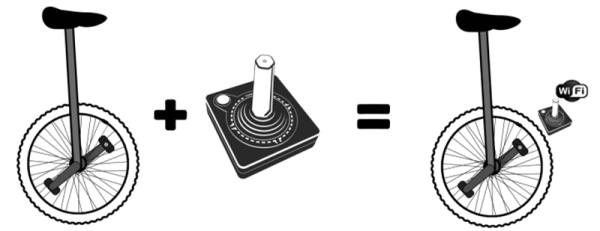
[retro.moe] is a unicycle and Commodore 64 enthusiast, and being the enterprising hacker he is, decided to combine his two interests. This led to the creation of the Uni-Joysti-Cle, the world’s first unicycle controller for the Commodore 64, and the first video game to use this truly immersive, better-than-an-Oculus unicycle controller.
The build began with the creation of Uni Games, the unicycle-enabled video game for the Commodore 64. This game was coded purely in 6502 assembly and features realistic physics, cutting edge graphics, and two game modes. It’s available on [retro.moe]’s site for the C64 and C128 jin PAL and NTSC formats.
Every game needs a controller, and for this [retro.moe] turned to his smartphone. A simple Android app with a few buttons to send up, down, left, and right commands to an ESP8266 chip attached to the C64’s joystick connector.
While a smartphone transmitting controller commands may seem like a vastly over-engineered joystick, there’s at least one thing a smartphone can do that a joystick cannot: poll an accelerometer. When the joystick senses movement, it transmits movement commands to the video game. Strap this phone to the pedal of a unicycle, and it’s the world’s first unicycle controller for a video game. Brilliant, and [retro.moe] can ride that thing pretty well, too.
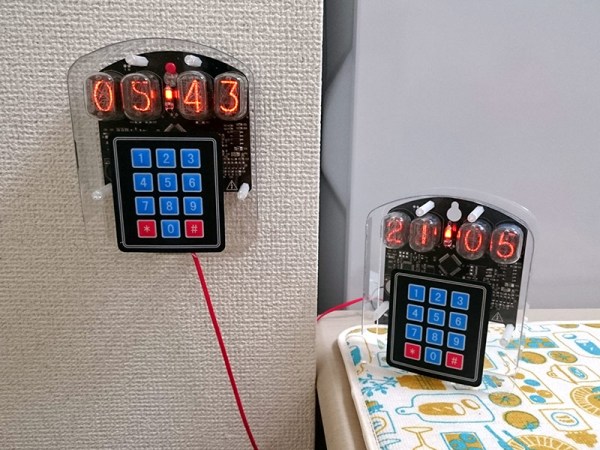
Nixie clocks. Nixie power meters. Nixie thermometers, speedometers, and even Nixies for personal adornment. Is there anything that hasn’t been Nixie-fied? How about a Nixie kitchen timer? Beyond the Nixie tube, this is a great build. Check out the video below the break.
As so often happens with Nixie aficionados, [Kouichi Kuroi] started with tubes and searched for a project to use them on. A wonky kitchen timer provided the thinly veiled excuse for the build – after all, anyone can drop a couple of yen on a commercial replacement, right? The timer features four IN-12 tubes and a large numeric keypad up front on a laser-cut acrylic case. For those who quibble with the keypad’s aesthetics and the wisdom of a Nixie project in the kitchen environment, [Ko] points out that an IP65 keypad would have more than doubled the price of the build, and a little common sense goes a long way to keeping the high-voltage side from meeting anything wet. In addition to countdown capability, the timer can also act as a stopwatch and display the time of day, and the Nixie tubes provide great visibility compared to seven-segment LCD timers.
As for the aforementioned Nixie projects, here’s a clock, power meter, thermometer, speedometer and necklace that we’ve featured before. What’s next for Nixies? We don’t know, but we’re keen to see what you come up with.
Of all the horrors visited upon a warrior, being captured by the enemy might count as the worst. With death in combat, the suffering is over, but with internment in a POW camp, untold agonies may await. Tales of torture, starvation, enslavement and indoctrination attend the history of every nation’s prison camps to some degree, even in the recent past with the supposedly civilizing influence of the Hague and Geneva Conventions.
But even the most humanely treated POWs universally suffer from one thing: lack of information. To not know how the war is progressing in your absence is a form of torture in itself, and POWs do whatever they can to get information. Starting in World War II, imprisoned soldiers and sailors familiar with the new field of electronics began using whatever materials they could scrounge and the abundance of time available to them to hack together solutions to the fundamental question, “How goes the war?” This is the story of the life-saving radios some POWs managed to hack together under seemingly impossible conditions.
In the US, we don’t hear much about computing from beyond the Anglosphere. We’ve seen some home computer clones from behind the iron curtain, but getting any information about them is hard. If you find an old keyboard with a QWERTZ layout, or even a few Cyrillic characters, in the States, it’s a rarity. To date, the only French computer on Hackaday is an old Minitel dumb terminal. To help rectify this, [Jeremie Marsin], [Thierry Mazzoleni], and [Jean Paul Mari] from Quebec brought the best of the French computing revolution of the 1980s along to this year’s Vintage Computer Festival East
The American-designed French Victor
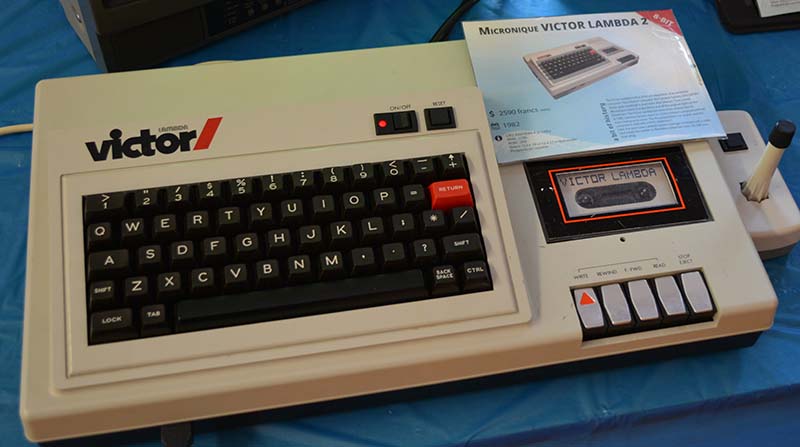
The evolution of the reigning champion of this exhibit begins with the Micronique Victor Lambda, a licensed copy of a purely American computer, the Interact Home Computer System. This computer featured a 2 MHz 8080A, 8 or 16 kB of RAM, and was quickly discontinued. The French company Micronique quickly bought the original designs and remarketed the computer in France.
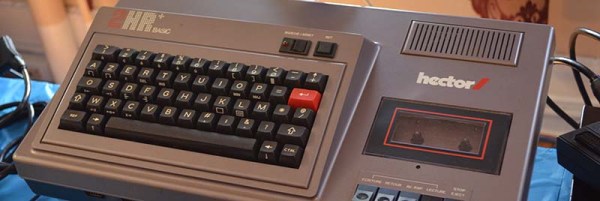
In a few short years, Micronique took this design and turned it into the Hector. This machine featured a 5 MHz Z80, 48 kB of RAM, high resolution graphics (243×231 at four colors) and included BASIC and Forth interpreters.
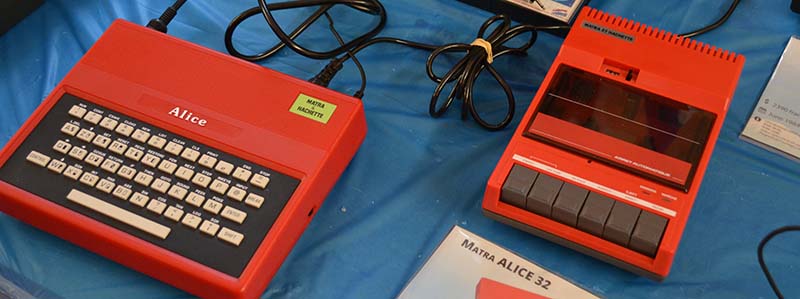
The Victor and Hector were the best home computers at the time, but for every Commodore or Apple, you need a ZX Spectrum. France’s version of this tiny computer with a terrible keyboard was the Matra Alice 32, a computer with a 1 MHz 6803, 16kB of Ram, and a real 80×25 text mode. The Alice is heavily based on the American TRS-80 MC-10, with a SCART connector and an AZERTY keyboard.
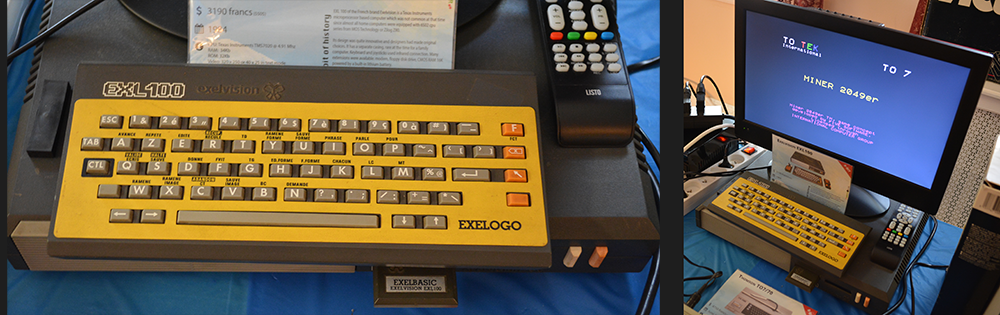
The weirdest computer [Jeremie], [Thierry], and [Jean Paul] brought out? That would be the Excelvision EXL100. The 1980s, for better or worse, were the times of the Z80 and 6502. The EXL100 was running something completely different. This home computer used a TMS7020 CPU from Texas Instruments, a speech synthesizer, and a wireless keyboard. Very strange for the time and relatively inexpensive; in 1984 this computer cost only ₣3190, or about $550 USD.
[Jeremie], [Thierry], and [Jean Paul] had an exhibit that presented the best the Francosphere had to offer to the computing world in the 80s and 90s. We haven’t seen enough early computers from outside the US, so we’re happy to have met these guys at the 11th annual Vintage Computer Festival East.
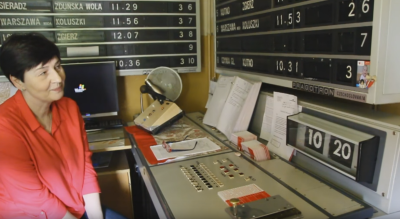
A short but highly detailed documentary by [Krzysztof Tyszecki] explores the split-flap display system in place at the Łódź Kaliska train station in Poland as well as the efforts needed by the staff to keep it running and useful to this day. Split-flap displays might be old technology, but many are still in use throughout the world. But even by those standards, the unit at Łódź Kaliska is a relic you wouldn’t expect to see outside a museum. “I doubt you’ll find an original anywhere else,” says a staff member. It requires constant upkeep to remain operational, and meeting the changing demands of a modern station within the limitations of the original system takes some cleverness. “In general the failure rate of the device is terrible,” he adds.
The system runs on punch cards. You can’t buy them anymore, so a local printer makes them – several hundred are needed every time there is a schedule change. The punching pliers (which also can no longer be purchased) get so worn out they replace the pins with custom-made ones from a local locksmith. The moving parts of the card reader have split-pins which need to be replaced every week or two – the stress of repeated movement simply wears them away. There’s nothing to do but replace them regularly. The assembly needs regular cleaning since dust accumulates on the cards and gets into the whole assembly. The list goes on… and so does the station.
There is no computation in the modern sense – it’s an electromechanical signing system managed and updated by human operators. It has more in common with a crossbar switch based telephone exchange than anything else. The punch cards are just a means of quickly, accurately, and repeatedly setting the displays to known states.
The short documentary goes into a lot of detail about every part of the system. The cards themselves are described in detail (1:07), as is the operator’s routine (2:27). We even see the back end controller (9:41), as well as see a split-flap module taken apart and tested (14:33) with an old tester the staffer isn’t sure will even work – but as with everything else we see, of course it does.


 The system runs on punch cards. You can’t buy them anymore, so a local printer makes them – several hundred are needed every time there is a schedule change. The punching pliers (which also can no longer be purchased) get so worn out they replace the pins with custom-made ones from a local locksmith. The moving parts of the card reader have split-pins which need to be replaced every week or two – the stress of repeated movement simply wears them away. There’s nothing to do but replace them regularly. The assembly needs regular cleaning since dust accumulates on the cards and gets into the whole assembly. The list goes on… and so does the station.


