[Stephen B.] kickstarted a MicroPython board. When he got it, he was pleasantly surprised to find that it worked great. His jaded soul balmed with a good experience, he found himself armed with a tool in search of a project. Then he remembered something that had stuck with him, which was a tide clock.
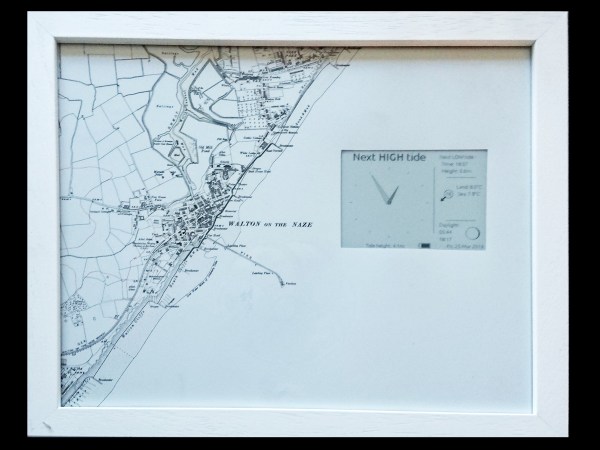
He lives 70 miles from the sea, but his stepmother had a birthday coming up. She went swimming daily, so he had his excuse to build. Unlike his inspiration project, a bunch of seven segment LEDs would not be received well by a technically disinclined stepmother with a well decorated home. So, instead of those, he went with an epaper display. It looks great.
He wanted to use the Kindle display to save money, but the weird power levels needed scared him off. He spent a bit more on a module, but it was probably worth it in time savings. Micropython board, an RTC, a battery, and e-paper display in hand, he had everything needed to build the clock but aesthetics.
Luckily a local frame shop entertained him by letting him pick up frames until he could find one that fit. He put a nice shoreline print together, installed the devices into the frame, and ended up with a really good looking clock. Sure it only tells time four times a day, but that’s enough if you live a life by the sea.