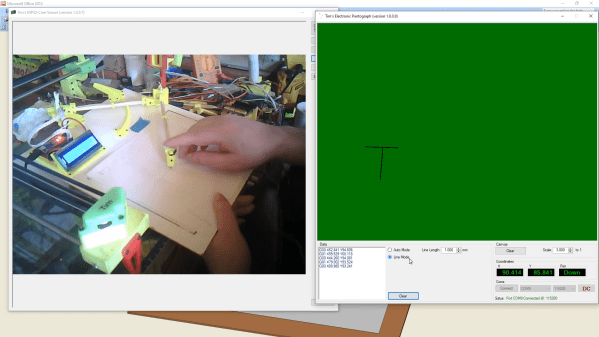
[Mr Innovative] decided to make his version of a small pen plotter (video after the break) to make labels on masking tape. The result is an impressive compact machine that is remotely controlled using your smartphone. The plotter is constructed using several different techniques, a piece of plywood as the base, a 3D printed bracket for the motors and pen carriage, and a routed acrylic plate that holds the lead screw and linear rail assembly. The whole thing is controlled by an Arduino Nano mounted on a custom motor driver carrier board.
The inspiration for this build came from a project by [michimartini] aka [Molten Cheese Bear] that we covered a few months ago. [Mr Innovative] went for belt vs direct drive and no local screen. It also appears to plot a little bit faster, but that might be due to differences in the ink pens used. An Android app called TextToCNC converts label text into G-Code, and the Grbl Controller app sends those commands to the plotter.
We like continued iterations of open source projects and look forward to seeing what the next generations look like. Thanks to [keithfromcanada] for submitting this tip.
As the digital photographic revolution took off, and everyone bought a shiny new film-less camera, there was a brief fad for photo printers. The idea was you’d have the same prints you’d always had from film, but the media for these printers would invariably cost a fortune so consumers moved on pretty quickly.
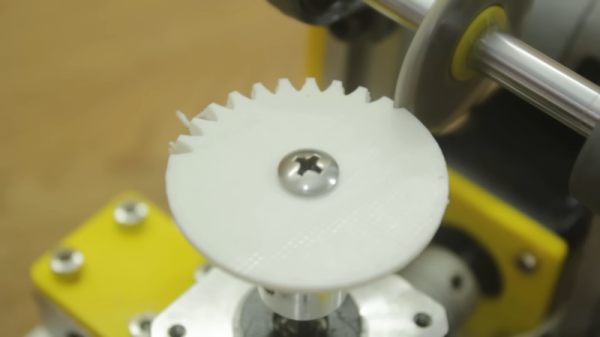
Now the pop up in second-hand stores and the like, which is how [Amen] acquired a Canon Selphy 740. It didn’t work, and on investigation it was found that a particularly tiny plastic gear had failed. Most people would have tossed the printer in the trash, but they instead opted to CNC-machine a new gear. It’s not everyday you tackle a job this small, so it makes for an interesting tale.
While the first instinct might be to reach reach for a CAD package, [Amen] instead wrote a script to create the raw GCode. The machining is done with a 0.2 mm bit ground to the desired profile. The result: a gear that gets the printer working again. It’s a dye-sublimation printer that leaves a negative image in the cartridge, allowing negative prints to be made with a bit of cartridge rewinding. And for those who might have ended up with a Selphy of their own, there’s a further post about using cheaper aftermarket cartridges.
[Marius Hornberger] has been busy hacking his “Hammer” CNC router again, and now it sports a much desired feature — an automatic tool-changer. Having wanted one for a while, [Marius] was unhappy sacrificing a big chunk of useable bed area just to park the tool-changer magazine. An obvious solution would be to have the magazine retract away from the bed, outside of the working area. Sadly, the CNC controller had only enough spare outputs to drive the pneumatic tool changer (mounted on the spindle) leaving none spare to control the magazine assembly. So, there was only one obvious route to take, use some simple spring-loaded mechanics to move the magazine into tool-picking range with the Y axis motion instead.
Obviously, the whole thing is CNC machined on the machine itself, taking only a couple of iterations and smidge of table-saw action to get everything to fit well and operate smoothly without binding or colliding with the moving gantry. A cunning pair of levers on each end of the magazine allow it to move much further than the advancing gantry, swinging it quickly into position when the Y axis is at the extreme of its travel, and retracting away when the gantry moves back. Another nice addition to the build was a tool depth sensor (AKA: a switch) mounted off to one side, which allows the machine to find the bottom of each tool, if it is not known, so the Z axis can compensate. When combined with the automatically retracting dust shoe, this is a definitely a CNC build we’d love to see in a shop near us!
[FloweringElbow] aka [Bongo] on YouTube is certainly having a go at this, and we reckon he’s onto a winner! This epic flatbed CNC build (video, embedded below) starts with some second hand structural I-beam, with welded-on I-beam legs, DIY cast aluminium side plates and plenty of concrete to give a strong and importantly, heavy structure.
The ideal machine is as rigid as possible, and heavy, to dampen out vibrations caused by high-feed speed cutting, or the forces due to cutting harder materials, so bigger really is better. For construction of the frame, steel is pretty strong, and the mass of the structure gives it additional damping, but triangulation was needed to counteract additional twisting. He stitch-welded the pre-heated frame in inch-long sections to limit the heat transferred into the metal, minimizing the subsequent warpage. [Bongo] used hacky Vibratory stress relief (VSR) constructed from a washing machine motor and eccentric weight, clamped to the frame, with feedback from a mobile phone app to find the resonant frequencies. There are other videos on the channel devoted to that topic of such stress relief techniques.
Precise enough to cut sticky-backed vinyl at half thickness!
When it came time for adding even more mass, a priming coat was made from a mixture of bonding epoxy and sharp grit, intended for non-slip flooring. The concrete mix used Portland cement, pozzolan (Silica fume) polycarboxylate superplasticiser and 1/2″ glass fiber threads. A second mix added crushed stone for additional mass. A neat trick was to make a handheld vibratory compactor from a plate welded onto the end of old drill bit, mounted in an SDS hammer drill.
Once the frame was flipped the right way up (collapsing the overloaded hoist in the process) it was necessary to level the top surface to accept the linear rails. This was done using a super runny, self-leveling epoxy, and checked by flowing water over it. Once the epoxy surfaces were adequately flat and coplanar (and much scraping later) the linear rails were attached, after creating some epoxy shoulders for them to butt up against. End plates to attach the Y axis lead screws, were added by bolting into the frame with a grit-loaded epoxy bond in between.
The gantry design was skipped for this video (but you can see that here) and once mounted a quick test showed the machine was viable. One curious task was making their own cable-chain from ply, on the machine itself, rather than buying something expensive off-the-peg. Why not? Once the machine was working well enough to mill a flat sheet of steel to nice reflective surface, it was used to mount a DIY drag-knife to cut out shapes in some vinyl, so it has the precision. We did like seeing an XBox controller used to manually jog the machine around! So much to see in this build and other related videos, we reckon this channel is one to watch!
We’ve featured CNC builds many a time, there’s a build whatever your needs and budget, but here’s a good starting point to build a machine, just good enough to build the tools you need. If you don’t happen to have a source of structural I-beam to hand, you can do something quite capable with wood, and if you fancy a go at 3D printing a knee mill, we’ve got that covered as well.
Printable sticky labels are a marvelous innovation, but sadly also one beset by a variety of competing offerings, and more recently attempts by manufacturers to impose DRM on their media. Fortunately they don’t have to rely on expensive printers or proprietary rolls of stickies, as [michimartini] demonstrates with the masking tape plotter. It’s a tiny pen plotter that writes your label onto the tape.
At its heart is the popular grbl G-code to motion parser, and its mechanism uses the lead screw axis from a DVD drive. Not for this project simply another hacked-apart drive mechanism though, for it has a custom-designed carriage for the axis. It’s 3D printed, and to ensure the least friction possible for a pen using only its weight to keep contact with the tape it was heated up once assembled to ensure all parts had a chance to bed in. Meanwhile the tape roll forming the X axis is turned directly by a standard stepper motor.
We like this project a lot, and look forward to any refinements to the idea. Meanwhile, it’s not the first custom label printer we’ve shown you.
[Nervous System] sells a variety of unique products, and we really appreciate the effort they put into sharing elements of their design and manufacturing processes. This time, it’s details of the work that went into designing a luxury lamp shade that caught our eye.
Top: Finished lamp. Bottom: Partially-assembled.
The finished lamp shade is spherical, but is made entirely from flat-packed pieces of laser-cut wood that have been specifically designed to minimize distortion when assembled into a curved shape. The pieces themselves are reminiscent of puzzle cells; complex, interlocking cellular shapes found in many plants.
As usual, [Nervous System] applied a hefty dose of math and computational design to arrive at a solution. Each unique panel of the lamp is the result of a process that in part implements a technique called variation surface cutting for the shape of the pieces. They also provide a couple of nifty animations that illustrate generating both the piece boundaries as well as the hole patterns in each of the 18 unique pieces that make up each lamp.
As for making the pieces themselves, they are laser-cut from wood veneer, and assembly by the end user takes an hour or two. Watch a video overview, embedded just below under the page break.
We’re glad [Nervous System] takes the time to share details like this, just like the time they figured out the very best type of wood for laser-cutting their unique puzzles and didn’t keep it to themselves.
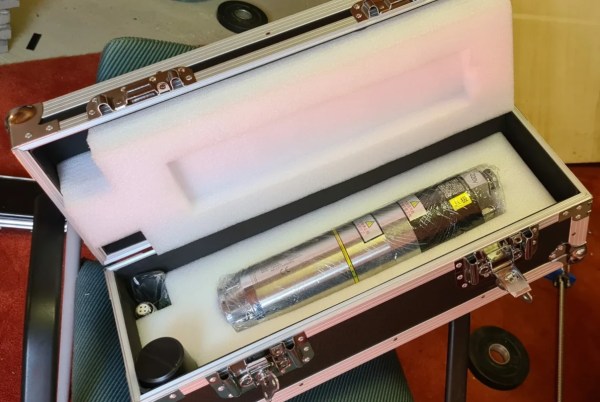
[Jeshua Lacock] from 3DTOPO owns a large-format CNC (4’x8′, or 1.2×2.4 m), that he strongly feels is lacking laser-cutting capabilities. The frame is there, and a 150 W CO2 laser tube has been sitting in a box for ages – what else could you need? Sadly, at such a scale, aligning the mirrors is a tough and finicky job – and misalignment can be literally blinding. After reading tales about cutters of such size going out of alignment when someone as much as walked nearby, he dropped the idea – and equipped the CNC head with a high-power laser diode module instead. Having done mirror adjustment on a few CO2 tube-equipped lasers, we can see where he’s coming from.
Typically, the laser modules you see bolted onto CNC heads are firmly under three watts, which is usually only enough for engraving. With a module that provides 5 watts of optical power, [Jeshua] can cut cardboard and thin plywood as well he tells us even 10 W optical power modules are available, just that he didn’t go for one. We reckon that 20 W effective power diodes are not that far into our future, which is getting very close to the potential of the blue box “40 W but actually 35 W but actually way less” K40 laser cutters we cherish. [Jeshua]’s cutter is not breaking speed limits, but it’s built on what’s already there, and the diode is comparatively inexpensive. Equipped with a small honeycomb surface and what seems to be air assist, it’s shown in the video cutting an ornamental piece out of cardboard!
We hackers have been equipping CNCs with laser diodes for a while, but on a way smaller scale and with less powerful diodes – this is definitely a step up! As a hacker, you should have at least some laser cutting options at your disposal, and this overview of CO2 cutters and their availability can get you started. We’ve also given you detailed breakdowns about different sides of laser cutting, be it the must-have of safety, or the nice-to-have of air assist.