Project Enclosures The Right Way

[Stephen Eaton] created an enclosure and shared his process in a pair of blog post. We thought is was amusing that he remarks on how rarely his projects get the to point that you’d want to make an enclosure for them. We’ve certainly got a lot of bare-PCB creations lying around. But when it does come time, we think his fabrication method is a good way to go.

First of all, he didn’t start from scratch. He already had a SparkFun project case sitting around. The problem is figuring how to make it work for your situation. We’ve used a drill, a Dremel, and a file in the past and that yields passable results but nothing that would be mistaken for anything other than a carefully mangled project box. [Stephen] decided to mill the openings he needed from the box, which yielded professional looking results. He started by emailing SparkFun and asking if they could give him a 3D model of the project box and the obliged. He then modeled the LCD screen, LED light pipes, button, USB port, and SD socket. From there it was off to the mill with a custom jig and a few tricks we think you’ll appreciate. The end result is just another reason to build the CNC mill you’ve had on your mind for so long.

Open Source Pick-and-place

This is a vacuum tweezers head for an open source pick-and-place. Those are the machines that professional printed circuit board manufacturers use to populate a circuit board with components before heading to the reflow oven. [Drmn4ea] built it with at-home rapid manufacturing in mind. The black orb on the left is a webcam for optical placement. The needle in the middle is an interchangeable vacuum-tool head. The motor on the right allows for different attachments to be swapped in automatically to suit a variety of parts.

This interfaces with a 3-axis CNC machine and should be easily compatible with a RepRap, Makerbot, or similar device. We wonder how he plans to handle reels of components, but this is a well-executed first step in the journey to a complete solution.

Want to see a professional pick-and-place at work? Check out one of SparkFun’s machines busy build a board after the break.

Continue reading “Open Source Pick-and-place”

1 Watt Laser Engraver

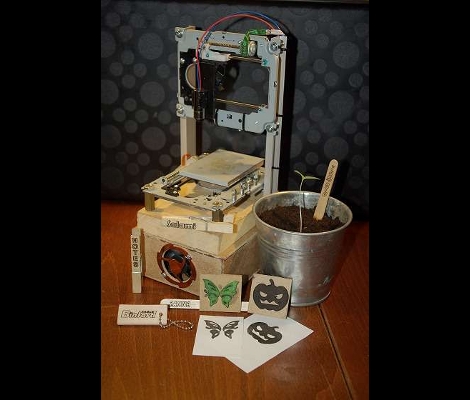
This laser engraver was built using printer parts, a CD-ROM carriage, and some homebrew electronic boards. The laser diode is a 1-Watt model similar to what we saw used as a weak laser cutter back in August. When the width of the material changes the focus of the laser is affected so the diode was mounted on a CD-ROM carriage (in the Z axis) for easy adjustment. The X and Y axes are made using parts from Epson Stylus 800 and Epson Stylus Color II printers. After the break we’ve embedded a video of the machine engraving some wood using EMC2 software on an Ubuntu box. It also boasts the ability to cut paper and some plastic but it can’t compare in power to a CO2-based unit.

Continue reading “1 Watt Laser Engraver”

Small CNC Gadget Draws What It Hears

This art piece makes drawings based on sound. [Mario Marchese], who is responsible for those illusion props back in february, built this little guy out of a bunch of junk he had lying around. It features four microphones that listen to ambient sound and feed the signal through some LM386 audio power amplifiers. The output is translated into forward, backward, left, and right movements of the writing platform while the pen is fixed in the same position. Despite what we said in the title of the post this isn’t strictly a CNC machine, but more the primordial cousin of one.

Constructing A CO2 Laser Cutter

angler

[Owen] contacted us to show us his site dedicated to his CO2 laser cutter build. He spent about 2 years and roughly $15,000 putting it together, so this is not small build. The laser and optics alone were $9,000. This site isn’t necessarily meant to be a template to build your own, but he shares so much information that we would certainly suggest you read it before digging into a build. He does have some downloadables, like the tool paths and the emc2 configuration files as well as a copy of the entire website. Great job [Owen].

Laser Cutter Doubles As A 3D Printer

[Bart] figured out how to use his laser cutter as a 3D printer. We’ve checked in on his open source laser cutter in the past and we’re happy to see he’s now done with the build. But rather than stop there he took it a step further. For less than $200 he built an extruder head and added RepRap circuitry. You can see in the image above the laser tube is in the background and the extruder head with a line of black filament is mounted on the gantry. [Bart] has other plans for extensibility as well, including a knife cutter, a pen plotter, and a Dremel mount.

From RepStrap To RepRap; A 3D Printer Is Born

[Gavilan Steinman] just printed and assembled his own RepRap machine and filmed the process. This isn’t news but we found it very interesting to watch. He started with a RepStrap, a rapid-prototyping 3D printer that as built by hand instead of printed by a similar machine. This is the seminal step in the self-replicating process.

From there he prints an extruder head which improves the quality of the parts the RepStrap can produce. We then see time-lapse footage of the printing process for a Mendel unit, the second generation of RepRap machines. We’ve embedded the video after the break. It’s a great way to spend ten minutes on a Sunday afternoon.

Continue reading “From RepStrap To RepRap; A 3D Printer Is Born”