Laser PCB Exposer Built From CD-ROM Drives

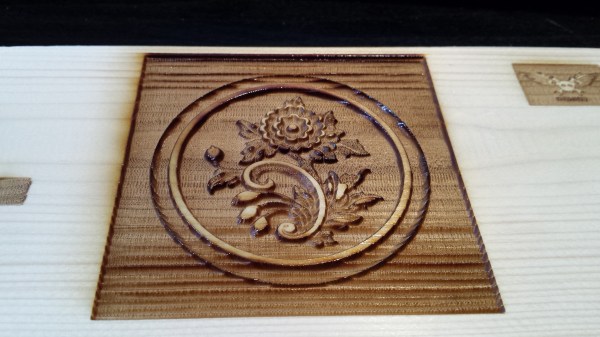
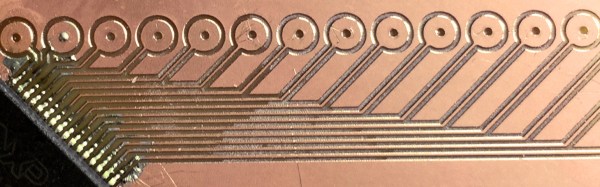
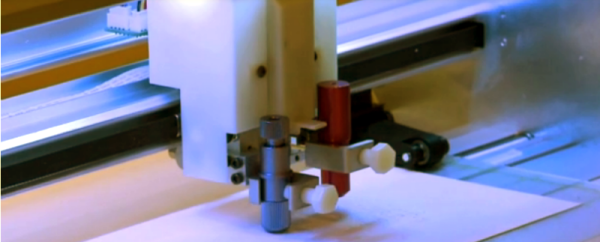
[Neumi] has built a CNC Laser using CD-ROM drives as the X and Y motion platforms. The small 405nm laser can engrave light materials like wood and foam. The coolest use demonstrated in the video is exposing pre-coated photo-resist PCBs.

With $61 US Dollars (55 Euro) for the Arduino, stepper drivers, and a laser in the project, [Nuemi] got a pretty capable machine after adding a few parts from the junk bin. He wanted to avoid using existing software in order to learn the concepts behind a laser engraver. In the end, he has a working software package which can send raster scans to an Arduino mega. The mega then controls the sync between the stepper and laser firings. The code is available on GitHub.

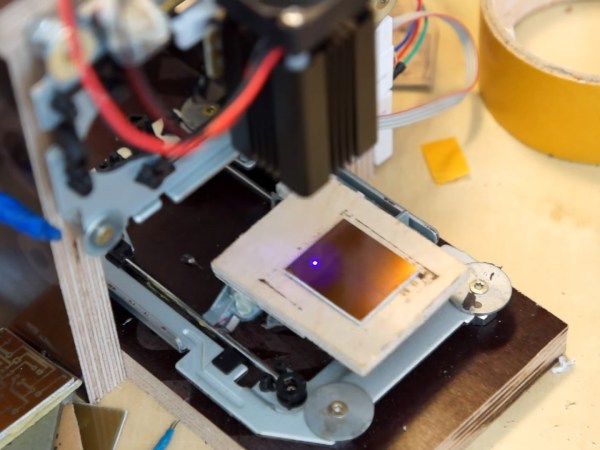
The machine can do a 30x30mm PCB in 10 minutes. It’s not about to set a record, but it’s cool and not at all bad for the price. You can see the failed PCBs lined up in the video from the initial tuning, but the final one produced a board very equivalent to the toner transfer method. Video after the break.

Continue reading “Laser PCB Exposer Built From CD-ROM Drives”

3D Laser Carving With The Smoothieboard

Expensive laser cutters have a 3D engraving mode that varies the laser power as it is etching a design, to create a 3D effect. [Benjamin Alderson] figured this could be replicated on a cheap Chinese laser — so he made his own program called SmoothCarve.

He’s got one of those extra cheap blue-box 40W CO2 lasers you can nab off eBay for around $600-$800, but he’s replaced the control board with a SmoothieBoard as an easy upgrade. He wrote the program in MatLab to analyze a grey scale image and then assign power levels to the different shades of grey. You can see the software and try it yourself over at his GitHub.

The resulting application is pretty handy — watch it carve the Jolly RancherWrencher after the break!

Continue reading “3D Laser Carving With The Smoothieboard”

Get Really Basic With Steppers And Eight Buttons

[Kevin Darrah] put together a good video showing how to control a stepper motor with, not a motor driver, but our fingers. Taking the really low-level approach to do this sort of thing gave us a much better understanding about the features of our stepper driver chips. Such as, for example, why a half step needed twice the current to operate.

[Kevin] starts with the standard explanation of coils, transistors, and magnets that every stepper tutorial does. When he hooks up simple breadboard with passives and buttons, and then begins to activate the switches in sequence is when we had our, “oh,” moment. At first even he has trouble remembering the correct sequence, but the stepper control became intuitive when laid out with tactile switches.

We set-up our own experiment to see if we remembered our lessons on the subject. It was a fun way to review what we already knew, and we learned some more along the way. Video after the break.

Continue reading “Get Really Basic With Steppers And Eight Buttons”

Be A Hero At Your Next Hackathon With A Foldable CNC

Be the hero at your next hackathon with this foldable cnc. When the line for the laser cutter is four teams deep, you’ll come out ahead. It might even be accurate enough to pop out a quick circuit board. Though, [wwwektor] just wanted a CNC that could be taken from storage and unfolded when needed. Sit it on a kitchen table and cut out some ornaments, or hang it from the front door to engrave the house’s address. Who needs injection molded chrome plated numbers anyway?

It’s based around tubular ways, much like other 3D printed CNCs we’ve covered. The design’s portable nature gives it an inherently unstable design. However, given the design goals, this is reasonable. It uses timing belts, steppers, and ball bearings for its movement. The way the frame sits on the table it should deal with most routing tasks without needing adjustment to stay in plane with the surface it’s set-on. As long as you don’t need square edges.

There’s a video of it in operation after the break. We love these forays into unique CNC designs. We never know what new idea we’ll see next.

Continue reading “Be A Hero At Your Next Hackathon With A Foldable CNC”

Milling PCBs With An Off-The-Shelf CNC

There’s a lot of little things that can go wrong before you get great results out of a process. We like to read build logs to learn from the mistakes made. [Marc Liyanage] bought a Nomad CNC machine from Carbide3d, and after a bit of learning has gotten some very nice PCBs out of it.

The first trip up he encountered was not setting the design rules in EagleCAD to check for gaps too small for his router bit. After he sorted that, and worked around an issue with Carbide not supporting R values for curves; instead opting for IJK, he made a nice TQFP to DIP break out board.

The next board was a more complicated double-sided job. He cleverly had the machine drill two holes all the way through the PCB to give him a space for two alignment pins. Unfortunately this didn’t work out exactly as planned and he had a slight misalignment with some of the via holes. It looked alright and he began assembling. To his dismay, the clearances were off again. It was a bit of deja vu for us.

We’ve made lots of boards on a CNC machine, and can attest to the task’s finicky nature. It’s certainly quicker than the photoresist technique for boards with lots of little holes. It will take someone quite a few tries before they start having more successes than failures, but it’s very rewarding.

Trash Can CNC Gets A Stepper Upgrade

[HomoFaciens] is back at the bench again and working on improvements to his cheap and simple CNC machine.

The video below will no doubt remind you about previous versions of [HomoFaciens]’ CNC builds, which we’ve covered in depth. With an eye to spending as little as possible on his builds, most parts are recovered from e-waste, with a fair amount of Dumpster diving thrown in. For this upgrade, the salvaged brushed DC motors with their signature gap-toothed encoder disks are replaced with genuine bipolar steppers. The primary intention of his build is to learn (and teach) as much as possible, so he spends a good amount of time going over steppers and their control – how to determine phase wiring, how to wire up the not-salvaged-but-still-cheap drivers, directional control, and half-stepping. The mechanics are decidedly dodgy, but there are clever expedients aplenty – we especially like the oil cup fabricated from a brass tube and a bolt with a hole drilled in it. Everything just works, and the results to expense ratio is hard to beat.

While we appreciate the upgrades here, we’re still keen to see how junky his other trash can CNC can get. And we’re still waiting on the paper clip and cardboard challenge.

Continue reading “Trash Can CNC Gets A Stepper Upgrade”

CNC Scrapbooking With A Raspberry Pi

It is perhaps a surprise that the widespread adoption of CNC machinery in the home has not come from 3D printing or desktop mills, but as a quiet revolution in the crafting industry. CNC cutters for plastic or card have been around for quite a while now, and while the prospect of cutwork greetings cards might not set all maker pulses racing these cutters do have significant untapped potential in other directions. Perhaps you have to own a carburetor whose gaskets have been unavailable since the 1960s to truly appreciate that.

[James Muraca] has a KNK Force, something of an object of desire in the world of desktop CNC cutters. The computer inside the Force is a Raspberry Pi, so of course [James] set about investigating its potential for running his own software. His progress so far is on GitHub, a web interface through which you can upload and cut an SVG file, but his plans are more ambitious. He hopes to turn his machine into a complete PCB manufacturing station, able to both cut the PCB, and with the addition of a vacuum attachment to pick and place components.

The KNK Force is an interesting machine not just because it is powered by a Raspberry Pi. Its cutter head is a rotary tool with a Z axis, so it can perform more heavy-duty and complex cutting tasks than its competition. In addition it has a camera built-in, and it is this feature that [James] hopes to use in his PCB project.

We’ve covered plenty of cutter projects before, from projects turning CNC machines and pen plotters into vinyl cutters to using a cutter as a laser engraver and even cutting solder paste stencils with one. We look forward to further progress on [James’s] project.