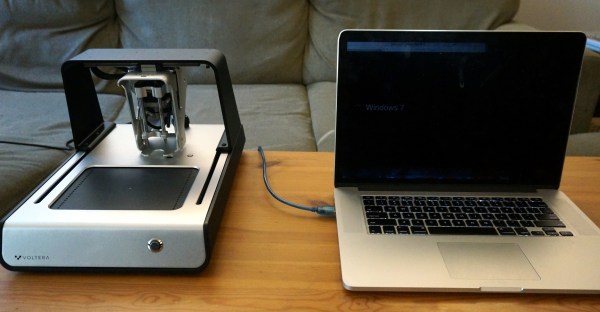
Hackaday SuperConference Call For Proposal

We’ve been keeping pretty quiet about the Hackaday SuperConference, but rest assured a full-blown announcement is on the way soon. For now we need your help getting the word out to presenters. Do you have a favorite hardware designer, hacker, or project? Get to work convincing them to Submit a Talk or Workshop proposal for the Hackaday SuperConference. Of course if you yourself fall into one of these categories, consider this your invitation to submit! Proposals are due October 10th.

The Hackaday SuperConference is the hardware con you’ve been waiting for. The two-day event will be held in San Francisco on November 14th and 15th. It features workshops and talks on hardware creation with topics like hardware engineering, creativity in technical design, product design, and prototyping. The winner of the 2015 Hackaday Prize, Best Product, and runners-up will be announced at the SuperCon.

The 2015 Hackaday Prize is sponsored by:

FPGA CNC

When you think of a CNC controller you probably think of a PC with a parallel port or some microcontroller-based solution like a Smoothie Board. [Mhouse1] has a different idea: use FPGAs as CNC controllers.

FPGAs inherently handle things in parallel, so processing G code, computing curves and accelerations, and driving multiple stepper motors at one time would not be an issue at all for an FPGA. Most computer-based designs will have slight delays when trying to drive everything at once and this introduces some mechanical jitter. Even worse jitter occurs when you have an old PC trying to run everything when some other task takes over the CPU.

Continue reading “FPGA CNC”

CNC’ed Business Card

Hobby CNC mills have made rapid prototyping easier and faster for hackers. One really useful application is quickly fabricating your own milled PCB’s. [proto logical] built a Reference PCB Business Card using his CNC mill after repeatedly coming across other hackers who were not too convinced about the capabilities of CNC mills in routing PCB’s (also referred to as isolation milling). He thought of making a business card sized reference PCB to show around when he bumps into such folks.

To keep it useful, he included inch and centimetre scales, 0.1″ grid of holes, reference track widths from 16 mil to 66 mil, a few common drill holes and vias and some SMD foot prints. The single sided board is 50 mil thick, so it doesn’t bulk up his wallet. He’s posted the Eagle board file (direct download) and G-code (text file) for those interested in milling their own reference boards. The idea isn’t new – it’s been tried several times in different form factors in the past, generally using more traditional techniques. [proto logical] got inspiration from [Rohit Gupta’s] TinkerRule – The Maker’s Swiss Army Knife. Then there’s the very popular uRuler made by [Dave Jones] of EEVBlog fame. If you have any suggestions on improving the design, chime in with comments here.

Thanks to [ACG] for sending in this tip that he dug up while looking for CNC routed PCB’s.

The IPad Controlled Camera Slider

[Daniel] and [Tobias] dabble in videography and while they would love a camera slider controlled by their favorite iDevice, commercial motorized camera sliders are expensive, and there’s no great open source alternative out there. They decided to build one for themselves that can be controlled either from a PS3 controller or from its own iPad app with the help of an ESP8266 WiFi module.

app_live_controlThe camera slider is a two-axis ordeal, with one axis sliding the camera along two solid rails, and the other panning the camera. The circuit board was milled by the guys and includes an ATMega328 controlling two Pololu stepper drivers. An ESP8266 is thrown into the mix, and is easily implemented on the device; it’s just an MAX232 chip listening to the Tx and Rx lines of the WiFi module and translating that to something the ATMega can understand.

By far the most impressive part of this project is the iPad app. This app can be controlled ‘live’ and the movements can be recorded for later playback. Alternatively, the app has a simple scripting function that performs various actions such as movement and rotation over time. The second mode is great for time lapse shots. Because this camera slider uses websockets for the connection, the guys should also be able to write a web client for the slider, just in case they wanted the ultimate webcam.

You can check out [Daniel] and [Tobias]’ demo reel for their camera slider below.

Continue reading “The IPad Controlled Camera Slider”

How To Upgrade A Chinese CNC Machine

Looking to add a small CNC machine to your garage or hackerspace’s arsenal of tools? Like any tools — China has you covered for the cheap options — but the question is, is it worth it? Typically it depends on the tool, but when you can upgrade your 3040 CNC router to use USB instead of a parallel port with the TinyG motion controller… most definitely!

The 3040 or 3020 CNC router is a popular Chinese machine used by many hobbyists — and for good reason. A rigid all-aluminum frame, decent stepper motors and pretty good resolution? It’s not a bad deal for around $1000USD. We’ve covered it many times before. Problem is, the electronics are a bit out-dated. Particularly in the fact that it uses Mach3 with a parallel port… Come on, who has a parallel port these days?

[John Lauer] set out to fix this. The TinyG is a motor controller we’ve covered a few times before as well — it was just waiting to be fitted into a 3040 CNC in order to run a better control system, like ChiliPeppr!

Continue reading “How To Upgrade A Chinese CNC Machine”

3D Objects From A Laser Cutter

Actors want to be singers and singers want to be actors. The hacker equivalent to this might be that 3D printers want to be laser cutters or CNC machines and laser cutters want to be 3D printers. When [Kurt] and [Lawrence] discovered their tech shop acquired a 120 Watt Epilog Fusion laser cutter, they started thinking if they could coax it into cutting out 3D shapes. That question led them to several experiments that were ultimately successful.

The idea was to cut away material, rotate the work piece, and cut some more in a similar way to how some laser cutters handle engraving cylindrical objects. Unlike 3D printing which is additive, this process is subtractive like a traditional machining process. The developers used wood as the base material. They wanted to use acrylic, but found that the cut away pieces tended to stick, so they continued using wood. However, the wood tends to char as it is cut.

In the end, they not only had to build special jigs and electronics, they also had to port some third party control software to solve some issues with the Epilog Fusion cutter’s built in software. The final refinement was to use the laser’s raster mode to draw surface detail on the part.

The results were better than you’d expect, and fairly distinctive looking. We’ve covered a similar process that made small chess pieces out of acrylic using two passes. This seems like a natural extension of the same idea. Of course, there are very complicated industrial machines that laser cut in three dimensions (see the video below), but they are not in the same category as the typical desktop cutter.

Continue reading “3D Objects From A Laser Cutter”

Update: What You See Is What You Laser Cut

If there’s one thing about laser cutters that makes them a little difficult to use, it’s the fact that it’s hard for a person to interact with them one-on-one without a clunky computer in the middle of everything. Granted, that laser is a little dangerous, but it would be nice if there was a way to use a laser cutter without having to deal with a computer. Luckily, [Anirudh] and team have been working on solving this problem, creating a laser cutter that can interact directly with its user.

The laser cutter is tied to a visual system which watches for a number of cues. As we’ve featured before, this particular laser cutter can “see” pen strokes and will instruct the laser cutter to cut along the pen strokes (once all fingers are away from the cutting area, of course). The update to this system is that now, a user can import a drawing from a smartphone and manipulate it with a set of physical tokens that the camera can watch. One token changes the location of the cut, and the other changes the scale. This extends the functionality of the laser cutter from simply cutting at the location of pen strokes to being able to cut around any user-manipulated image without interacting directly with a computer. Be sure to check out the video after the break for a demonstration of how this works.

Continue reading “Update: What You See Is What You Laser Cut”