Microscopy used to be a rarity in the hobby electronics world. But anyone doing lab work has always needed a microscope and with today’s tiny parts, it is almost a necessity. However, [Nathan Myhrvold] didn’t use an ordinary microscope to capture some beautiful snowflake pictures. According to [My Modern Met], the pictures are the highest resolution snowflake pictures ever taken.
Of course, the site is more interested in the visual aspect of it, but they did provide some clues about the tech behind the pictures. According to the site:
Myhrvold used a special camera of his own design. He combined the magnifying power of a microscopic lens.. with a specially designed optical path. This path allowed the lens to channel its image to a medium-format digital sensor… In addition, the camera featured a cooling stage upon which the tiny specimens could rest. With LED short-pulse lights and a shutter speed of less than 500 microseconds, Myhrvold was able to capture multiple images of each snowflake at different focal lengths. These images were then stacked to create the final image.
There was a time during the early years of mass digital photography, when a film scanner was a common sight. A small box usually connected to a USB port, it had a slot for slides or negatives. In 2020 they’reĀ a rare breed, but never fear! [Bezineb5] has a solution in the shape of an automated scanner using a Radpberry Pi and a mechanism made of Lego.
The Lego mechanism is a sprocket feeder that moves the film past the field of view from an SLR camera. The software on the Pi runs in a Docker container, and features a machine learning approach to spotting frame boundaries. This is beyond the capabilities of the Pi, so is offloaded to a Google Coral accelerator.
The whole process is automated with the Pi controlling not only the Lego but also the camera, to the extent of retrieving the photos from it to the Pi. There’s a smart web interface to control everything, making the process — if you’ll excuse the pun — a snap. There’s a video of it in action, that you can see below the break.
We’ve featured many film scanner projects over the years, one that remains memorable is this 3D printed lens mount.
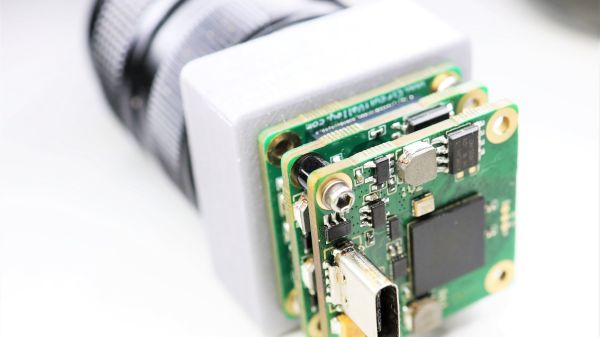
In 2020 when we carry an all-purpose computer and data terminal able to store our every thought and deed on a global computer network, it’s easy to forget that once upon a time we were excited by the simpler things. Take the camcorder for example, back in the 1990s the idea of a complete video recording solution that captured moving images on tape cartridges and fit in the palm of your hand was a very big deal indeed, and camcorders as we called them in those innocent times were a prized posession. Now they’re a $0.50 find a Goodwill, which is how [Dustin] picked up the RCA camcoder he’s converting into something altogether more modern. He’s gutted it and upgraded it by removing the analogue innards and retaining only the case and lens assembly to put around a Raspberry Pi and associated HQ camera module.
Opening the camcorder up reveals a ton of miniaturised analogue circuitry, but once the original assemblies are removed it’s relatively straightforward to put the Pi camera on the rear of the lens unit. There’s plenty of space for the Pi in the box, and he’s putting a touchscreen on the outside.
Sadly the camcorder’s original tiny CRT is no longer working, else that would have been the ultimate retro viewfinder. Still we hope to see some tinkering on that part of the project since those little CRTS make for delightful hacks. The project is very much a work in progress, but should serve that these once ubiquitous devices are now in the realm of the throwaway.
Calculating three-dimensional position from two-dimensional projections are literal textbook examples in geometry, but those examples are the “assume a spherical cow” type of simplifications. Applicable only in an ideal world where the projections are made with mathematically perfect cameras at precisely known locations with infinite resolution. Making things work in the real world is a lot harder. But not only have [Jingtong Li, Jesse Murray et al.] worked through the math of tracking a drone’s 3D flight from 2D video, they’ve released their MultiViewUnsynch software on GitHub so we can all play with it.
Instead of laboratory grade optical instruments, the cameras used in these experiments are available at our local consumer electronics store. A table in their paper Reconstruction of 3D Flight Trajectories from Ad-Hoc Camera Networks (arXiv:2003.04784) listed several Huawei cell phone cameras, a few Sony digital cameras, and a GoPro 3. Video cameras don’t need to be placed in any particular arrangement, because positions are calculated from their video footage. Correlating overlapping footage from dissimilar cameras is a challenge all in itself, since these cameras record at varying framerates ranging from 25 to 59.94 frames per second. Furthermore, these cameras all have rolling shutters, which adds an extra variable as scanlines in a frame are taken at slightly different times. This is not an easy problem.
There is a lot of interest in tracking drone flights, especially those flying where they are not welcome. And not everyone have the budget for high-end equipment or the permission to emit electromagnetic signals. MultiViewUnsynch is not quite there yet, as it tracks a single target and video files were processed afterwards. The eventual goal is to evolve this capability to track multiple targets on live video, and hopefully help reduce frustrating public embarrassments.
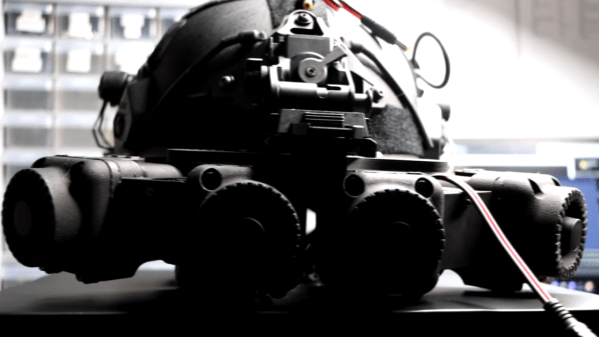
The camera in question is the Runcam Night Eagle 2, prized for its 0.00001 lux sensitivity. Black and white only, its capable of providing vision in moonlight and starlight conditions without external illumination. In this project, it’s hooked up to a monocle display designed for use with drone FPV setups. With lithium batteries and a charge circuit hooked up, and everything stuffed inside a compact 3D printed case, the final result is a portable, pocket sized night vision device for under $200 USD.
[Happy_Mad_Scientist] notes that in starlight conditions, it provides an advantage over other nighttime Airsoft players relying on IR illumination to see in the dark. We can imagine it would perform well in concert with a bright IR headlamp for those times when there’s simply no ambient light available – particularly indoors.
We’d love to say that all of our projects worked perfectly on the first try, but the average Hackaday reader is a bit too experienced to buy a fib like that. The reality is, DIY projects rarely get everything right out of the gate. It takes some time to identify issues and work out all the kinks. But of course, that’s half the fun.
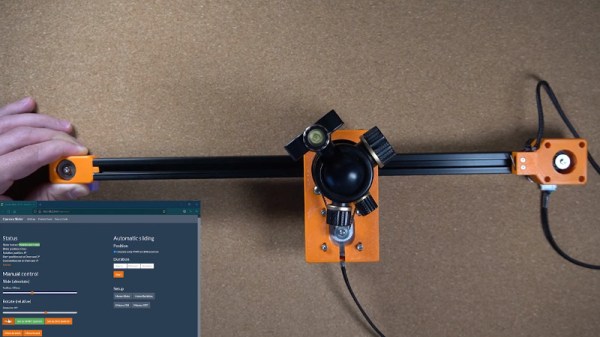
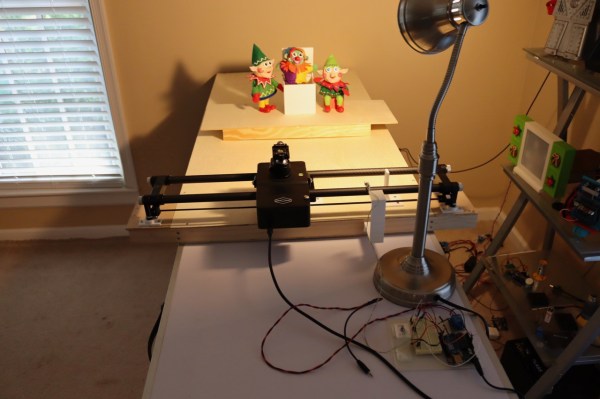
For a perfect example of this process, check out the latest update on the 3D printed DSLR camera mount that [isaac879] has been working on. When we last checked in with this project over the summer the mount was already impressive, but with the latest improvements and the addition of a whole new axis of movement, this homebrew camera motion system is an extremely compelling project for anyone who wants to take their project videos to the next level.
Back in June, the mount [isaac879] showed off was only capable of pan and tilt. But as you can see in the video after the break, he’s since mounted that to a track made of 20×40 aluminum extrusion and added another stepper motor. This allows the pan/tilt mount to move itself back and forth on the track to get those slick panning shots that all the cool kids use in their videos nowadays.
But even if you’re not interested in the slider aspect, the core pan/tilt mount has also received a number of refinements over the last few months. Perhaps the most obvious is the switch over to thinner and lighter stepper motors. Reducing mass is always an improvement with a moving system like this, and in the case of the pan motor, the shorter can prevents a potential collision with the camera itself. Obviously the smaller motors are weaker, but [isaac879] considers that a feature; the mini motors will just start skipping steps if things get bound up instead of potentially damaging your expensive camera.
He’s switched to flange bearings to help hold the frame together, improved wire routing, added a mounting point for the electronics, reprinted the pinion gears in a flexible filament to help absorb some vibrations, and switched over to TMC2208 stepper drivers. The new drivers may actually be one of the biggest usability upgrades, as they allow the entire mount to move faster and more accurately. Critically, [isaac879] also reports the new drivers have solved a troublesome vibration issue he was seeing when the camera was moving slowly.
Never underestimate the power of nostalgia. In an age when there are more megapixels stuffed in the sensor of a smartphone camera than the average computer display can even represent, why would jagged images from a 20-year-old grayscale camera with pixels numbering in the thousands still grab attention? Maybe what’s old is new again, and the coolness factor of novelty is something that can’t be quantified.
The surprise I had last Monday when I saw my Twitter notifications is maybe only second to the feeling I had when I was invited to become a Hackaday contributor. I’d made a very simple web app which mimics a Game Boy Camera using the camera from your phone or desktop, and it got picked up by people so much that I’m amazed my web host is still holding. Let’s look at why something seemingly so simple gained so much traction.