These days, most of us are carrying a fairly impressive digital camera with us at all times. But as capable as the hardware and software of a modern smartphone may be, there’s still plenty of reasons you may want a “real” camera to go along with it. The larger sensor, advanced controls, and selection of lenses that you’ll get with even a relatively cheap camera opens up a world of artistic possibilities.
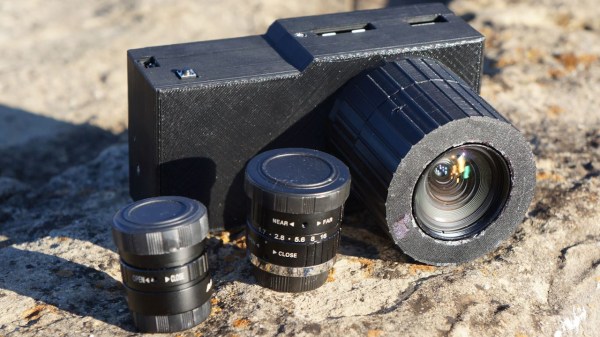
If you’re really into chasing that perfect shot, you can even build your own digital camera these days. This design from [Jacob Cunningham] may not be able to go shot-for-shot against a Canon or Nikon in its current state, but we think you’ll agree there’s a lot of potential here — especially for something pieced together with modular components and perfboard.
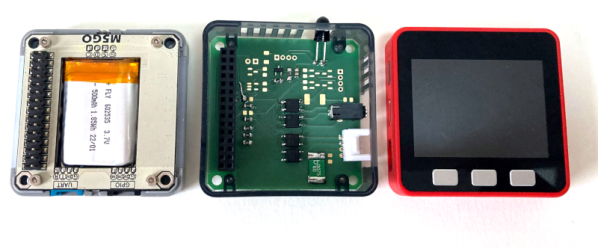
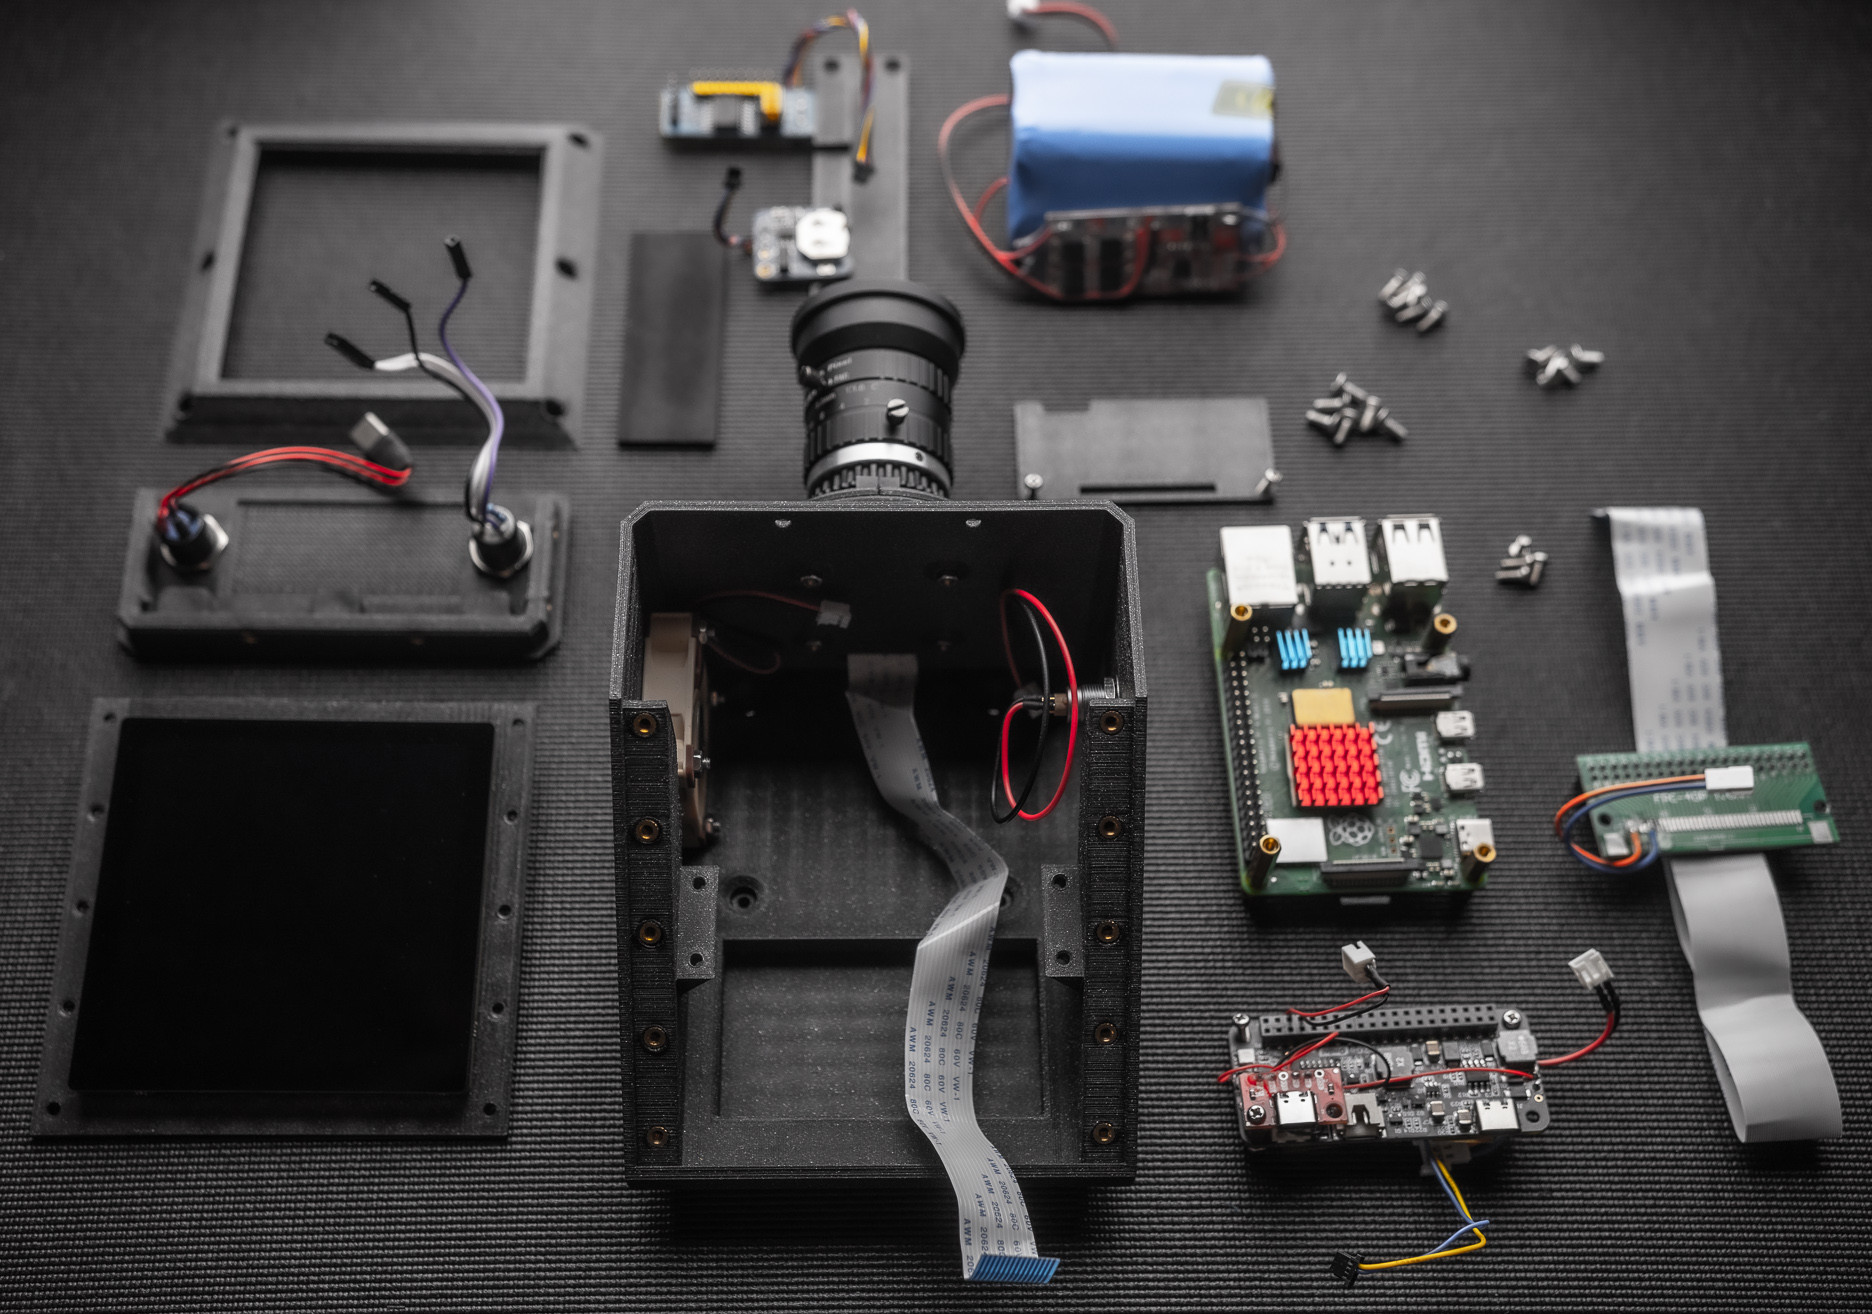
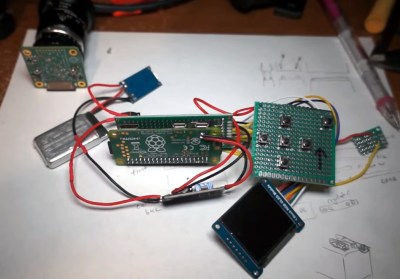 Inside the 3D printed enclosure is a Raspberry Pi Zero, a Pi HQ Camera module, an 1.5″ OLED display, a lithium-ion battery pouch cell, and the charging and voltage regulation boards necessary to keep everything powered up. There’s also a handful of tactile buttons to work through the settings and menus, and a 10-axis IMU to help you keep your horizon level.
[Jacob] figures the whole thing comes in at around at $185.00, though naturally that number could go up or down considerably depending on what you’ve already got in the parts bin and what kind of lenses you add to the mix.
The hardware side of things looks more or less complete, at least for a first version, and [Jacob] has provided everything you’ll need to build one of your own. But the software is still a work in progress, with the latest push to the Python code in the project’s GitHub repository just eight hours old at the time of this writing. If you’ve been looking for a DIY camera project to really sink your teeth into, this could provide a great starting point.
If you’re more interested in moving pictures, we recently covered the CinePi project, which aims to develop an open source cinema-quality camera that you won’t need studio backing to afford.
Continue reading “Raspberry Pi Zero Powers Custom Camera Platform” →