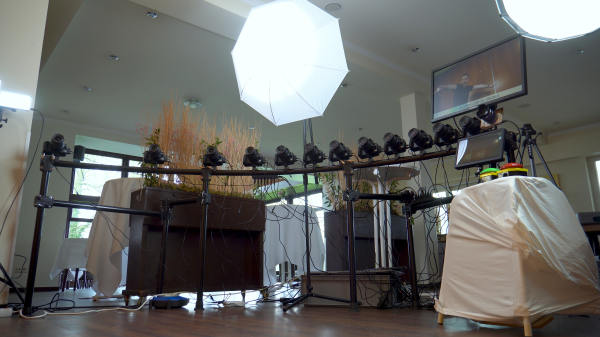
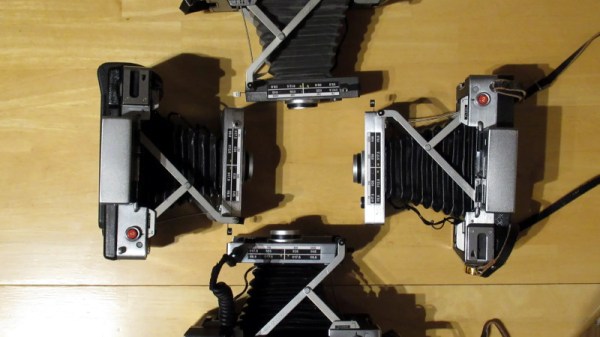
Stereophotography cameras are difficult to find, so we’re indebted to [DragonSkyRunner] for sharing their build of an exceptionally high-quality example. A stereo camera has two separate lenses and sensors a fixed distance apart, such that when the two resulting images are viewed individually with each eye there is a 3D effect. This camera takes two individual Sony cameras and mounts them on a well-designed wooden chassis, but that simple description hides a much more interesting and complex reality.
Sony once tested photography waters with the QX series — pair of unusual mirrorless camera models which took the form of just the sensor and lens. A wireless connection to a smartphone allows for display and data transfer. This build uses two of these, with a pair of Android-running Odroid C2s standing in for the smartphones. Their HDMI video outputs are captured by a pair of HDMI capture devices hooked up to a Raspberry Pi 4, and there are a couple of Arduinos that simulate mouse inputs to the Odroids. It’s a bit of a Rube Goldberg device, but it allows the system to use Sony’s original camera software. An especially neat feature is that the camera unit and display unit can be parted for remote photography, making it an extremely versatile camera.
It’s good to see a stereo photography camera designed specifically for high-quality photography, previous ones we’ve seen have been closer to machine vision systems.
As the world becomes more and more digital, there are still a few holdouts from the analog world we’ve left behind. Vinyl records are making quite the comeback, and film photography is still hanging on as well. While records and a turntable have a low barrier for entry, photography is a little more involved, especially when developing the film. But with the right kind of equipment you can bridge the gap from digital to analog with a darkroom setup that takes digital photographs and converts them to analog prints.
The project’s creator, [Muth], has been working on this project since he found a 4K monochrome display. These displays are often used in resin 3D printers, but he thought he could put them to use developing photographs. This is much different from traditional darkroom methods, though. The monochrome display is put into contact with photo-sensitive paper, and then exposed to light. Black pixels will block the light while white pixels allow it through, creating a digital-to-analog negative of sorts. With some calibration done to know exactly how long to expose each “pixel” of the paper, the device can create black-and-white analog images from a digital photograph.
[Muth] notes that this method isn’t quite as good as professional print, but we wouldn’t expect it to be. It creates excellent black-and-white prints with a unique method that we think generates striking results. The 4K displays needed to reproduce this method aren’t too hard to find, either, so it’s fairly accessible to those willing to build a small darkroom to experiment. For those willing to go further, take a look at some other darkroom builds we’ve seen in the past.
It’s one of those things that certainly sounds simple enough: take a picture of a receipt, run it through optical character recognition (OCR), and send the resulting information to whatever expense-tracking website or software you wish. There are companies that offer such a service, so it can’t be too difficult to replicate on your own…right?
That’s what [Marcel Robitaille] thought when he set out to create his homebrew “Receipt Ingestion” system, anyway. But in reality it took so much time to troubleshoot and implement that he says it would have been faster to just enter in all his receipts by hand. We’re happy he stuck with it though, otherwise you wouldn’t be reading about it on Hackaday, and we wouldn’t be able to learn anything from the detailed account he’s provided.
It only took an evening to hack together a rough demo, and the initial results were very promising. The code could detect the edges of the receipt, rotate the captured image appropriately, and then pull out the critical information such as date, total amount, business name, etc. He was then able to decipher the API for Splitwise, an online service for splitting bills, by capturing the data sent by his browser while adding a new bill. With this information, writing up some Python code to push his captured data into the service was trivial. So far, so good.
Using a QR code as reference point.
But like so many horror films that begin with a happy family starting a new life in a beautiful home, there was a monster lurking in the shadows. It’s one thing to capture data from perfectly clean and flat receipts, but quite another to get any useful info out of one that spent half the day crumpled up in your back pocket. The promising proof of concept that worked a treat under controlled conditions failed completely in the real-world, with [Marcel] reporting that only 1 in 5 receipts he tried to scan actually went through.
In the end, [Marcel] realized that the best way to handle the unreliable condition of the receipts was to focus on a different object in the image. He came up with a QR code marker that he could put on the table with the receipt to be scanned, which his software can use as a known point of reference. This greatly improves the reliability of the image rotation and transformation, which in turn makes the OCR more reliable. It also makes it much easier to tell which images need to be scanned — if there’s no QR code found, the software just skips that shot and keeps looking.
The unique challenges of digitizing large amounts of printed content using OCR makes for some fascinating problem solving, and we’re glad [Marcel] shared this particular story with us. While there’s still some edge cases that need chasing down, he’s using the software on a nearly daily basis, and has posted it up on GitHub for anyone who might wish to build on his efforts.
In the olden days, you would have a roll of film that you could take to your local drug store and have them develop it. But a serious photographer would likely develop their own photos to maintain complete creative control. While photo editing software has largely replaced the darkroom of old, the images are still held on physical media, and that means there’s room for improvement and customization. In an article for photofocus, [Joseph Nuzzo] shows how you can make your own CFexpress card — the latest and greatest in the world of digital camera storage tech — for less than $100 USD.
The idea here is pretty simple, as CFexpress uses PCIe with a different connector. Essentially all you have to do is get a M.2 2230 NVMe drive and put it into an adapter. In this case [Joseph] is using a turn-key model from Sintech, but we’ve shown in the past how you can roll your own.
Now you might not give it much thought normally, but NVMe devices get pretty hot. This usually isn’t problem inside a large computer case, where they often have large amounts of air blowing over them. But inside a camera you need to dissipate that heat, so thermal compound is a must. With everything screwed together, you have your own card that’s faster and cheaper than commercial offerings.
Vizy is a Linux-based “AI camera” based on the Raspberry Pi 4 that uses machine learning and machine vision to pull off some neat tricks, and has a design centered around hackability. I found it ridiculously simple to get up and running, and it was just as easy to make changes of my own, and start getting ideas.
Out of the box, Vizy is only a couple lines of Python away from being a functional Cat Detector project.
I was running pre-installed examples written in Python within minutes, and editing that very same code in about 30 seconds more. Even better, I did it all without installing a development environment, or even leaving my web browser, for that matter. I have to say, it made for a very hacker-friendly experience.
Vizy comes from the folks at Charmed Labs; this isn’t their first stab at smart cameras, and it shows. They also created the Pixy and Pixy 2 cameras, of which I happen to own several. I have always devoured anything that makes machine vision more accessible and easier to integrate into projects, so when Charmed Labs kindly offered to send me one of their newest devices, I was eager to see what was new.
I found Vizy to be a highly-polished platform with a number of truly useful hardware and software features, and a focus on accessibility and ease of use that I really hope to see more of in future embedded products. Let’s take a closer look.
Taking apart old stuff and re-using the parts to make something new is how many hackers first got started in the world of mechanical and electronic engineering. But even after years working in industry we still get that tinge of excitement whenever someone offers us an old device “for parts”, and immediately begin to imagine the things we could build with the components inside.
So when [Victor Frost] was offered an old Cricut cutting plotter, he realized he could use its parts to create the camera slider he’d been planning to build. The plotter’s X stage, controlled by a stepper motor, was ideal for moving a camera platform back and forth. [Victor] wanted to build the entire thing in a “freehand” way, without making a detailed design or purchasing any new parts. So he dived into his parts bin and dug up an Arduino, a 16×2 LCD, some wires and buttons, and a few pieces of MDF.
The camera mount is simply a piece of steel that a GoPro’s magnetic mount can latch onto, but [Victor] keeps open the possibility of mounting a proper tripod ball head. The Arduino drives the stepper motor through an Adafruit Motor Shield, with a simple user interface running on the LCD. The user can set the desired end points and speed, and then run the camera back and forth as often as needed. In this way, the software follows the same “keep it simple” philosophy as the hardware design.
A team from the Max Planck Institute for Intelligent Systems in Germany have developed a novel thumb-shaped touch sensor capable of resolving the force of a contact, as well as its direction, over the whole surface of the structure. Intended for dexterous manipulation systems, the system is constructed from easily sourced components, so should scale up to a larger assemblies without breaking the bank. The first step is to place a soft and compliant outer skin over a rigid metallic skeleton, which is then illuminated internally using structured light techniques. From there, machine learning can be used to estimate the shear and normal force components of the contact with the skin, over the entire surface, by observing how the internal envelope distorts the structured illumination.
The novelty here is the way they combine both photometric stereo processing with other structured light techniques, using only a single camera. The camera image is fed straight into a pre-trained machine learning system (details on this part of the system are unfortunately a bit scarce) which directly outputs an estimate of the contact shape and force distribution, with spatial accuracy reported good to less than 1 mm and force resolution down to 30 millinewtons. By directly estimating normal and shear force components the direction of the contact could be resolved to 5 degrees. The system is so sensitive that it can reportedly detect its own posture by observing the deformation of the skin due its own weight alone!